Paul and I had hoped to play a Punic Wars game for this month's encounter but at the last moment I was called away and we had to settle for a replay of the Normans v Saxons game from last week which I had fortuitously not cleared away! Paul took the William and the Normans and yours truly Edgar the Aetheling and the Saxons. As usual a photomontage which tries to capture the action, interspersed with rather better photos Paul took during the game. In the end after 10 of the planned 12 we ran out of time, so frenetic had the action been, agreeing on a winning draw for Paul's Normans. The Saxons, battered but undefeated, live to fight on another day ~
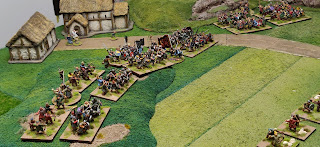
William's two right Divisions formed up with his knights on the far right......while his left mirrored the deployment.
A closeup showing off Phil's brushwork to good advantage.
Edgar threw his skirmish screen forward while his mounted warriors demonstrated on his right.Meanwhile, the three Divisions formed up along the ridge and down into the valley blocking the road towards the north.
The Saxon shieldwall has formed up and will resolutely defend their position.Having drawn out the Norman left Division the mounted warriors retire uphill and the Coerl bowmen begin to whittle down William's knights.
The whole Norman and Breton left Division is moving steadily forward to threaten the Saxon right Division despite coming under fire from the bowmen.Those skirmishers' look more than a tad exposed!
William's forces are finding the going difficult - poor Command dice - but the Saxons are not tempted forward to exploit his difficulty.
The Saxon mounted warriors though have impetuously charged the leading Norman knights. Despite being at a disadvantage they earn a welcome draw and further blunt the Norman's advance.
Norman knights on William's right just will not move forward! Oh the dice! How we laughed!! The infantry meanwhile struggle forward emboldening the skirmishers to keep up their fire.Norman pressure begins to tell as the skirmish screen first buckles, then breaks. A first taste of victory for William!
As the skirmish screen is overrun the Saxon centre and left Divisions brace for the expected onslaught. The Coerls making up the left Division look very nervous.
William's forces are attacking in the centre and menacing on his right.
The crisis point is approaching. In the centre the Saxons repel the Norman assault while the Coerls are assaulted repeatedly by the knights.
Viewed from behind the Norman right the position looks much better for the Saxons than they felt.Fighting though along the line now is intense. Saxon lines buckle again but do not break. William just cannot deliver the knockout blow
From behind the Saxon right it is becoming clear that William's forces are slowly gaining the ascendancy.
While the Saxon right is miraculously holding and even bearing back the knights the centre is clearly being pushed back.As dusk falls - we ran out of time in Turn 10 of 12 - the game ends in a winning draw for William's forces! Paul had fought back from a shaky start to almost defeat the Saxons. On my part I'd done better than I feared by the end, so I was pleased by the final outcome. We no doubt got lots wrong, as you do when learning new rules, but we are getting there I think. Hail Caesar delivered a grand narrative to the game with lots of twists and turns, just what is wanted in medieval warfare I'd think.


A splendid and hard fought encounter there, a nearly but not quite for Billy's boys.
ReplyDeleteSaved by the bell, but which of us?
DeleteIndeed it was a truly epic encouter, hard fought from start to finish...even though it took the Normans some time to actualy get started 😬 The loss of the left wing Norman cavalry commander made it very touch and go! We were lucky that there was very little Saxon cavalry available to exploite the disaster!
ReplyDeleteA really enjoyable days gaming with lots of fun and banter, and yet another wonderful collection of figures.
Thank you Dave for another wonderful session.
You are welcome! Though I would have preferred to see your poor dice throws continue...
DeleteYou chaps really do have some wonderful figures and terrain to game with! Your little vignettes always give me ideas to the point I have started collecting 'civilians' to make my own in 10mm. HCII does look to give a very good game, as does Black Powder II, with nice additional 'stuff' in the supplements.
ReplyDeleteTime often is against us but glad to see you felt the Normans got a winning draw. Looking forward to the next in this 'campaign'.
They are the product of too much time on my hands I sometimes think...
DeleteLovely to follow, I was browsing the new Hail Caesar rules last night, so I enjoyed this. Picked up the latest Wargames Illustrated and enjoyed your piece - that was a grand parade.
ReplyDeleteGlad you enjoyed both your visit and my two pieces in Wargames Illustrated.
DeleteA great looking game David…
ReplyDeleteThe Saxon line bent but didn’t break now they need to send the invaders back to Normandy…
All the best. Aly
Thank you Aly, Edgar is holding on, just.
Delete