David Bickley's Wargames Blog

The occasional ramblings of an average gamer, journeyman painter, indifferent modeller, games designer, sometime writer for Wargames Illustrated and host of games in GHQ.


Saturday 30 June 2018

Odds & Sods To End The Month

As another month draws to a close and the year is already half way done I find I have just a few odd figures finished which I’ve not shared with anyone as yet. So, first off four 
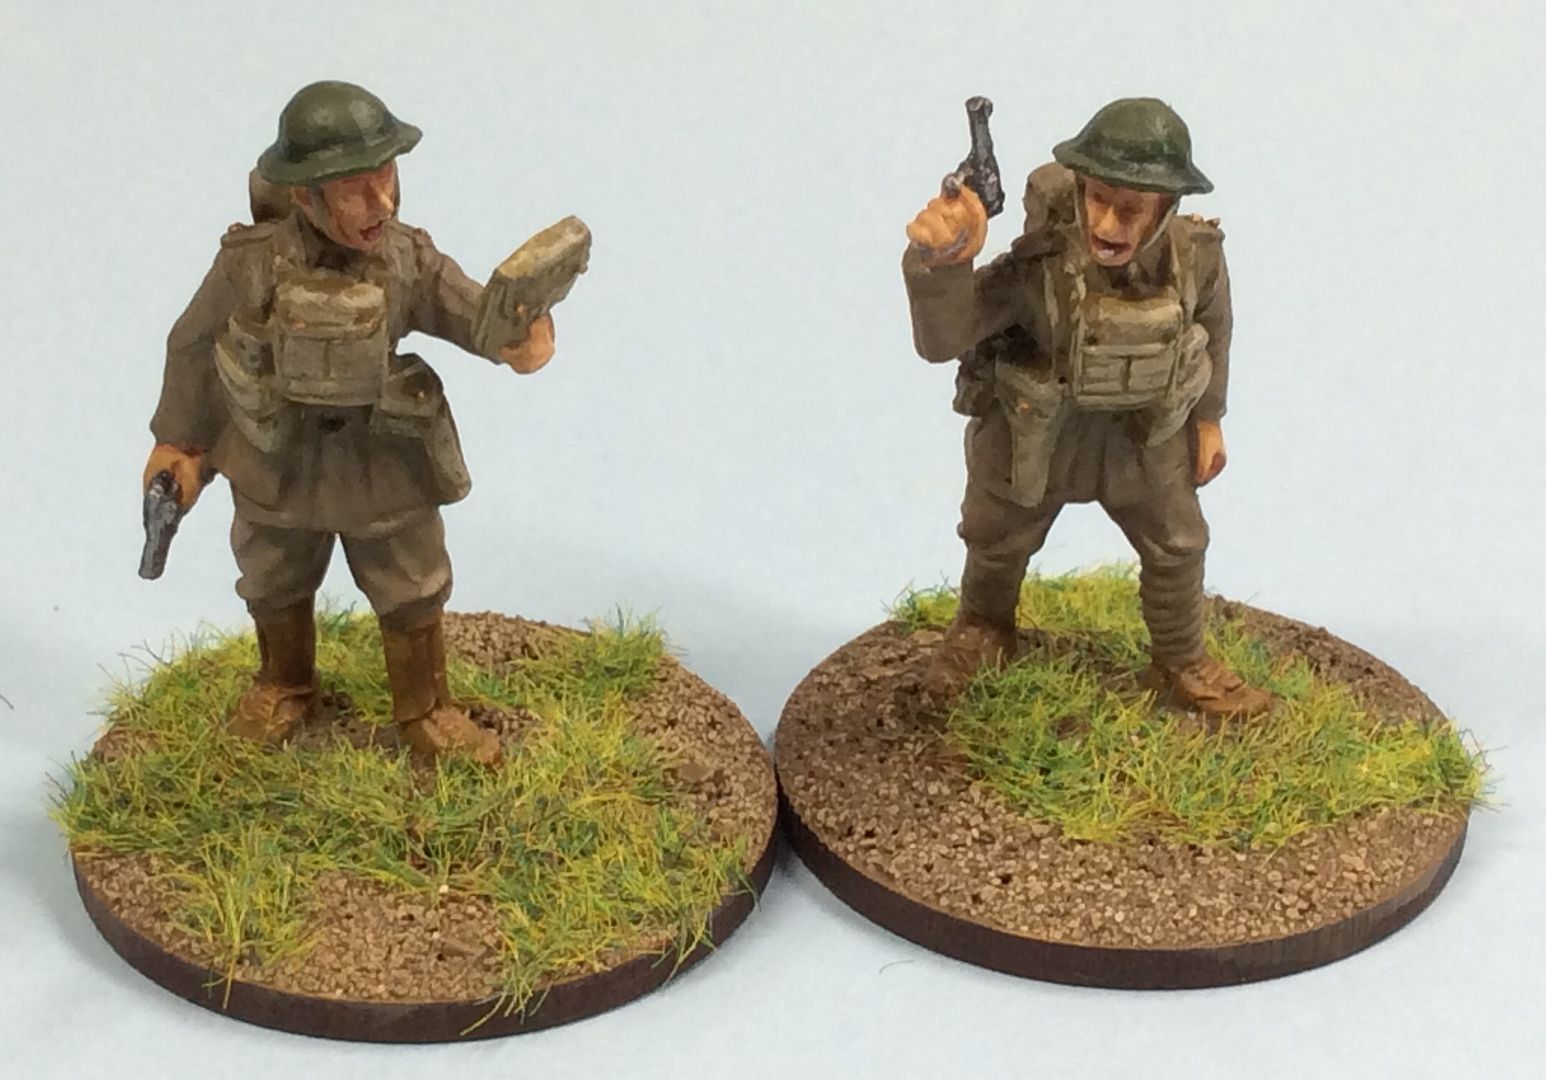
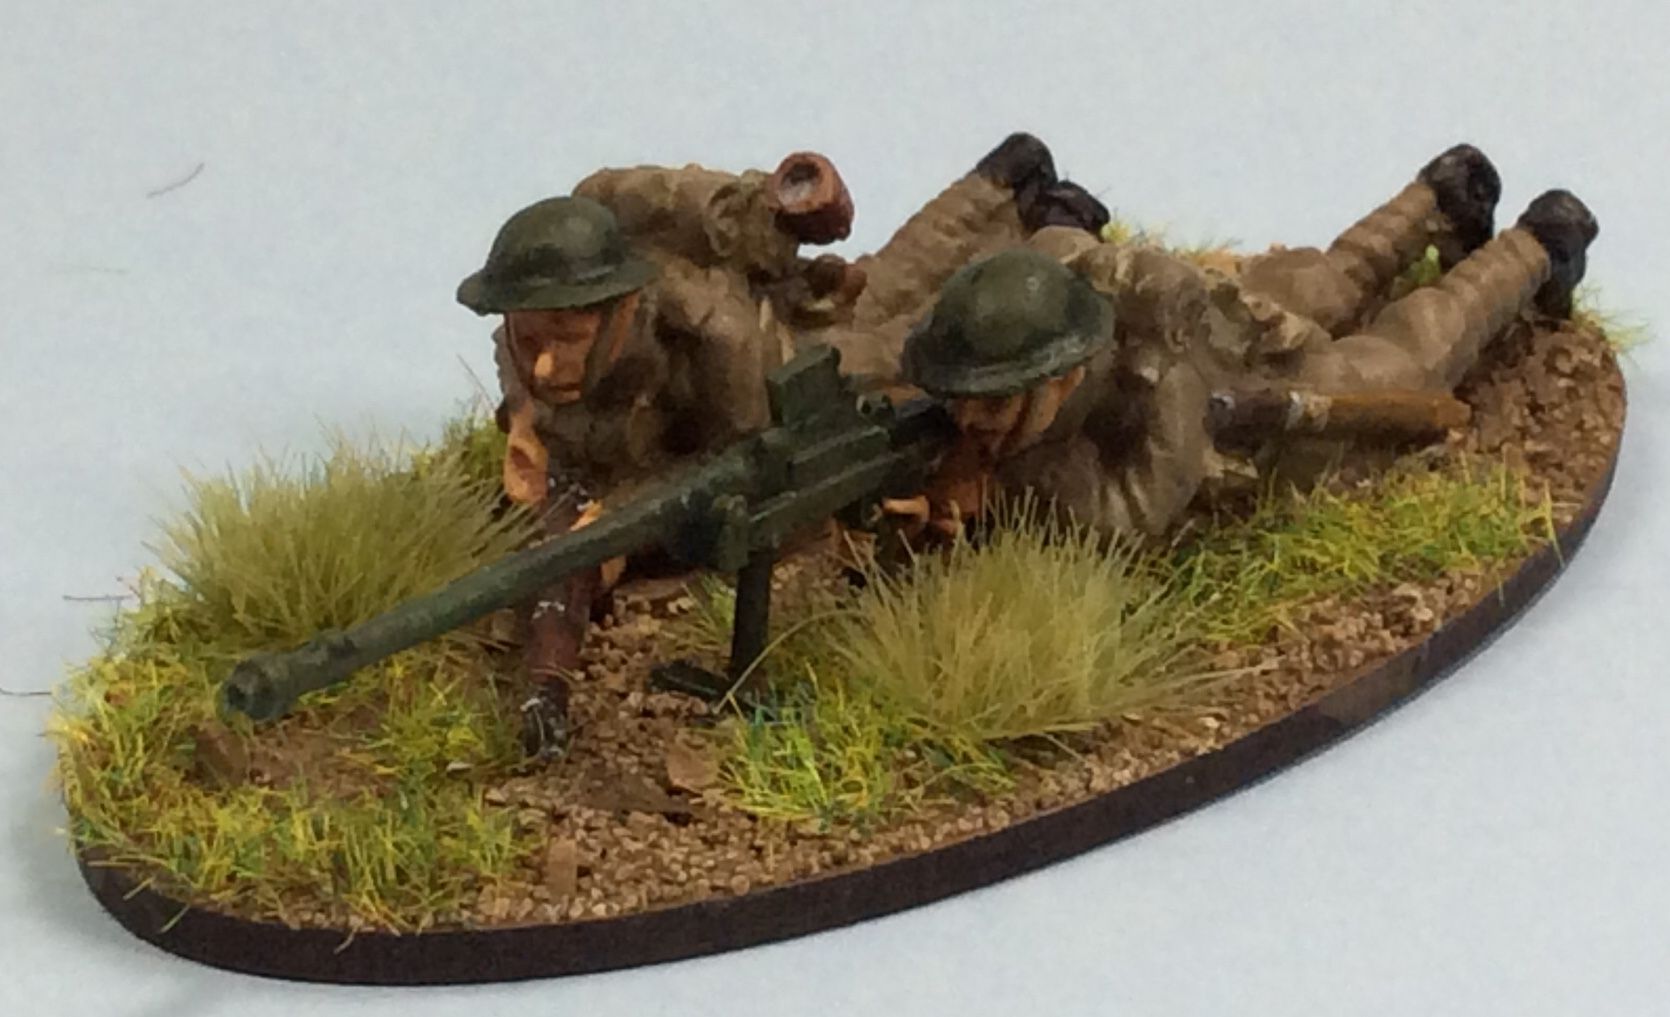
Mutton Chop 1938-40 British Infantry, mainly for my VBCW games but also for deployment in our ongoing Blandings/Operation Zeelowe Games. Two officers first, then an Anti -Tank Rifle team of two men ~

Next, the Partizan free figure from the May show, even though I didn’t attend due to the recovery phase of my hip replacement operation Lawrence kindly sent me the figure. Here he is, Captain Bicclesworth RFC ~

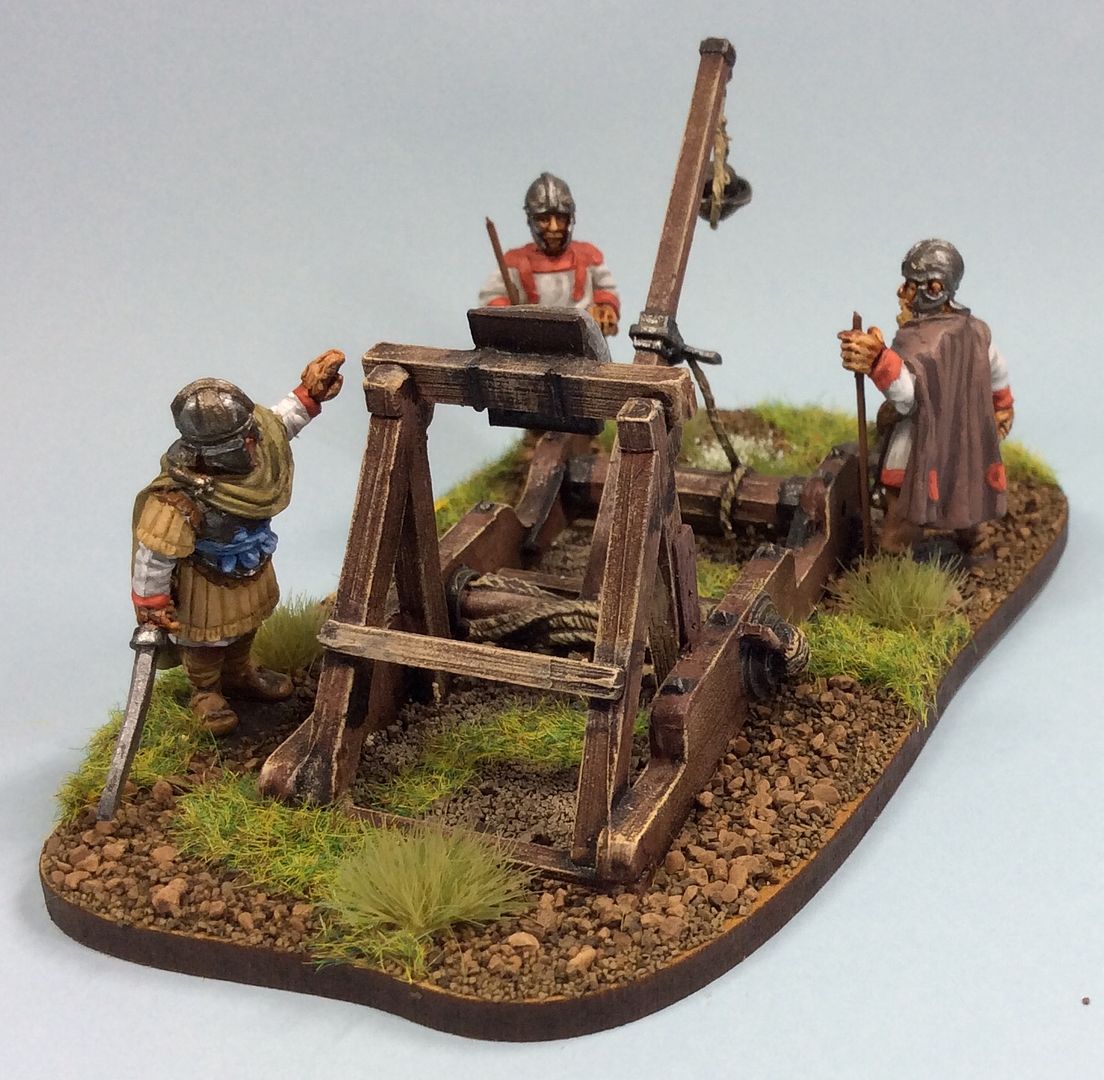
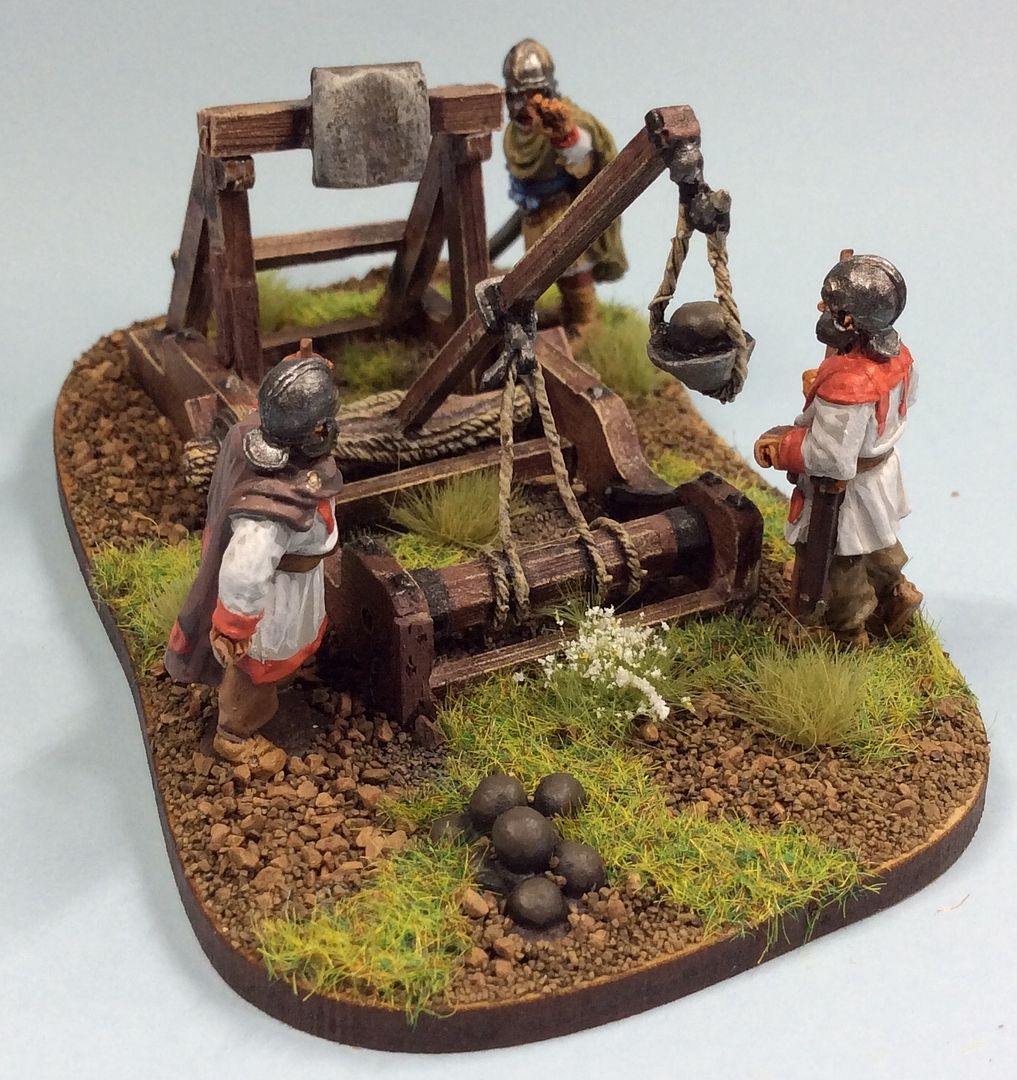
Next, two Labourers from Trent Miniatures British Artificiers set ~
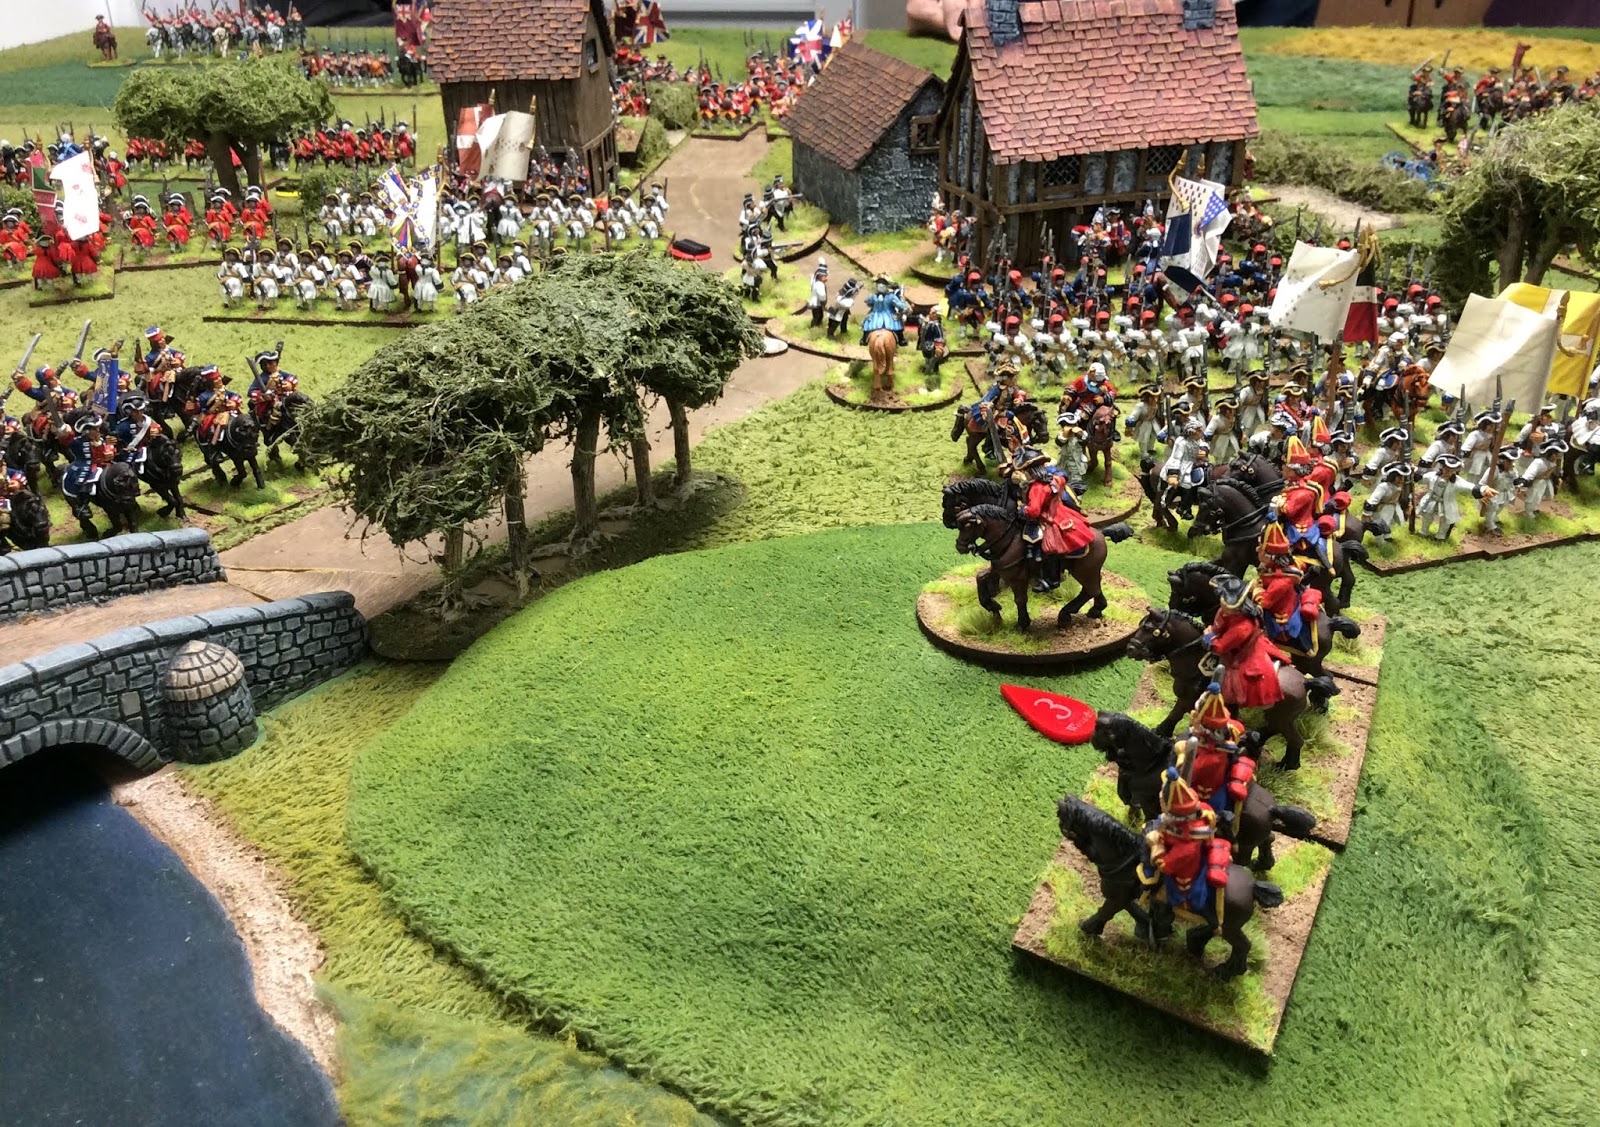
Finally two old sets of figures rebased along with other ephemeral pats of my SYW collections: French infantry in camp and British Infantry drinking and whoring. Both sets are from Wargames Foundry, though the French vignette sees the addition of an Irregular Miniatures roasting spit and fire and a seated figure from another civilian set, the British set has the camp fire added from the French set as I used the table elsewhere~
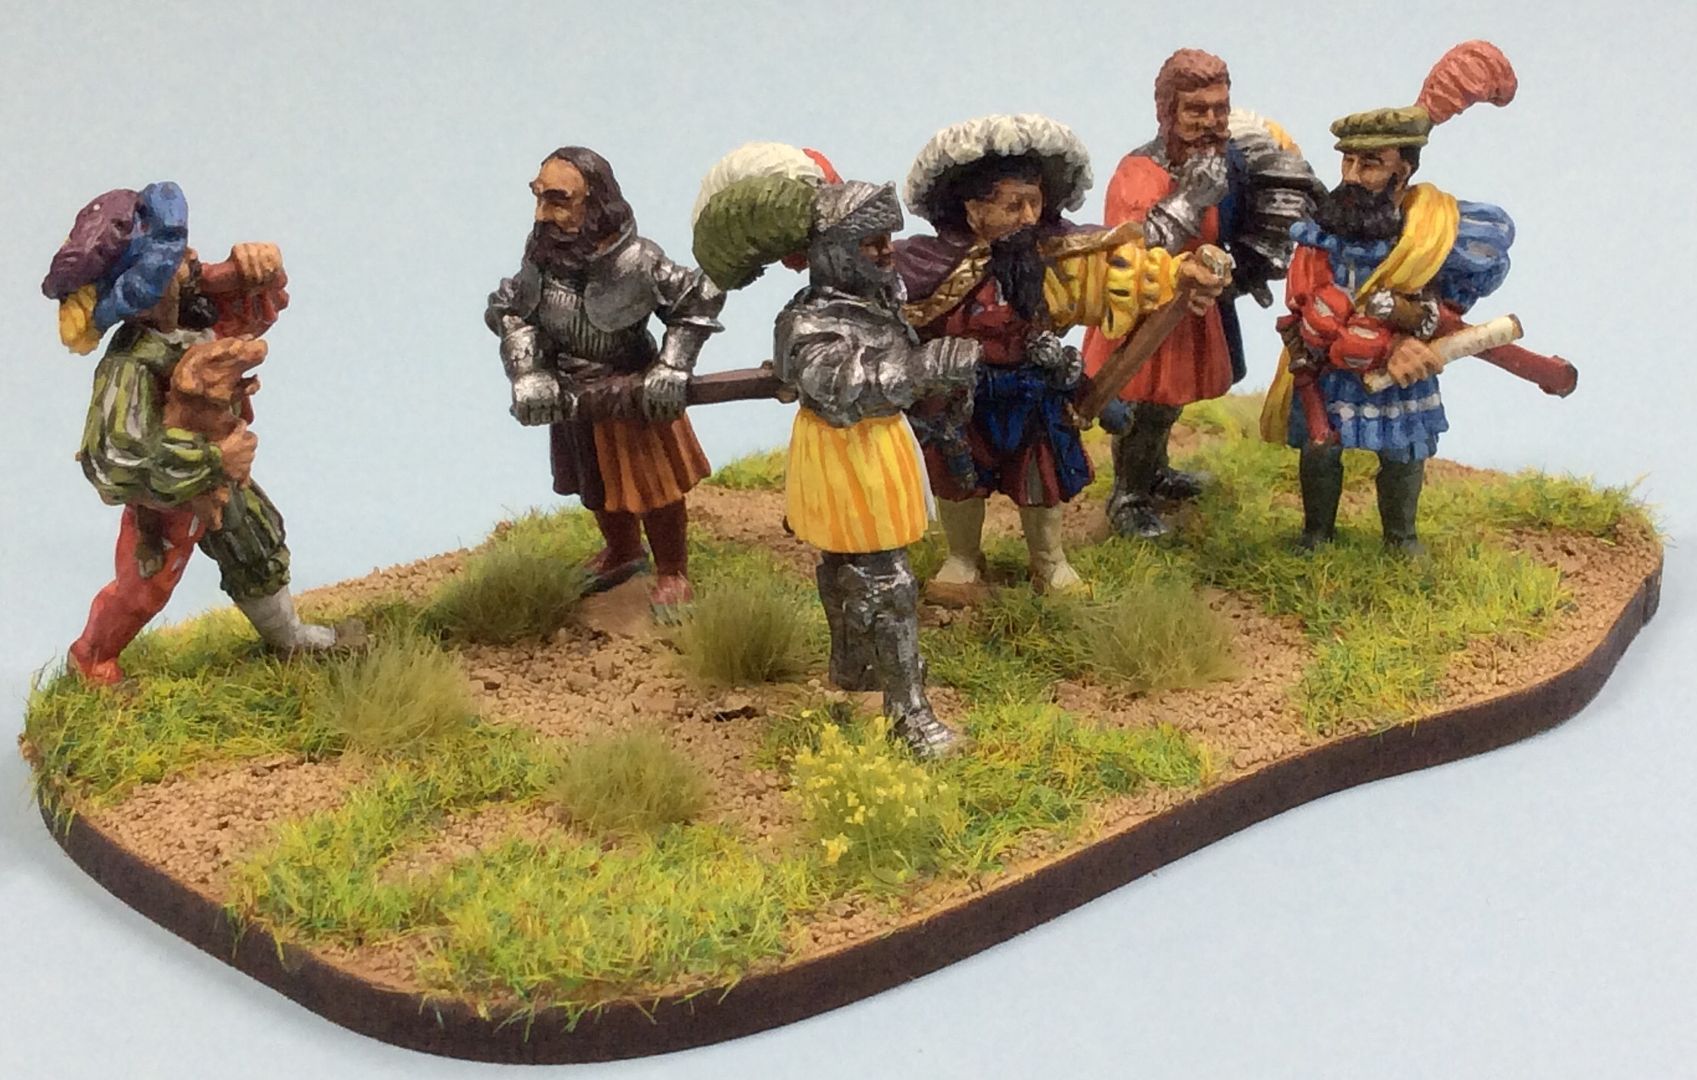
I've started work now on my Warlord/ ProGloria Landsknecht pike block, the first figures I bought for our Italian Wars project as it happens! I have already finished the mounted Command figure and started the two standard bearers, so I hope to have something to show in mid July. On Sunday I hope to go to Penkridge Table Top Sale, so I may add to the Lead Pimple! If not then, then perhaps at Barrage in Stafford the following Sunday?


Tuesday 26 June 2018

Too late to save PMaxImp...

...but a stone thrower has been added to the Late Roman armies. The machine itself was part of a generous gift from long time chum and master modeller Ian Bottrill. I think it is from Gripping Beast but I can’t be sure. The crew were three odd figures in my ‘come in for’ boxes, Foundry Late Romans, so they fit right in with the rest of my collection.


I removed the sword from one figure and lowered the arm slightly with gentle bending. Some brass rod fitted the other hand to stand in for the operating lever. The second figure needed no alteration, just the addition of the brass rod lever. The third figure needed no adjustments at all. Nothing to it really, but a nice addition to the collection for the next game, later this year no doubt.
On the painting desk now are four Mutton Chop 1938-40 British figures, two officers and a two man Boys AT Rifle team. Alongside them are two Trent Miniatures Artificiers. I’m also rebasing the Foundry SYW dismounted French Hussars and Dragoons along with their British dismounted Dragoon opponents. Time though now to sort out the table layout in GHQ for the Wargames Illustrated photoshoot.

Saturday 23 June 2018

4.5” Howitzer & crew 1914

As part of my break from our Italian Wars project I have added a further artillery piece model and gun crew to my 1914 BEF force. The gun is a resin kit which was included in a large bag of figures Matt passed to me last year. The gun itself is manufactured by  T.A.Miniatures http://taminiatures.com/shop/  The crew are from Wargames Foundry's WWI 1914 British range, sculpted by Dave Andrews, and so compatible in all ways save heft with his later Great War Miniatures which comprise the bulk of my BEF ~


They have been completed just in time to join the rest of my and Phil's collections for Dan's visit for a Wargames Illustrated photoshoot to illustrate a piece I've written for the magazine on adapting Black Powder rules to the 1914 phase of the Great War.
On the painting desk now are three modified Foundry Late Romans to be the crew for a stone thrower which was part of a gift from my long time chum and modeller Ian Bottrill. So, back to painting it is!


Thursday 21 June 2018

The Battle of Hipstadt

Time for a larger game in GHQ and what better than a run out for my SYW collection? A fictional game centred on the struggle for the strategically important town of Hipstadt between the British and the French. The objective is to control the town by the end of turn 10 ,a very taxing game both size and time wise for me at least! I hope the pictures will, as ever, convey the sense of the action without burdening the reader with unnecessary cut and thrust detail ~
In the first two turns the French miserably fail almost all of
their Command rolls! Merde!!!!

As a consequence, much of the French cavalry on their left
wing and the Guard Infantry brigade are distant from the 
action developing around Hipstadt.

Mind you, the British are not much more active in the first two
turns! As the French commander I felt quite uneasy after two
turns, despite the lack of movement on both sides.

British  Grenadiers seize part of the town in the face of a
hesitant French infantry Brigade shielded by Light Infantry
skirmishers.

The French right wing, cavalry of the Guard and Cuirassiers du
Roi. A magnificent spectacle, but can they fight you ask?

As the action unfolds the French press forward in the centre 
and on the right while the British hesitate.

Alas, the French cavalry are having the worst of things against
their English opponents. The Gendarmes are routed and their
supports hit by a Sweeping Advance!

They too are routed and the General leading them is killed,
leaving the cuirassiers high and dry! Mon Dieu!!!!

Both Guard cavalry regiments fail our in house Rally from 
Route phase and so are dispersed. The leaderless Cuirassiers
are attacked by the Horse Grenadiers supporting the Horse
Guards.

With the French right wing destroyed the Horse Guards sweep
the artillery from the hill, forcing the Comte Du Merde to take
refuge with the stalled infantry before Hipstadt.

The British have seized all of the town by this stage. This will
be a tough task now for the French, especially with the
British cavalry free behind their right flank and centre.

The British just cannot be dislodged from Hipstadt! The
French position looks grim to say the least, with both of the
cavalry Brigade commanders now dead!

And in Turn 9 it is all over, with Du Merde conceding the field
and saving as much of his army as is possible! Lord Rawnsley
surveys the victorious British, satisfied with a victory well
won!
As ever here in GHQ we used Black Powder for the rules finding them to our taste, although we have added a Rally From Route phase, largely as our table is only 6' x 6'6" and we have smaller armies in consequence than the creators of the rules have in their games. The routed unit is moves 12/18" to its rear and is allowed a chance to Rally at a -2. If it passes then it Rallies on the spot, if it fails then it Routes another 18" and is allowed a second chance to Rally at -1. If it fails a second time then it is dispersed. Of course, if it is contacted in either Rout by the enemy it is destroyed! It works for us, but may not be to the taste of others; that's always the way with wargamers and rules I've found!
Next week's Monday game here in GHQ will be on a Wednesday! You'll see why when you pop back next week!

Tuesday 19 June 2018

Salm-Kirberg Hussars.

I've given the Italian Wars project a bit of a rest for the present, largely because the last two units I have to paint are Landsknechts! Instead I'm choosing to work on small additions to existing projects. First up are four unreleased figures from Trent Miniatures which I've chosen to depict as the Salm-Kirberg Hussars, a French loyalist unit in British pay during the Flanders Campaign of 1793-95. In Black Powder terms they will be a Small Unit in our games, one of several colourful such ones I've already recruited ~


The sources, both visual and written, which I've found do not entirely agree as to small details like sash colours and plumes, but I chose largely to follow the Knotel plate, though I did take a few minor liberties in execution!

As Phil might say, "They will do!" At least they will for me, if not anyone else. Next on the painting desk is a WWI 4.5" howitzer and crew. I hope to finish that this week, although with shorter painting sessions and therapeutic walking it may take a bit longer!

Wednesday 13 June 2018

Baldinus vicit Imperatoris

Or more properly The Glorious Death of Pompus Maximus, late Emperor. This week’s game here in GHQ saw a Late Roman game in our ongoing tale of Pompus Maximus and Baldinus and their struggle for the Imperial throne sometime in the late C4th. As usual we played out the game using our in house version of Neil Thomas’s Ancient and Medieval rules. The game swung this way and that, as they generally do with these rules we find, before a decisive moment ended the contest. A few pictures to convey the sense of the game. Next week, hopefully, a SYW game using Black Powder ~

The army of Pompus Maximus was cavalry centred, Heavy and Cataphract on
the left wing, Light cavalry and Horse Archers on the right. Two units of 
Dark Age infantry, supported by a unit of Heavy Arches, a unit of Light
Infantry and a bolt thrower held the cente.

The army of the rebel Baldinus was infantry heavy, with Dark Age Infantry,
Warbands, Heavy Archers and.a Bolt Thrower. His cavalry, all Heavy, was
concentrated on his right. You will note above the heroic Pompus right in the
action! Bit of an error of judgement on my part that!

I took my eye of the game as I concentrated on the cavalry action on my left.
Suddenly I found my infantry had fled and Pompus Maximus was fighting for
his life! Although he fought valiantly no units could come to his aid. Despite
reducing the enemy to half strength Pompus eventually succumbed and with
his untimely death the army fled. "Hail Baldinus!" Perhaps not...


Monday 4 June 2018

Crossing the Po

For the second week on the trot Phil kindly agreed to come over to GHQ so we could have a game as I continue my rehabilitation by getting back into normal activities as much as I can. I suggested combining our completed Italian Wars bases and trying out Neil Thomas’s Renaissance rules to see what changes we might like to make. We managed to make armies of thirteen units a side by combining our bases. Each side had an objective to seize in addition to trying to destroy the enemy army. The Florentines had to seize the farm in the Papal deployment area, while the Papal army had to seize the bridge over the Po in the Florentine deployment zone. The pictures will I hope capture the colour and drama of the unfolding action in a battle which went right down to the wire ~
The Florentine army deploys mostly to the right of the Po river bridge. The
bridge is defended by a unit of mounted crossbows and a (very) large gun!

The Elmetti of the Papal army, supported by a unit of Halberdiers and another
of swordsmen, seize the high ground on the left. The artillery covers the 
approach to the farm. On the army's right the main force is focused on the 
objective of the bridge over the Po.


The Elmetti dominate the Florentine's right flank, supported by the swordsmen
and Halberdiers. The right flank advances with determination to seize the
bridge.

The Florentine Gendarmes are strangely inactive as the rest of their army
advances steadily against the Borgia foe.


Screened from the enemy by units of crossbows and handguns the pike and
spearmen advance steadily towards the enemy.

With the Florentine Gendarmes still inactive, the swordsmen and the
Halberdiers close on the Florentine shot.


In the distance the Papal army moves against the bridge,while in the
foreground the battle rages for the centre.

Having seen off the Florentine shot, the swordsmen rashly engage the still
stationary Gendarmes, supported by a unit of Elmetti!


The Florentine and Landsknecht pike finally get to grips with the enemy,
while in the distance a unit of Borgia handgunners advances on the bridge.

The push of pike takes centre stage now, but the Halberdiers take the 
Florentines in the flank to swing the outcome. More Borgia units move on the
bridge on the right.


At last the Florentine Gendarmes engage the Elmetti! The outcome was
largely underwhelming for Phil's cause I have to say.

In the final moments of the battle the Florentine pike and their Landsknecht
allies are destroyed and the Florentine army is broken. The bridge is firmly
in the hands of the Papal army, resulting in a victory for the Borgia cause!


The game lasted about three hours, punctuated by lunch, and demonstrated to our satisfaction that Neil Thomas's Renaissance rules would suit us well, although we already have made the first adjustments and additions to the basics. The colour and spectacle of the armies on the tabletop battlefield have inspired us to press on with the project. Next week though we plan a return to the C5th struggle for the Roman Empire between Pompus Maximus and Baldinus.

Landsknecht Command Element

As my army of the Papal States will have a number of mercenary Landsknecht elements I thought I ought to include a Command Element for them. In addition, these are the first figures I’ve completed since my hip replacement operation last month. There are six figures on the base: two Steel Fist Late Medieval Foot Knights and four Warlord/ProGloria Landsknecht figures, including an odd looter picked up with the light gun set at Januarys Table Top Sale in Penkridge.

I’m taking a break now from the Italian Wars project and have located two small pieces for other projects: a 4.5” Howitzer and crew which will do for both the Great War and the VBCW; four Hussars by Matt for Trent Miniatures, the Salm-Kirkerg Hussars. That should take about two weeks at my current pace.