David Bickley's Wargames Blog

The occasional ramblings of an average gamer, journeyman painter, indifferent modeller, games designer, sometime writer for Wargames Illustrated and host of games in GHQ.


Wednesday 25 November 2015

The Great Siege of Bhyklabad

John came up from Cheltenham recently for one of our semi-regular all day games. We had agreed on an Indian Mutiny game and as a scenario was called for which would entertain us both, give us both a chance of a win, and have a bit of an unexpected twist. I decided to set the game in the context of a besieged garrison of HEIC troops and some loyal Native Infantry. These brave fellows would be heavily out numbered by the attacking Pandies who had to carry the walls of Bhyklabad before a relief column under Major General Archibald Huttless could come to the aid of the defenders. Stealing an idea from Phil, I decided that this could not happen until the afternoon session to give an edge to the morning's struggle. The object of the Mutineers is to carry the walls and capture or destroy the garrison, while the local native Prince, the Nabob of Nham, is charged with protecting his treasure from the marauding British relief column. Hence, some of the Mutineer forces have half an eye on both objectives and also their flanks and rear! For the brave lads of the Bhyklabad garrison, well, they need to hold their lines until relieved! The first photo shows the overall situation in Bhyklabad: the native quarter on the right is defended by Neil's Bluecaps, the European Quarter around the Residency by the Bombay Fusileers. Each European Regiment is supported by a Loyal Native Battalion. In addition the Royal Navy and Royal Artillery man heavy guns, rockets and a battery of 9lbers ~


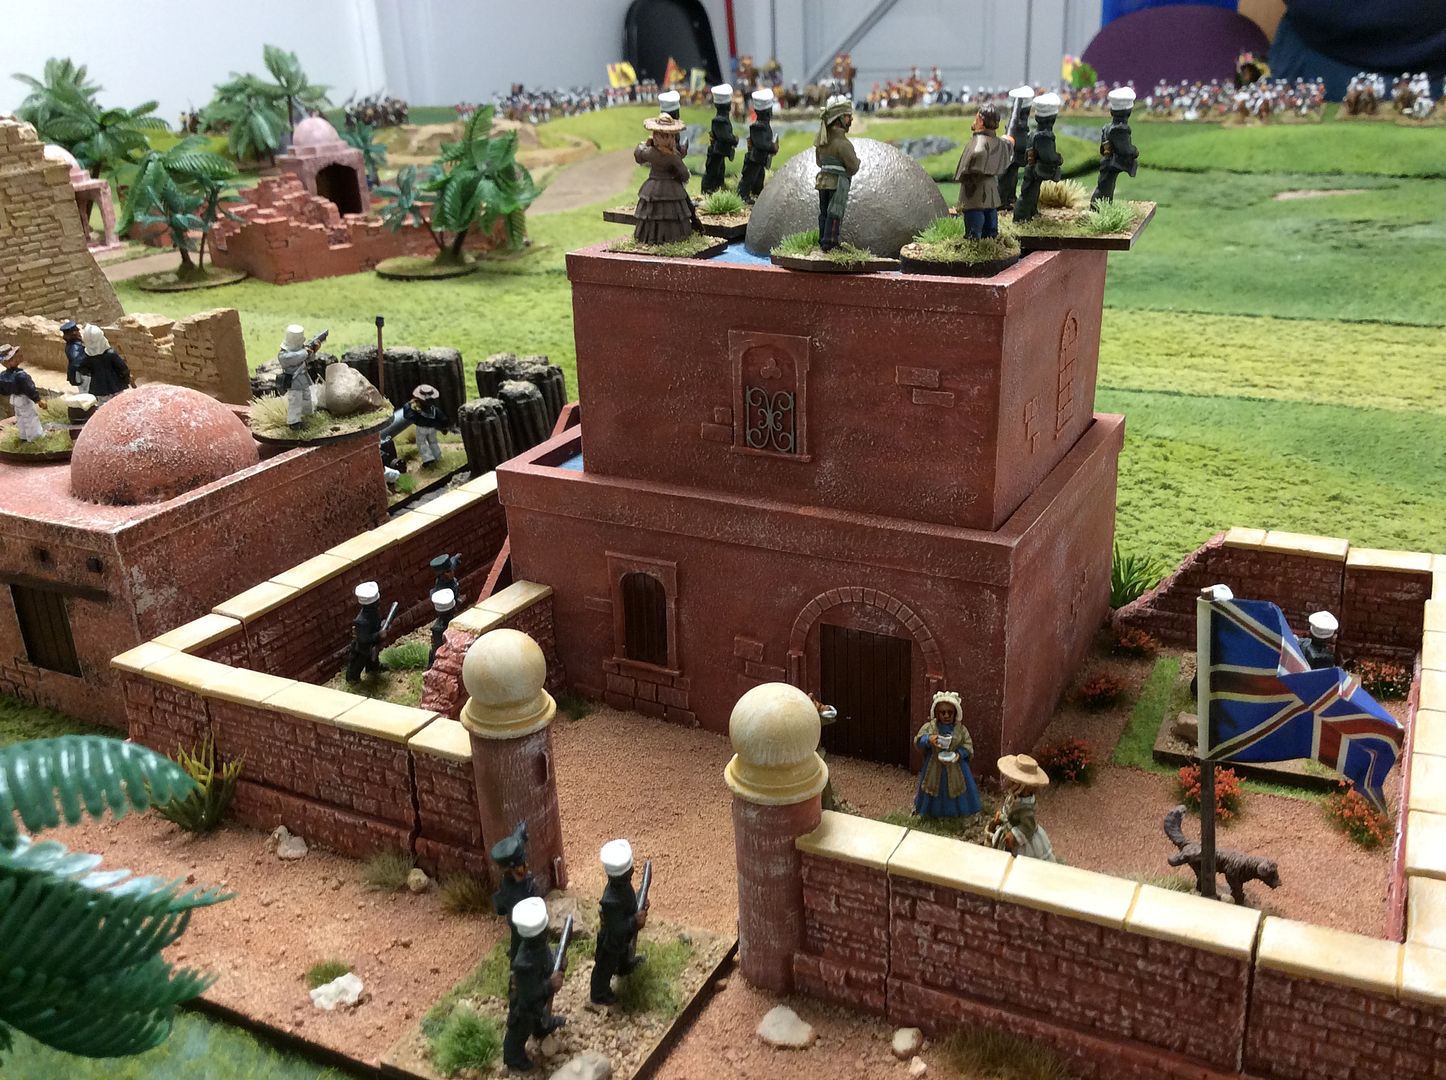
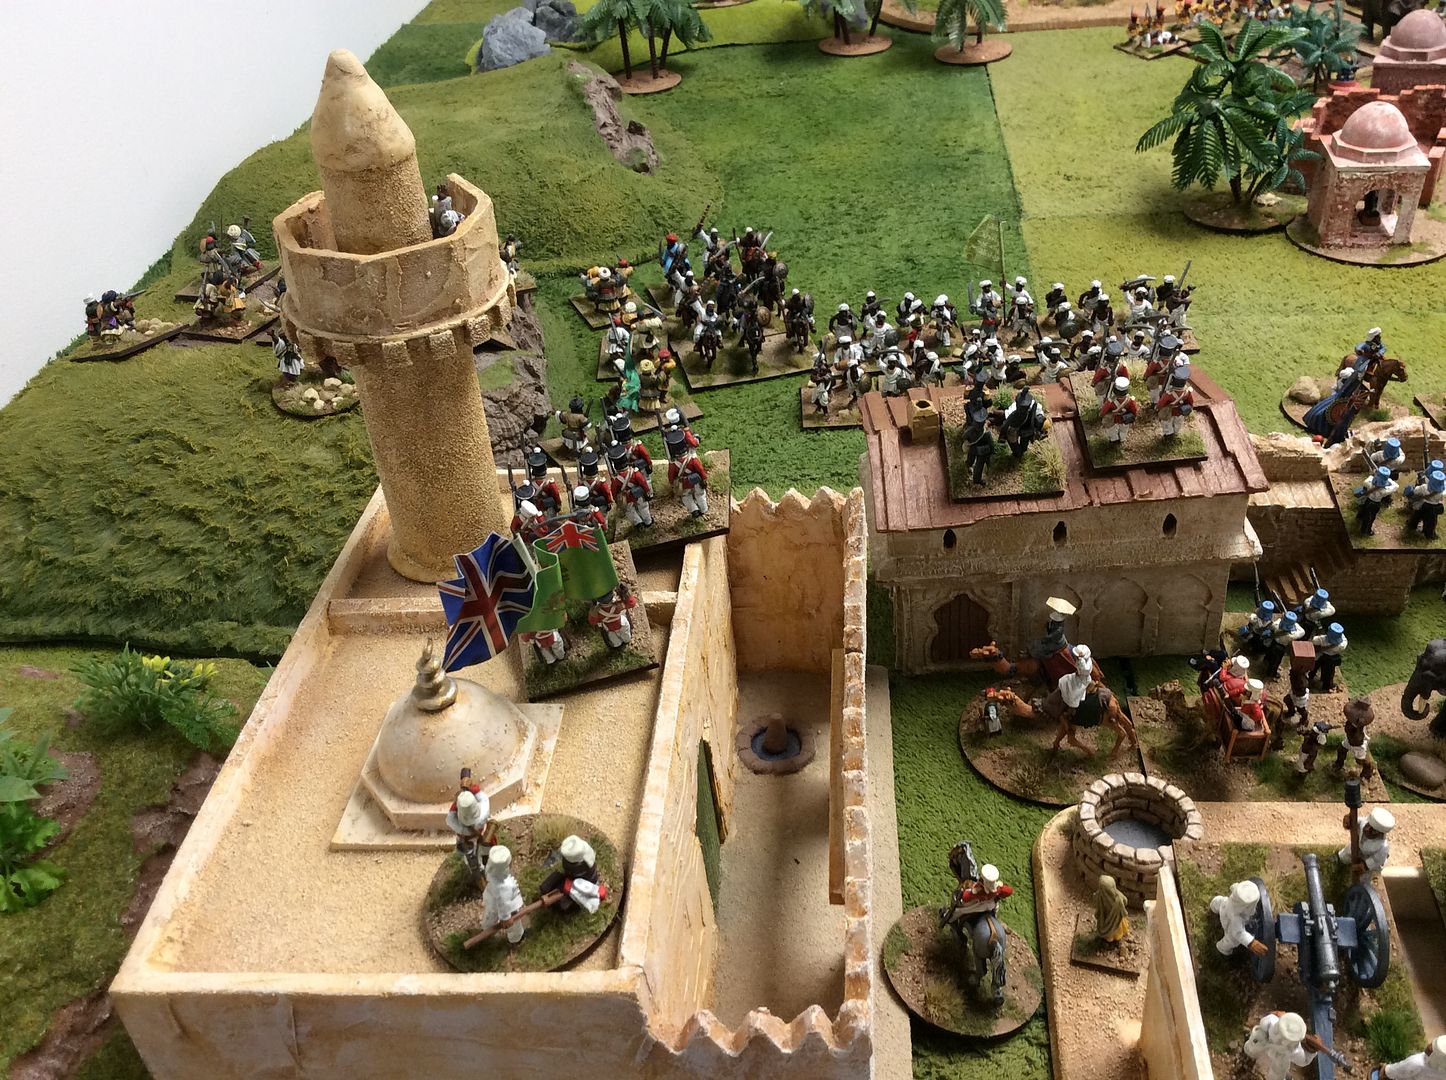
The Residency is defended by a loyal battalion of Gurkhas who are supported by a 64lb naval gun. From the rooftop the enemy can be seen in the distance massing for the attack ~


The gunners of the Royal Navy prepare to engage the enemy under the watchful eye of their commander ~


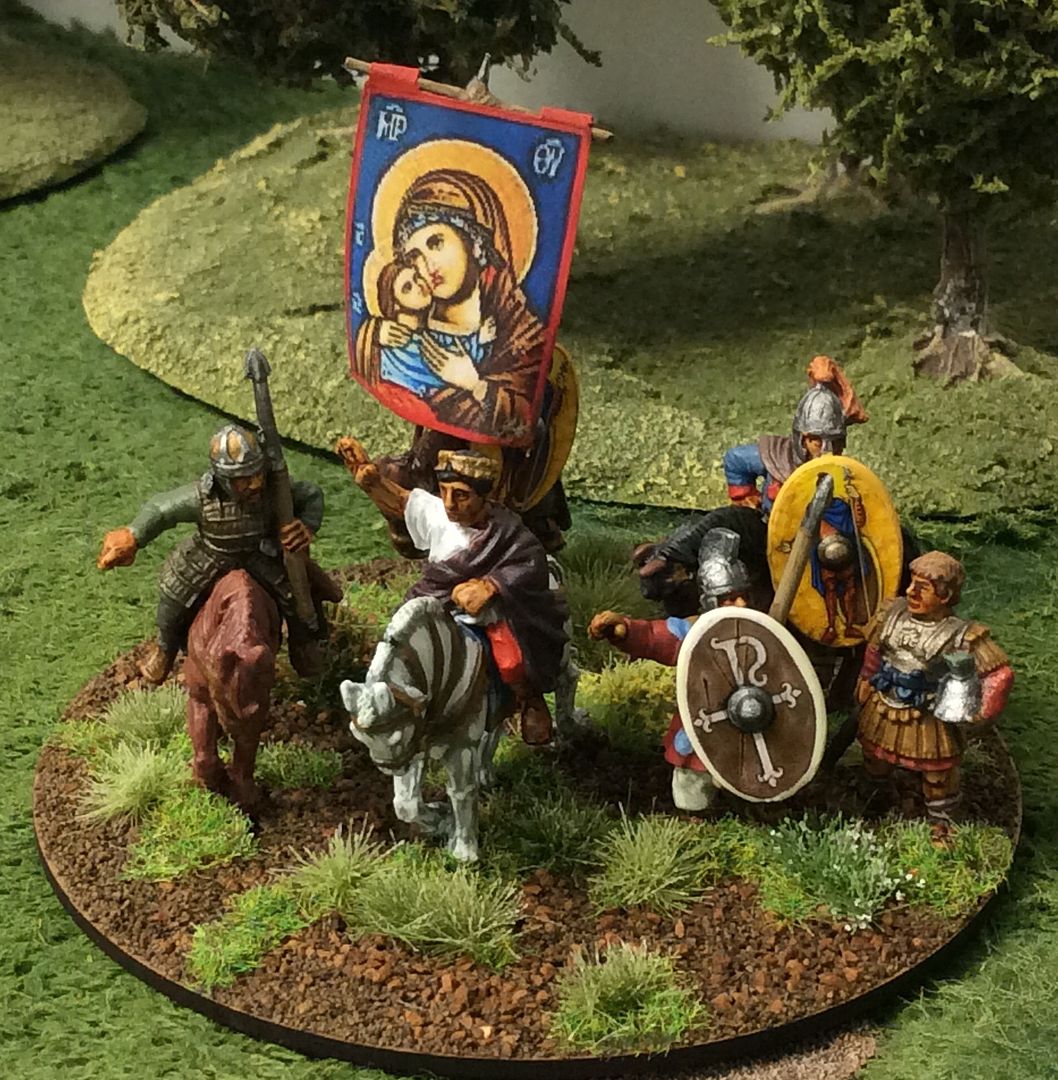
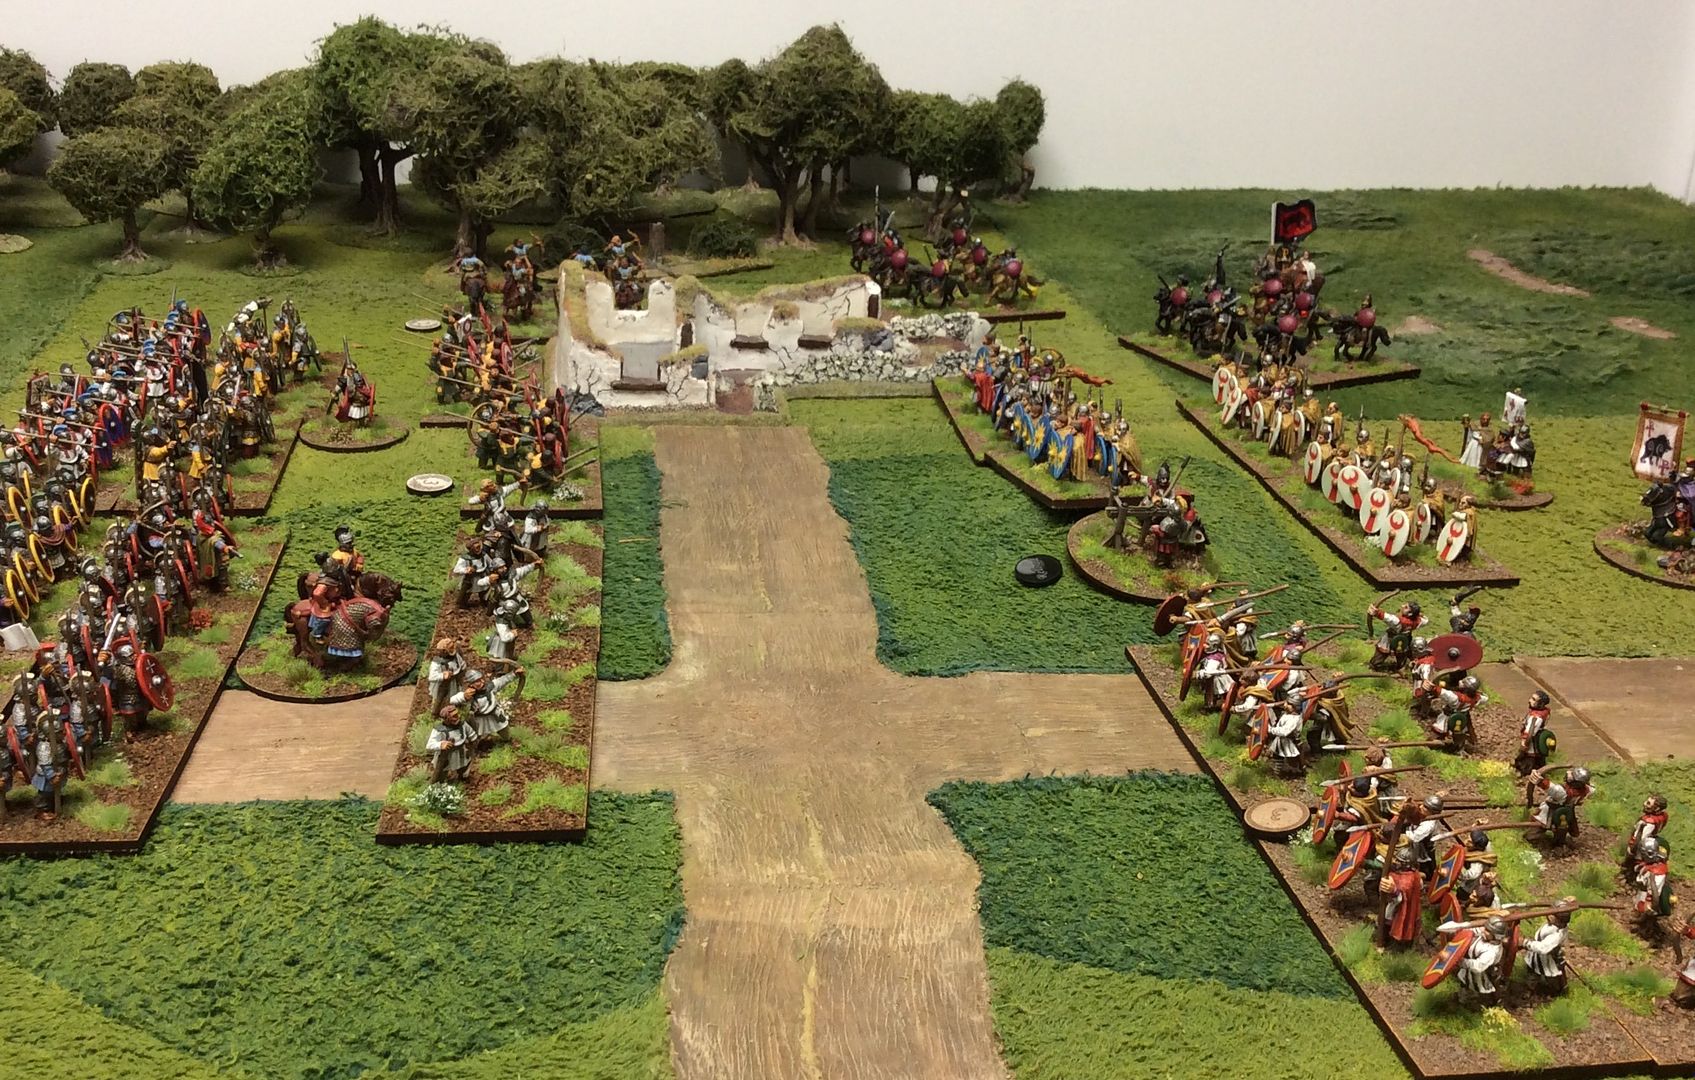
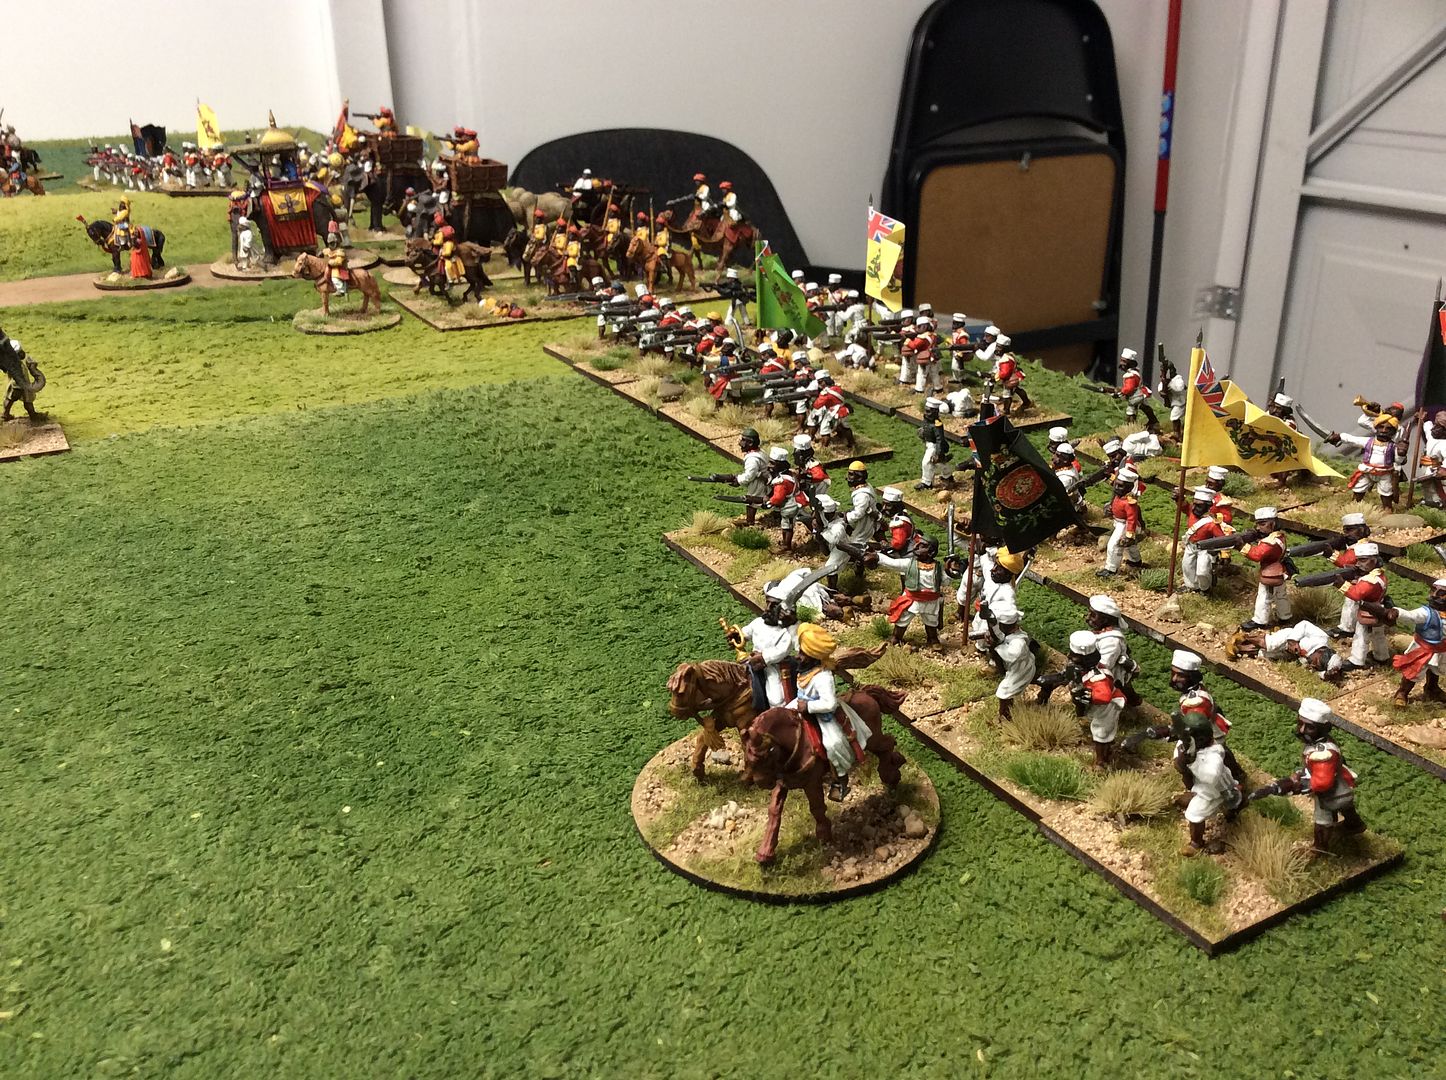
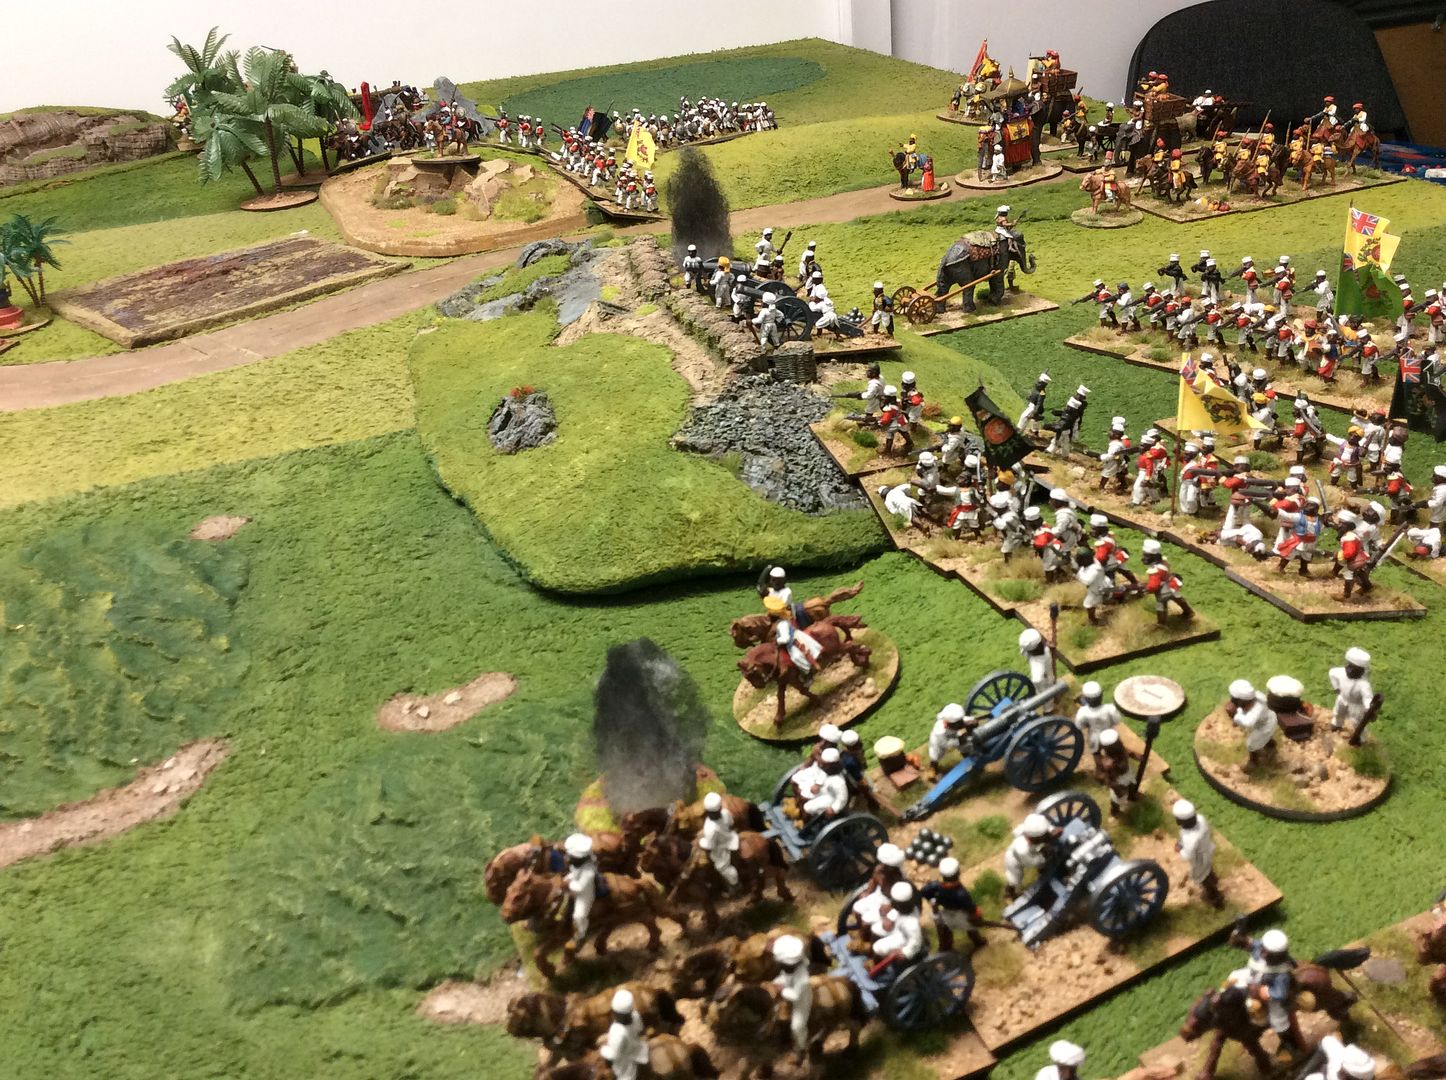
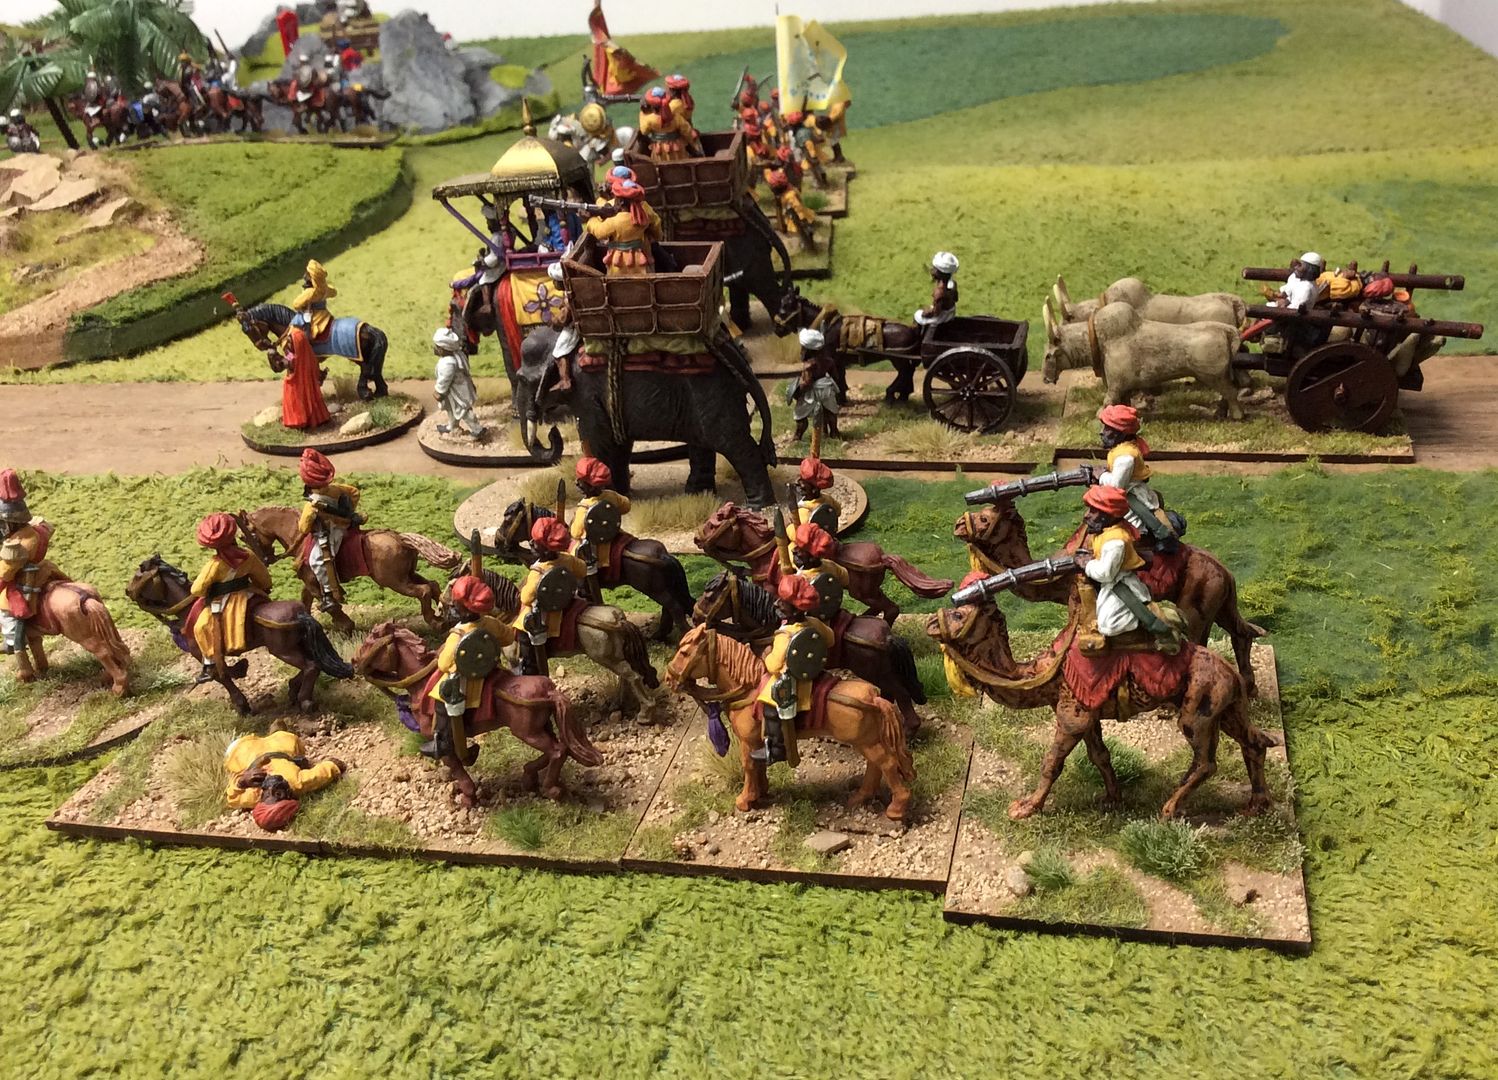
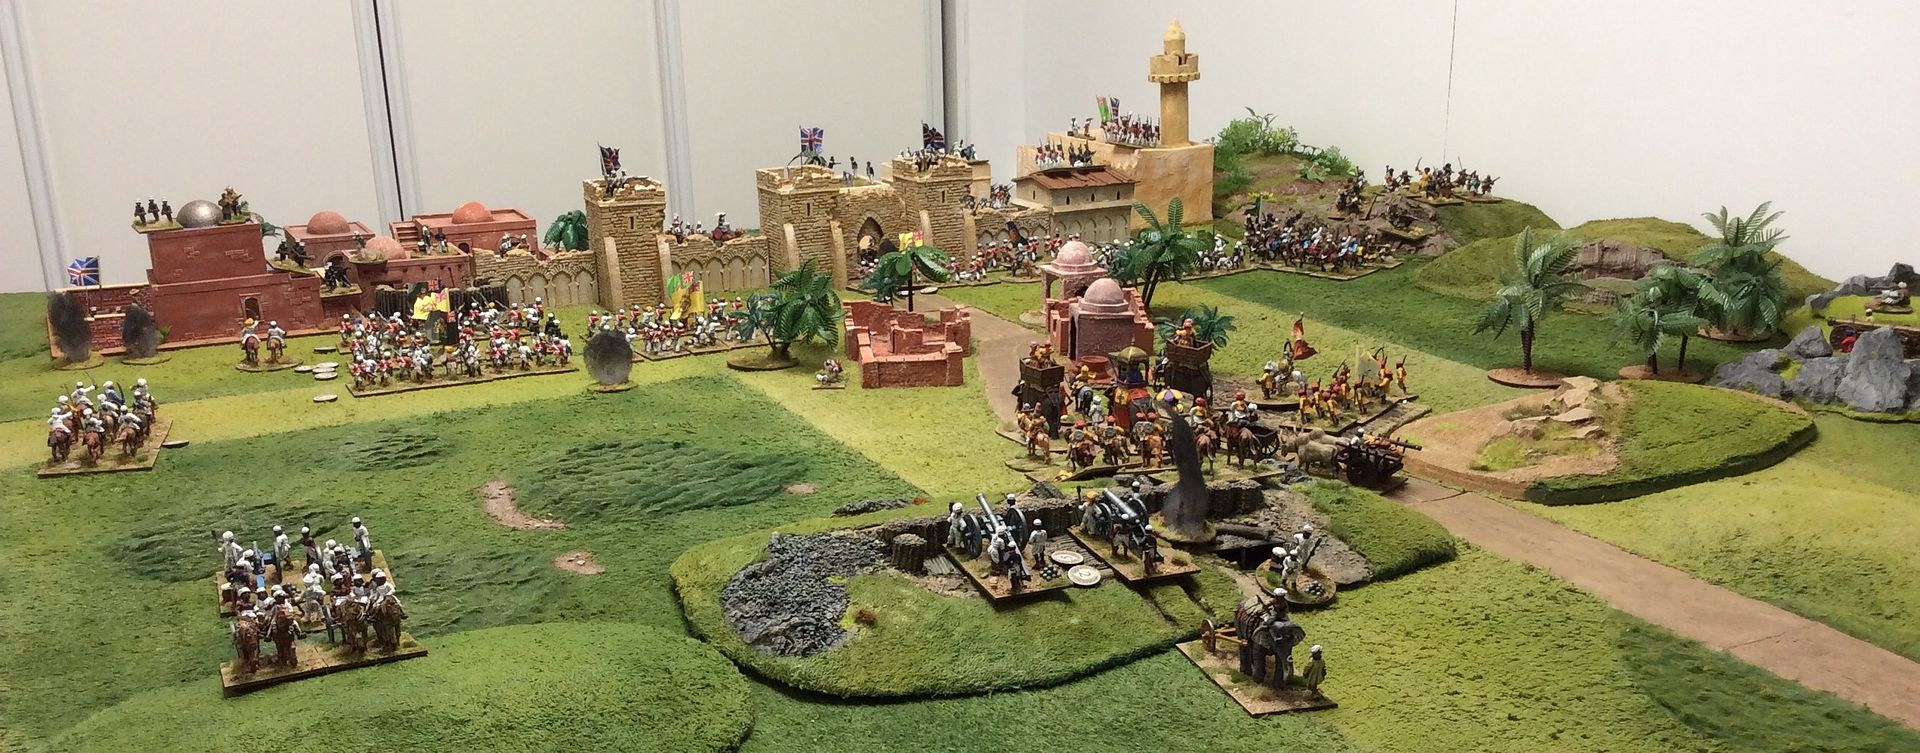
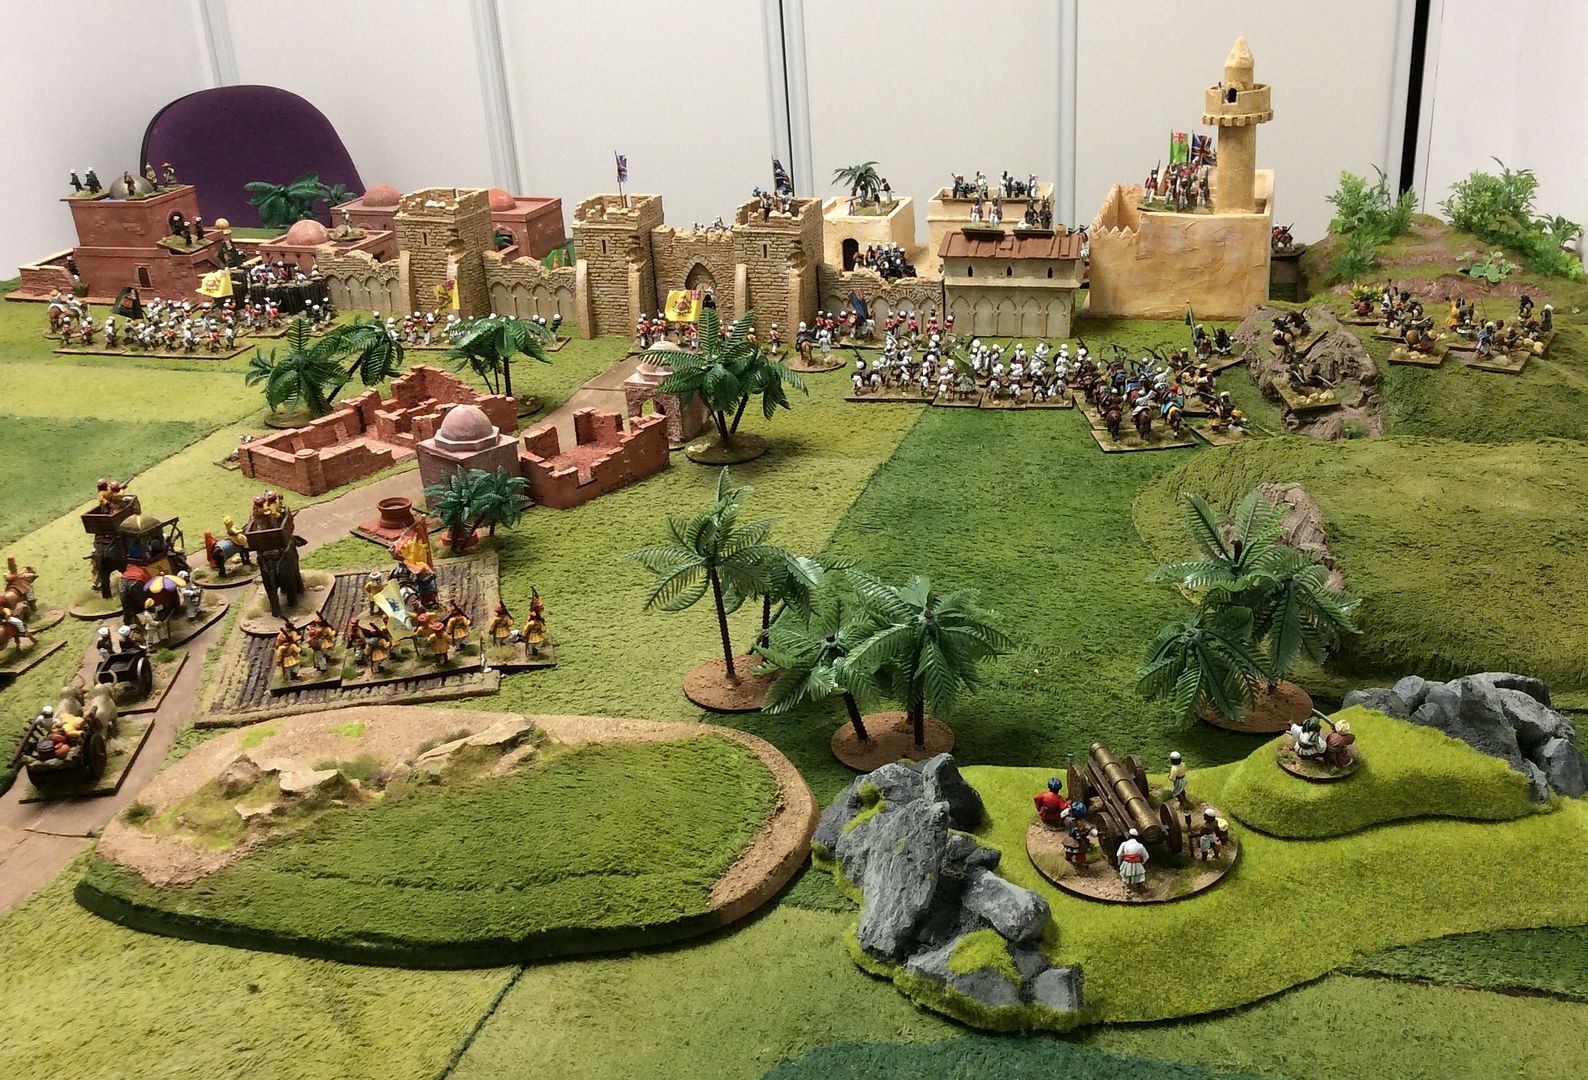
The attackers are drawn up ready for the command to move forward and attack the substantial defences of Bhyklabad. The Nabob of Nham can be seen in the middle distance with his guard carefully protecting his treasure convoy ~


Their attack develops under the cover of a bombardment from the Mutineers' heavy artillery. Their task is to silence the HEIC's artillery and then batter the walls to create an opening for their massed ranks of infantry ~


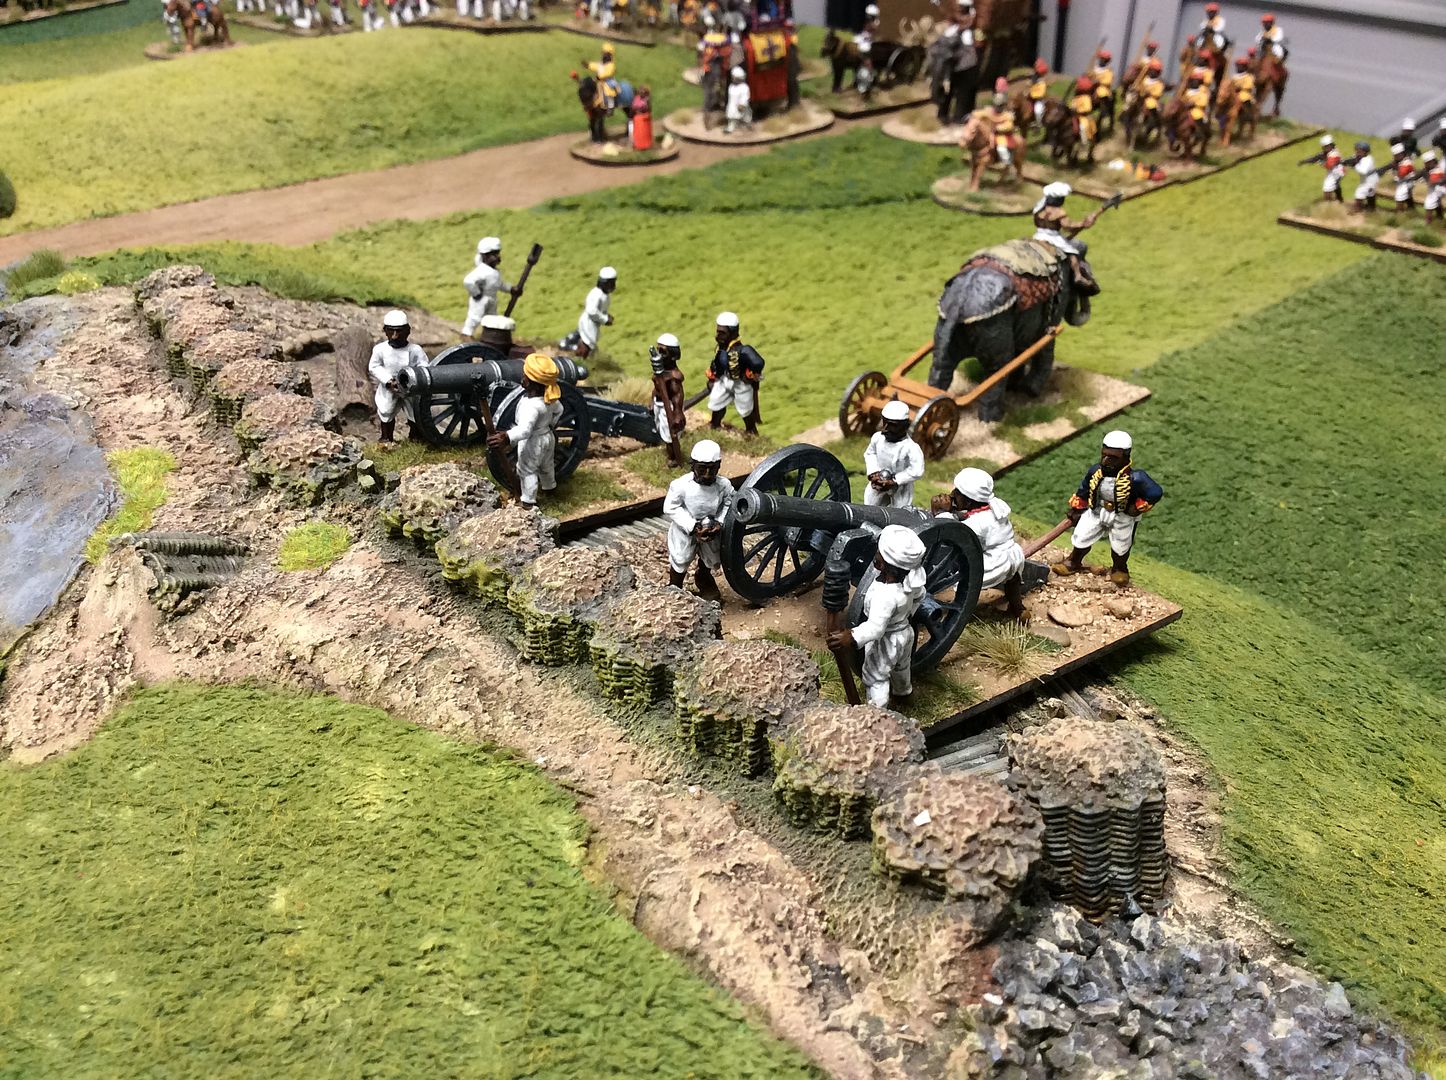
The Mutineers are supported by the hill local tribe of Bhurpas who amongst their forces have the antiquated 'Great Gun of Bhyklabad', so large and cumbersome it only fires in alternate turns. The task of this behemoth is to batter open the gate into the city ~


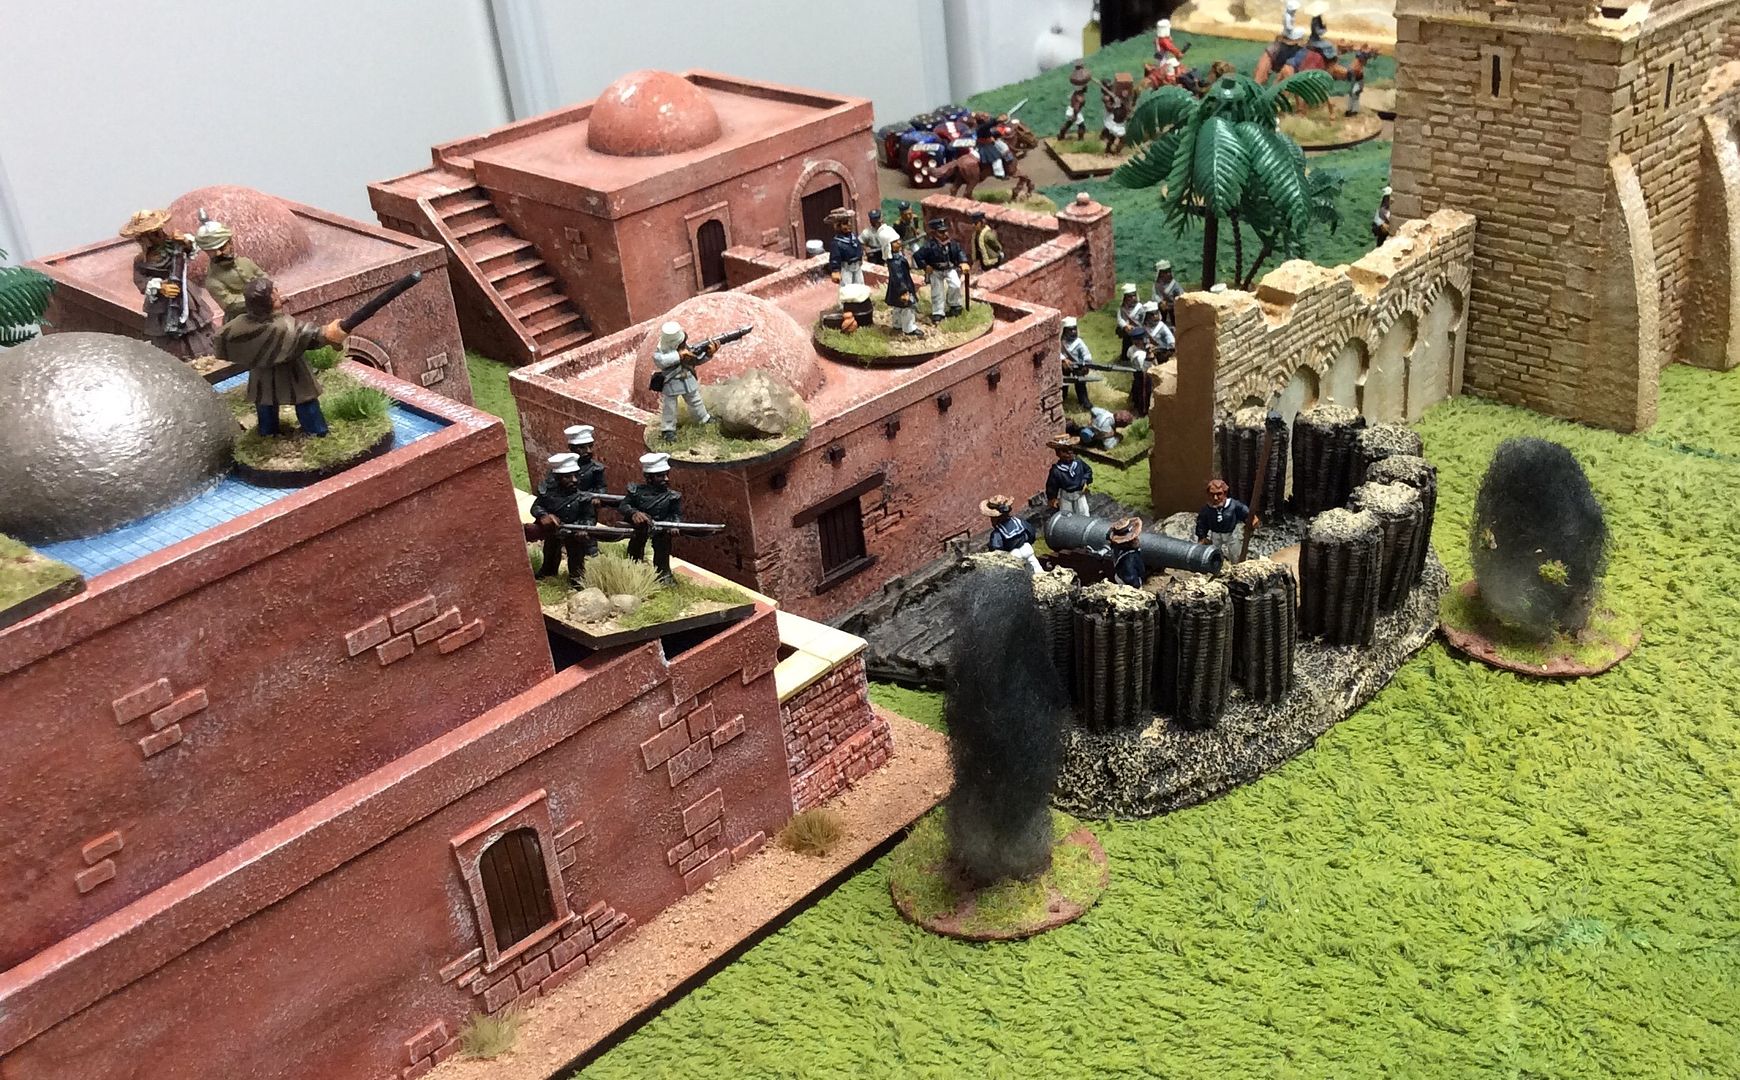
Inside the besieged city hasty preparations for defence are accompanied by reading the women, children, sick and wounded to be evacuated should the relief column arrive. The defenders are thinly stretched along the walls but are manfully prepared to do their duty to the Queen and to God ~


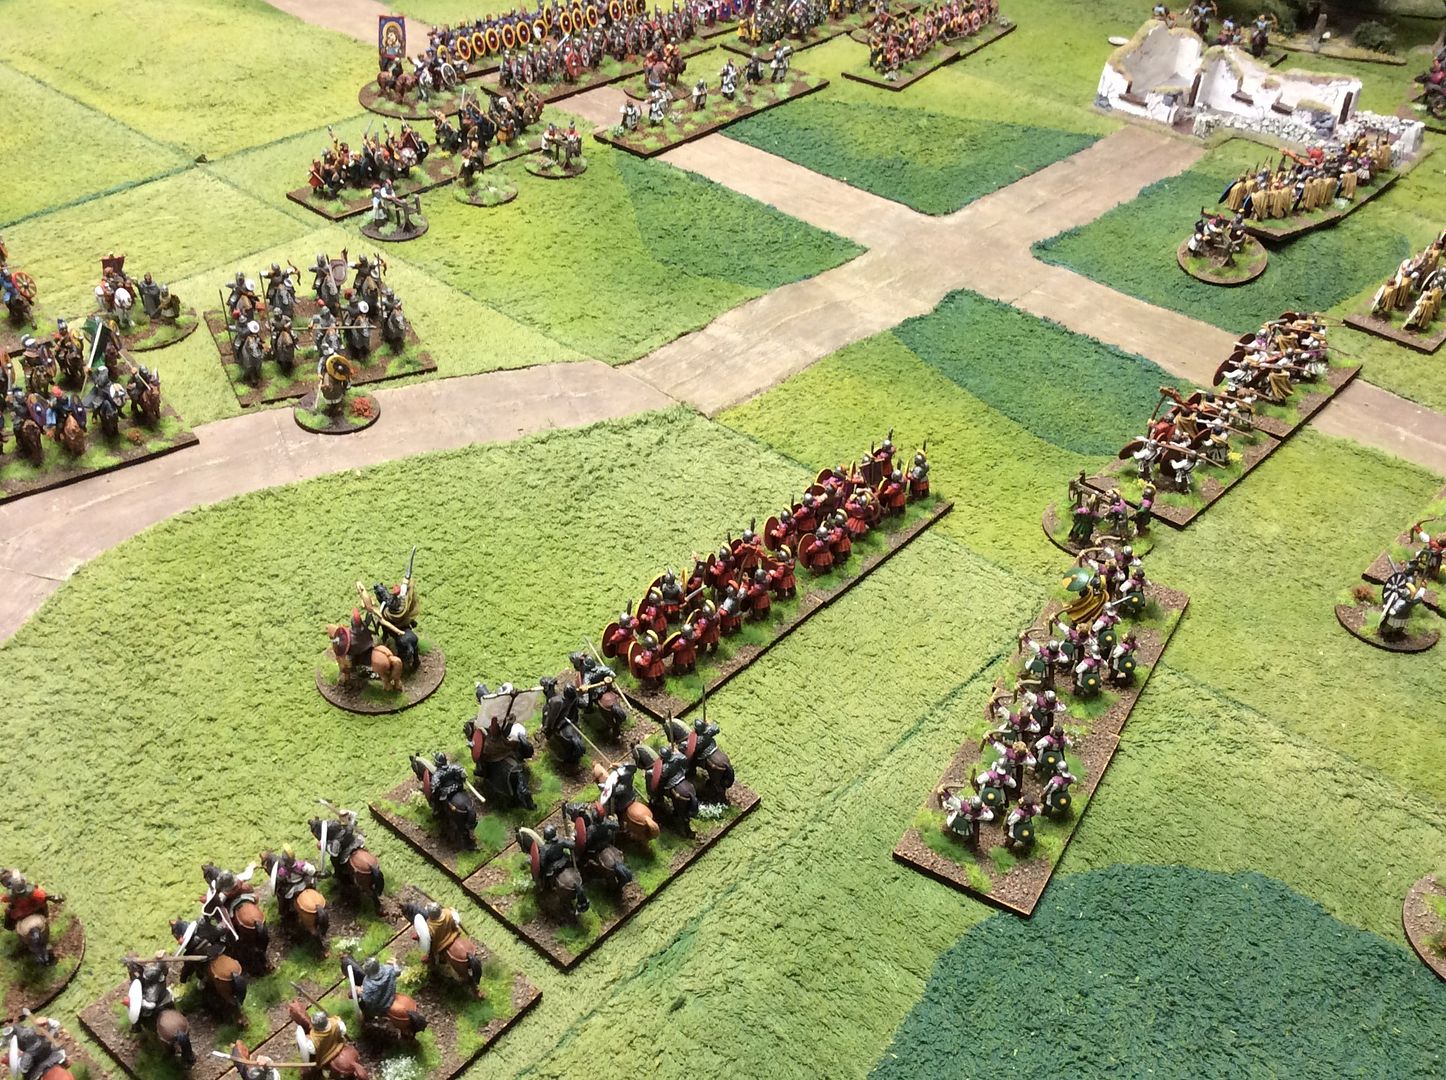
Drums beat, trumpets sound, banners wave and the attack gathers pace. The defenders open fire at long range in an attempt to neuter the Mutineer artillery before they can deploy or do much damage to the walls of the city. Early turns mostly consisted of Mutineer cautious advance supported by heavy fire from their big guns while the gallant defenders replied in a largely successful attempt to render the enemy guns ineffective. The RN Rocket battery was especially effective in disrupting the advance of the Mutineer Horse Artillery and supporting cavalry ~


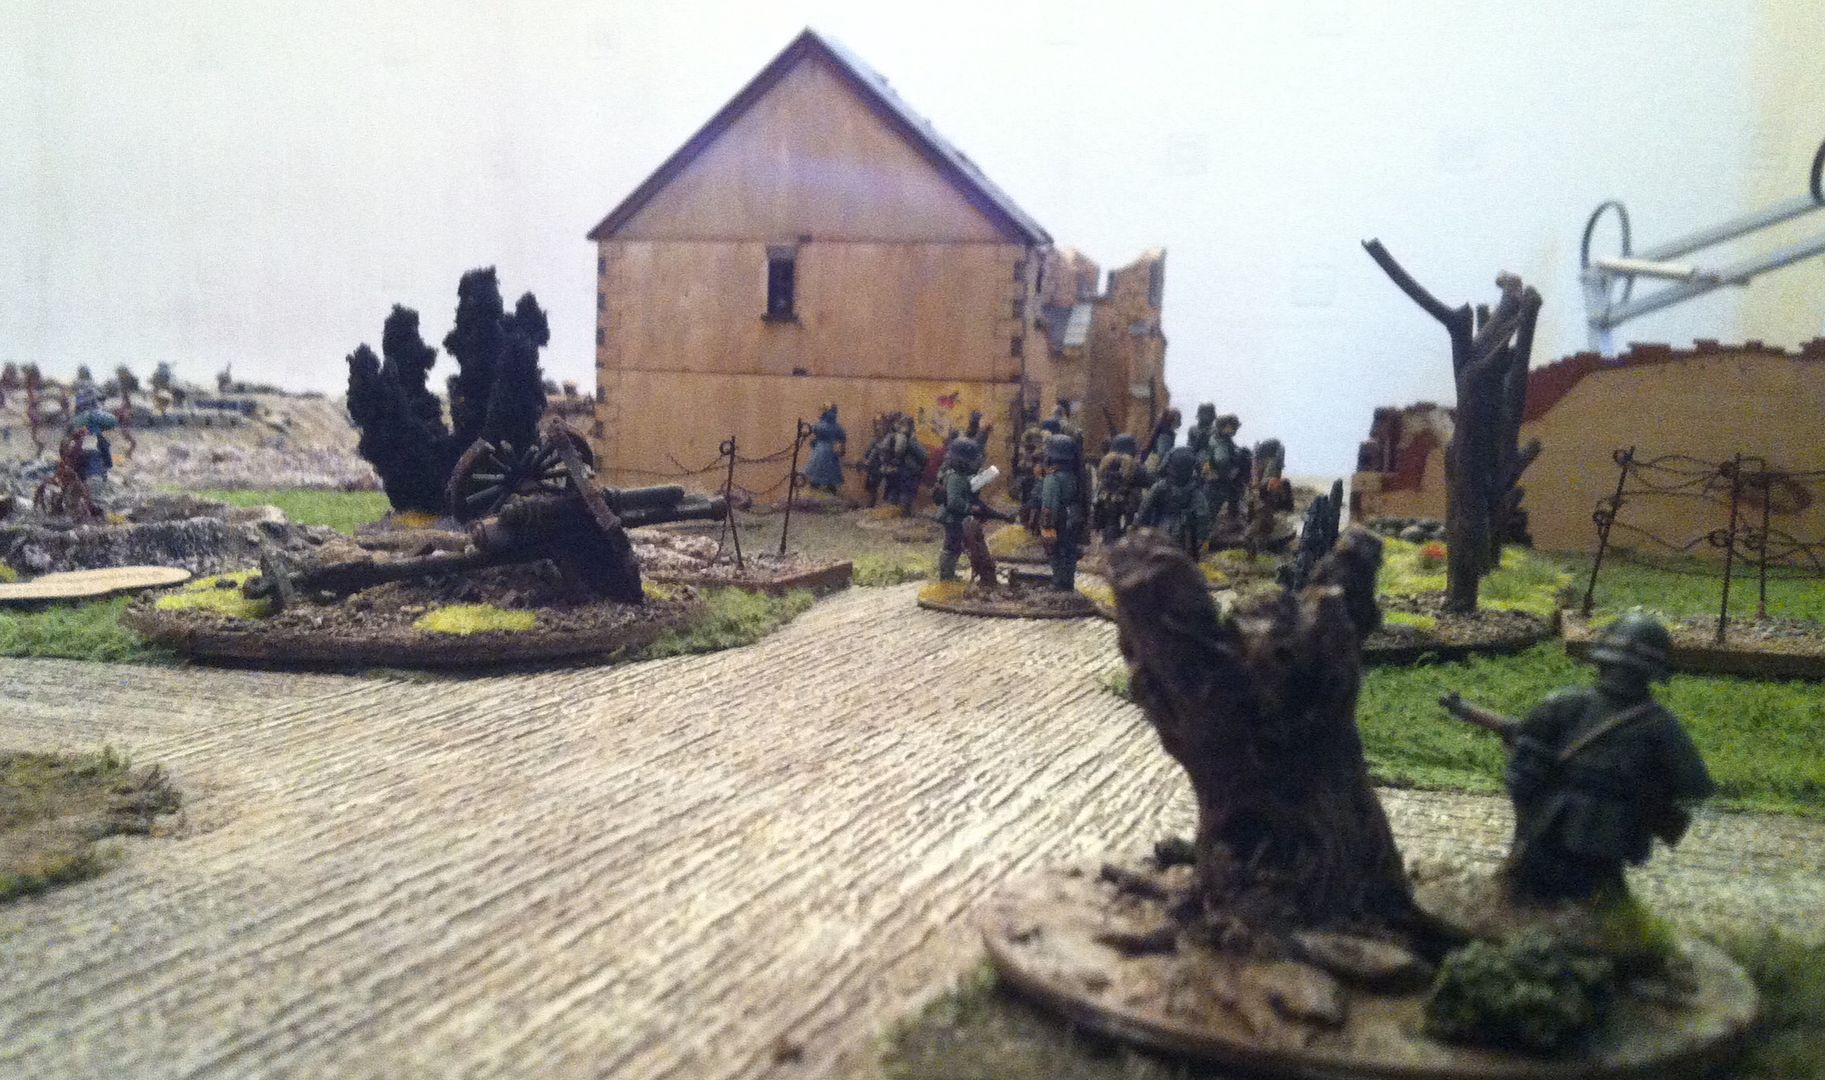
The Mutineer artillery is also successful as it smashes round after round into the RN 64lber battery. Manfully the surviving crew stick to their task in the best tradition of the Service, trading blow for blow with the enemy's heavy guns on the ridge ~


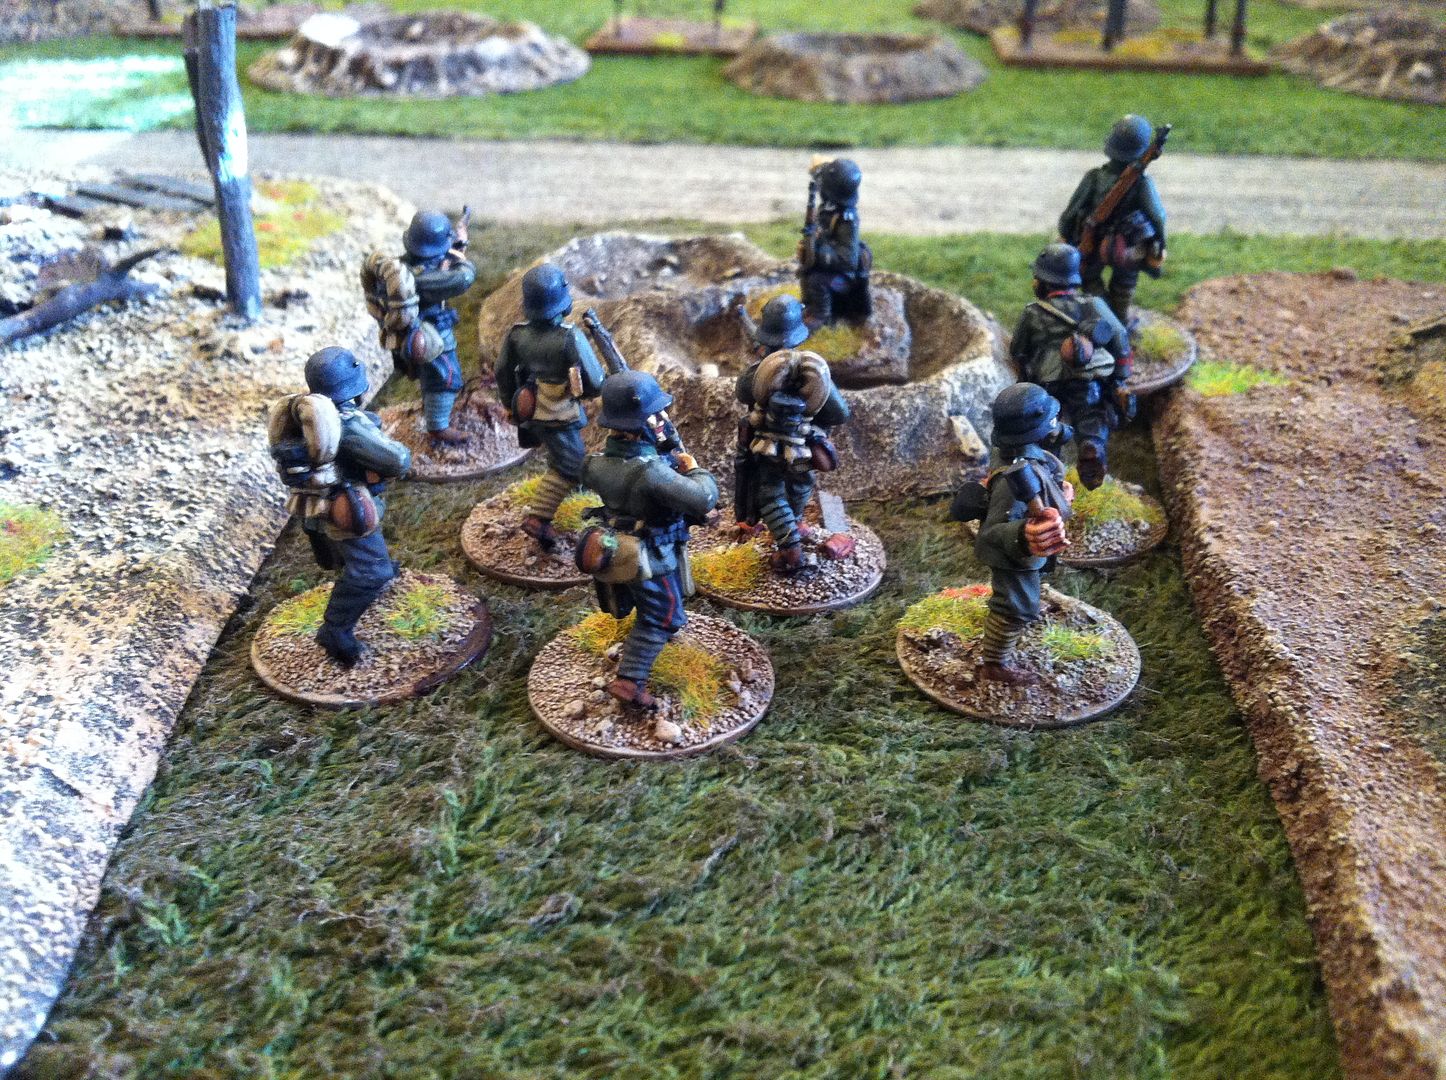
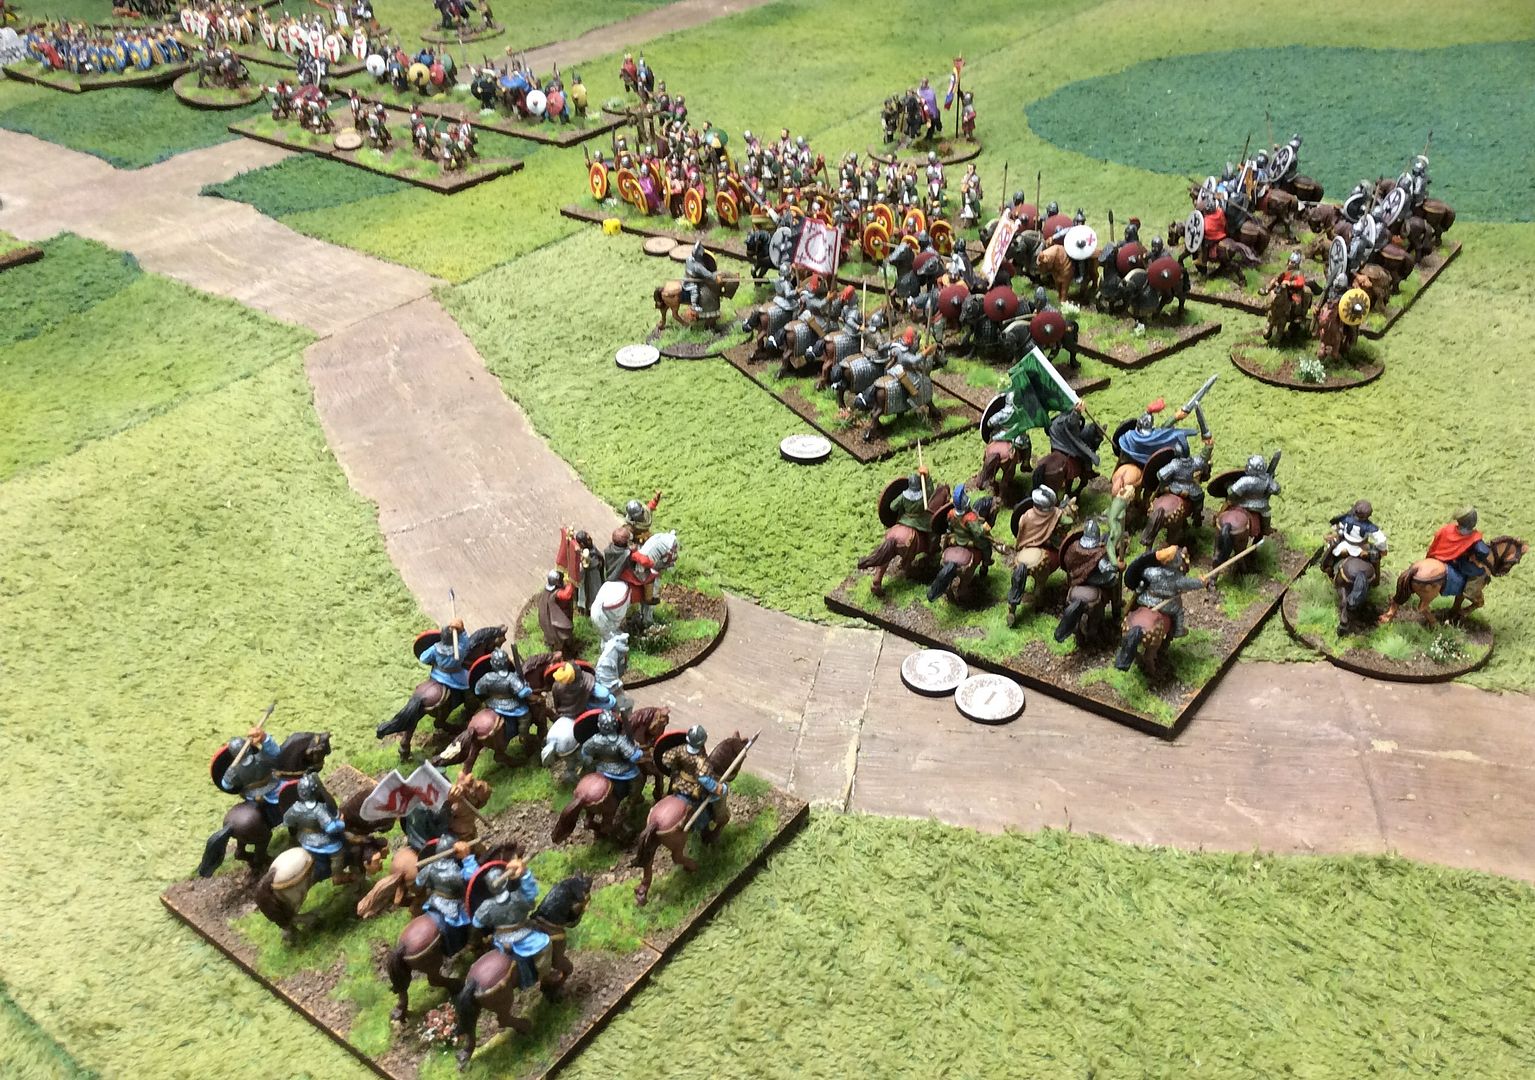
Unable to advance due the disruptive effect on their 'Pluck' of the repeated rocket strikes, the Mutineers' Horse Artillery deploys at long range in an attempt to support the infantry advance on their flank ~


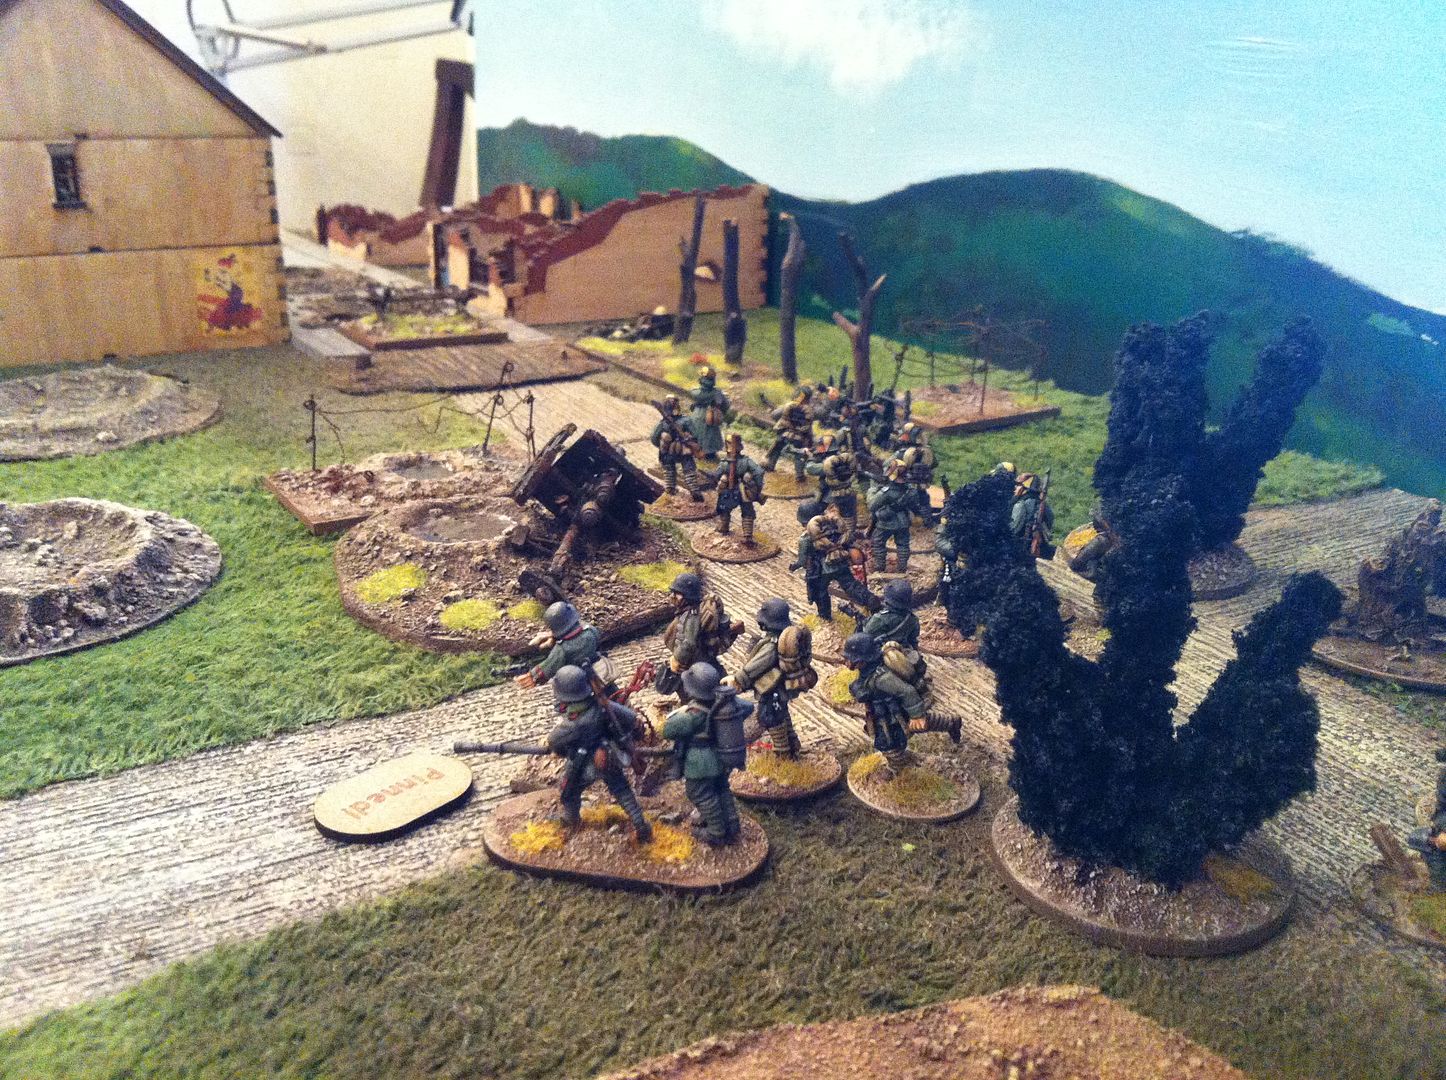
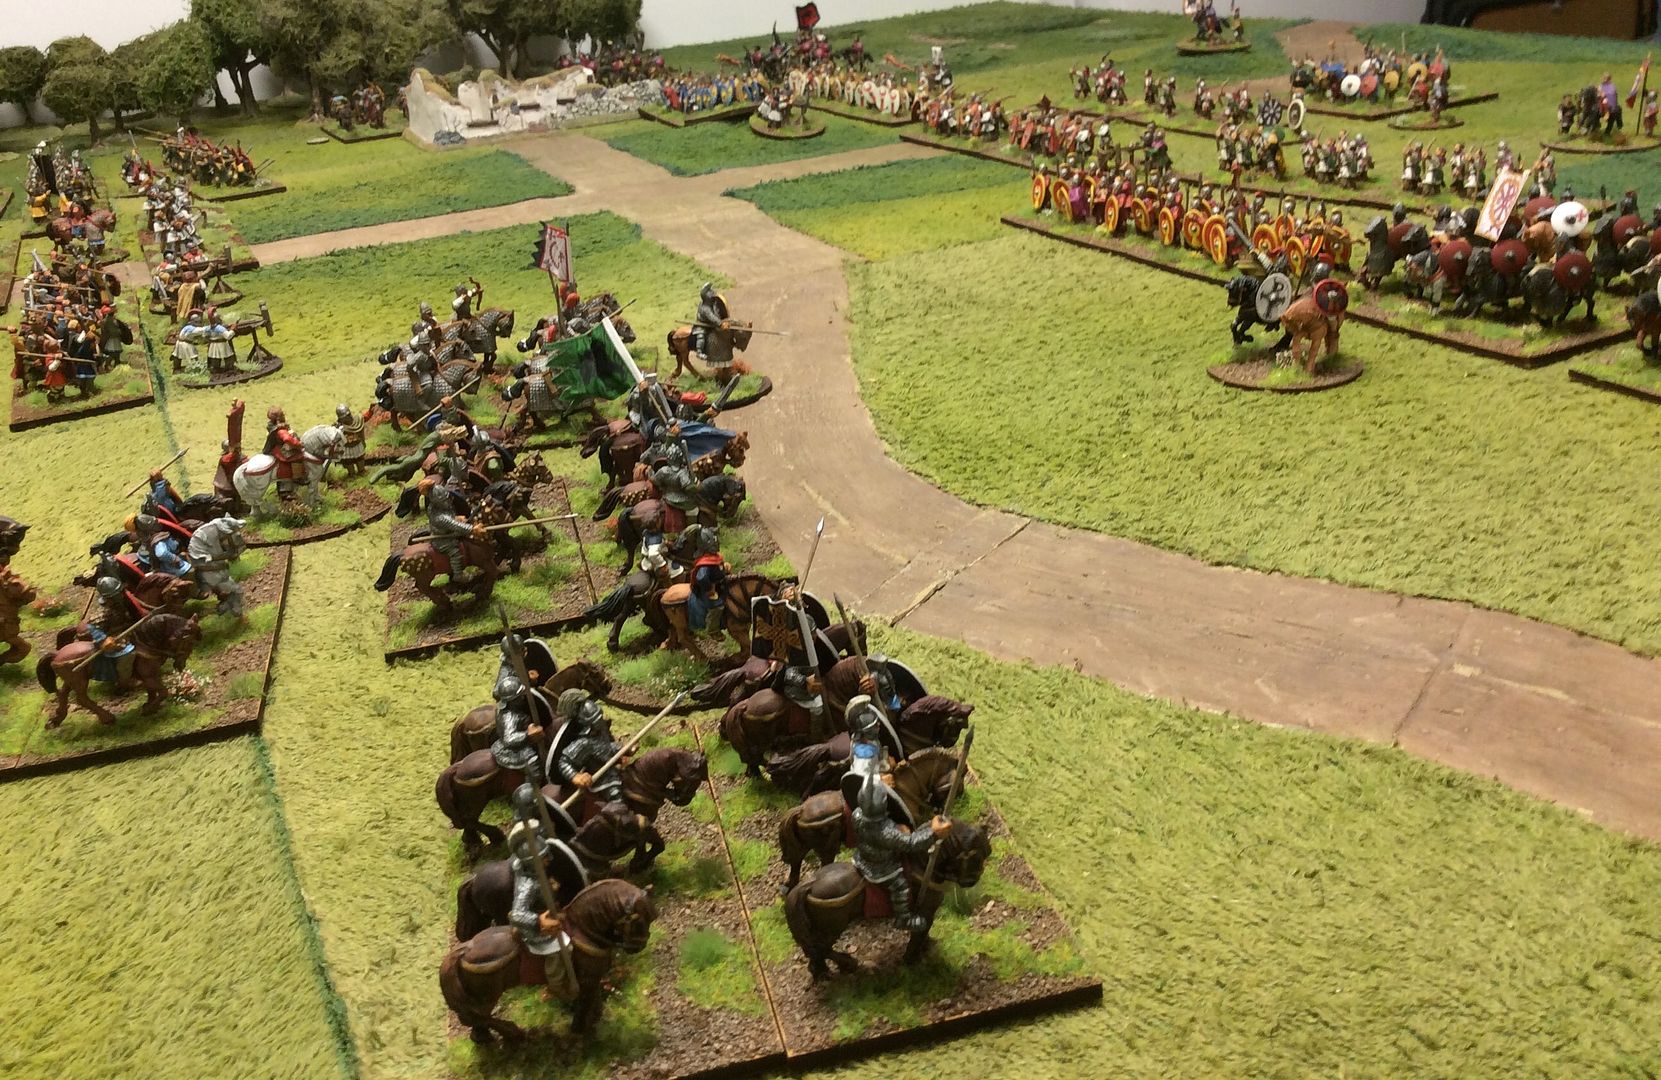
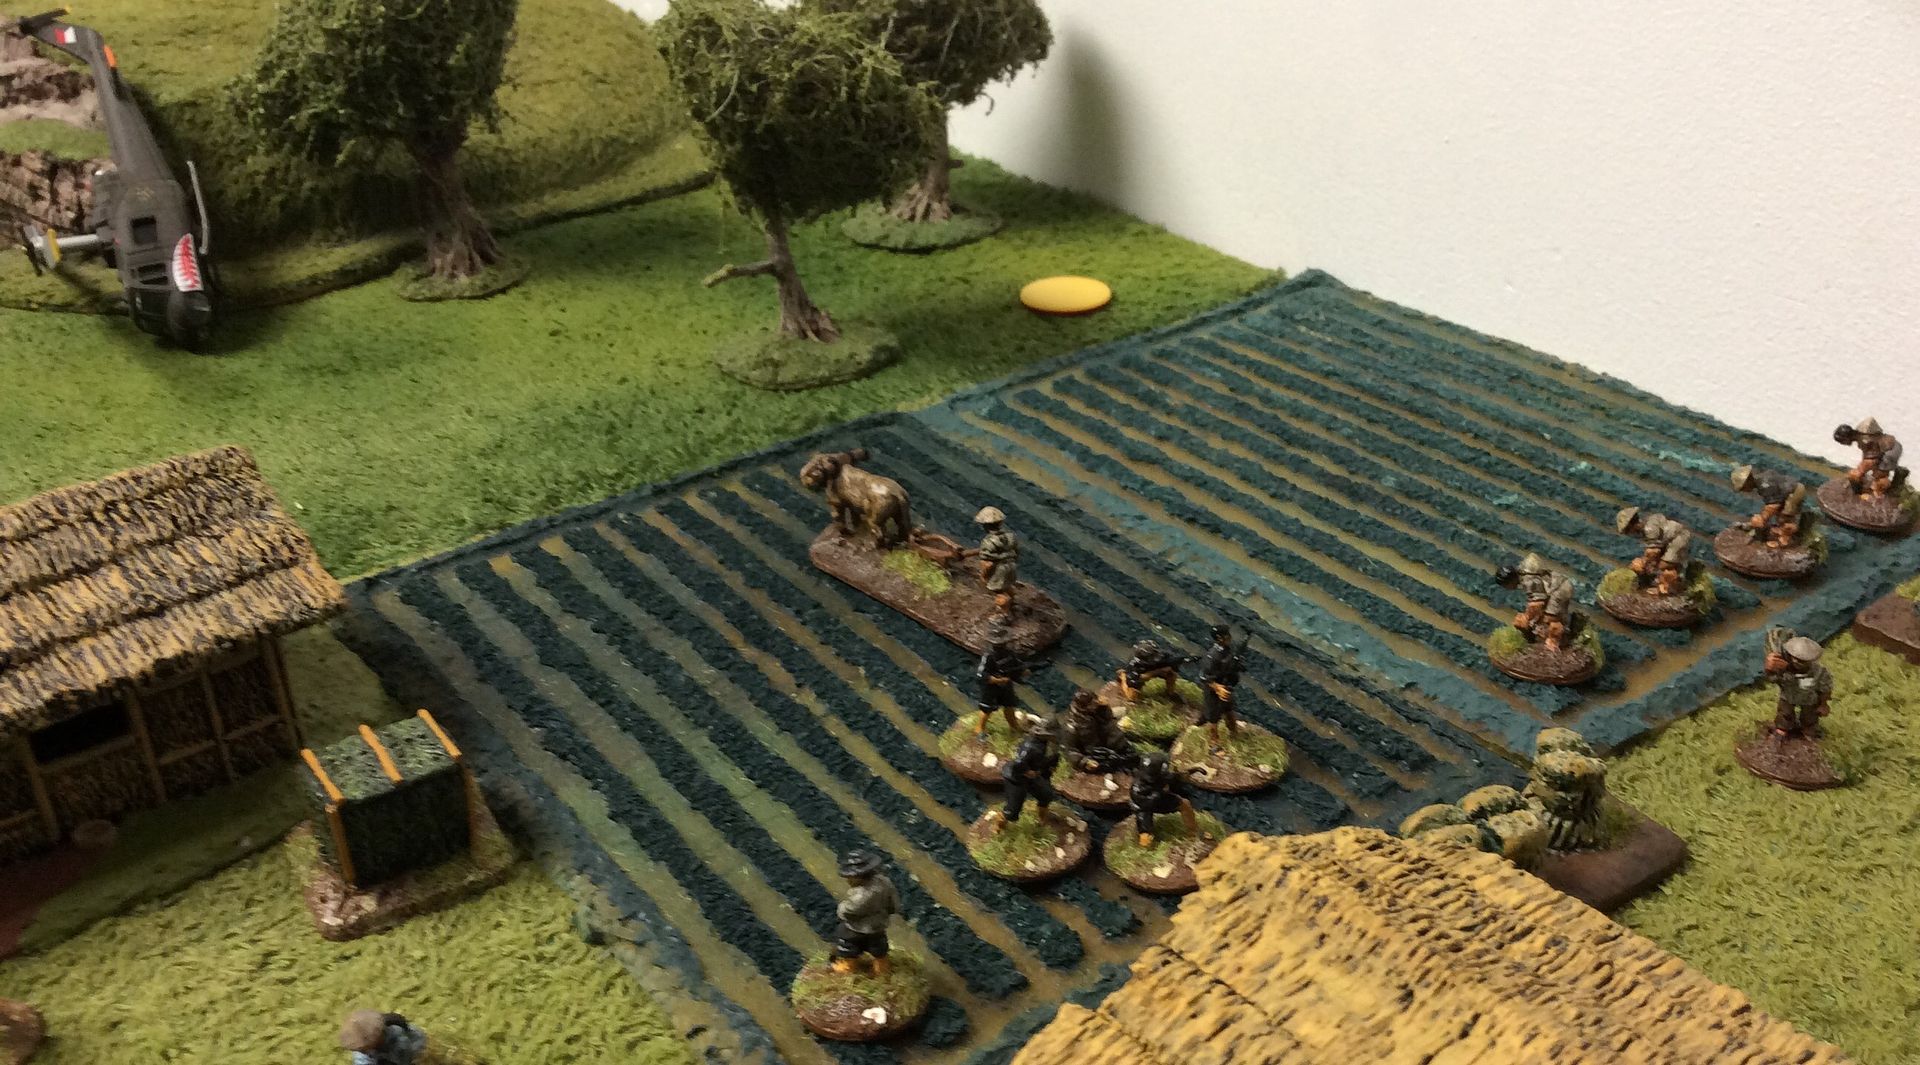
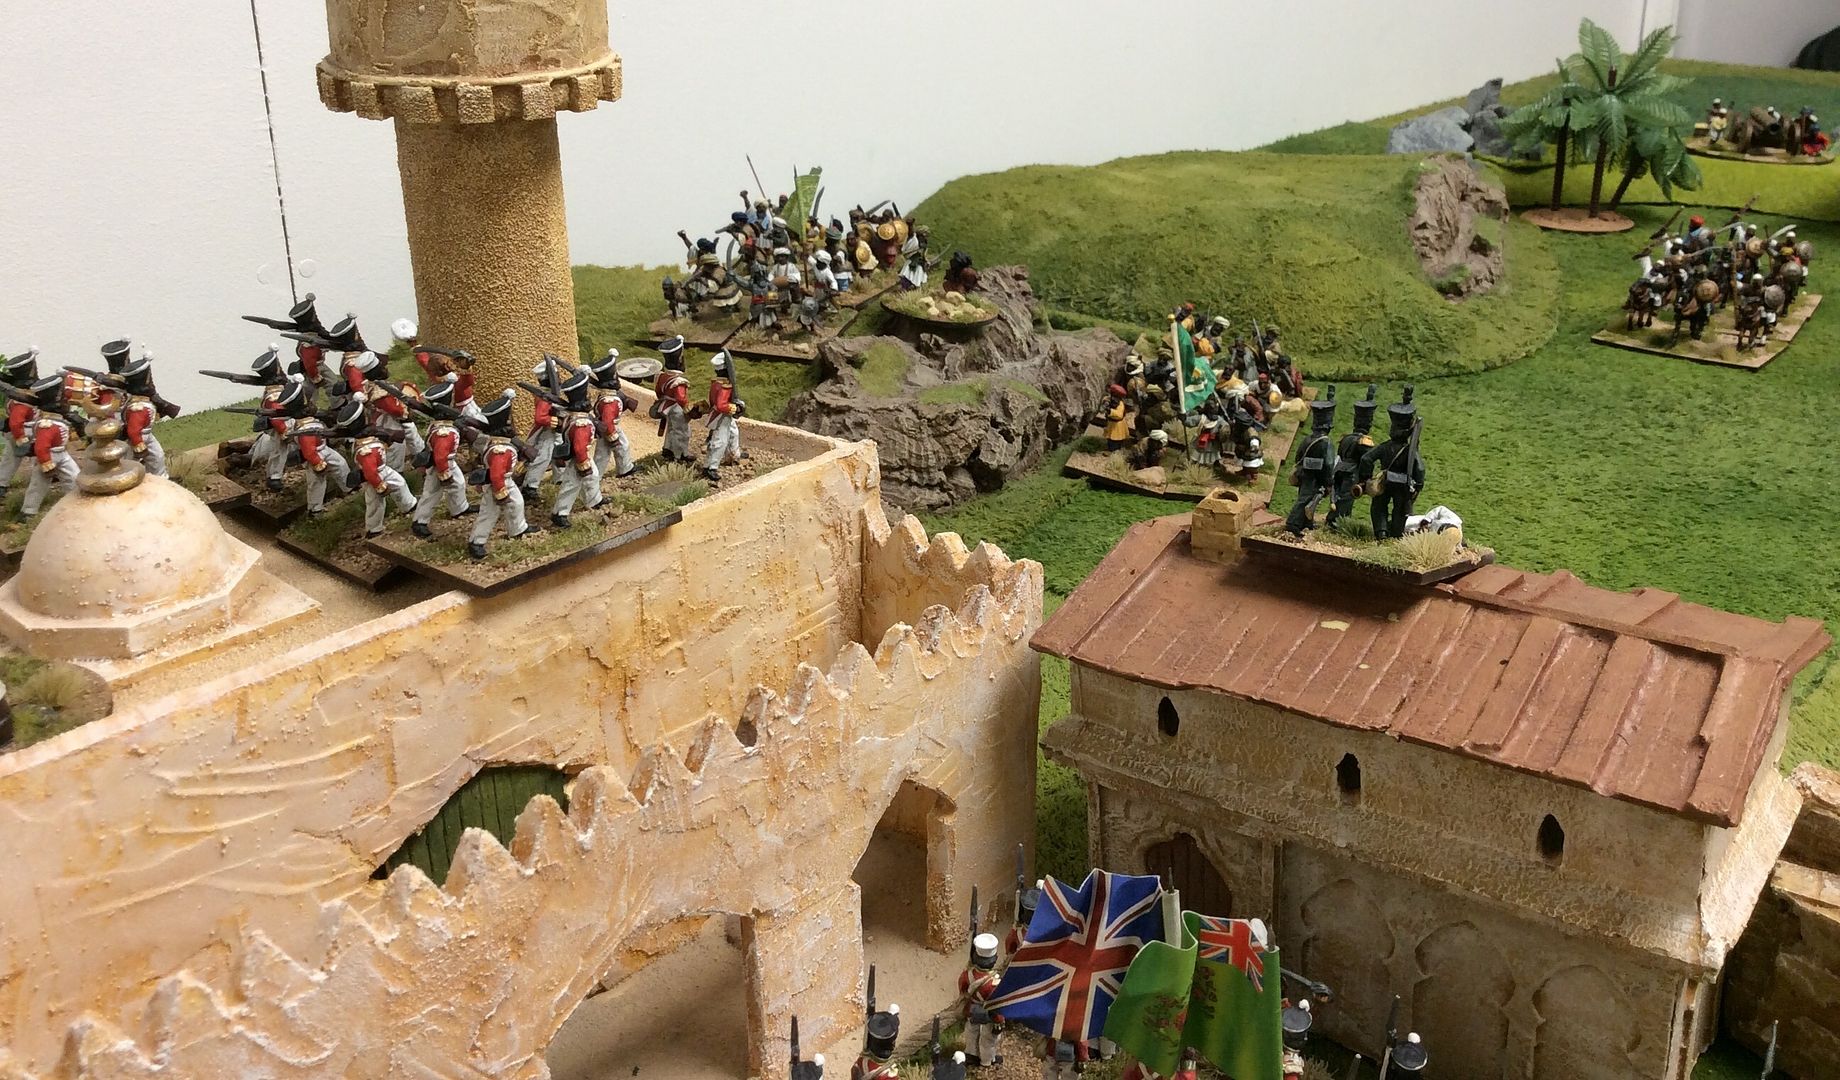
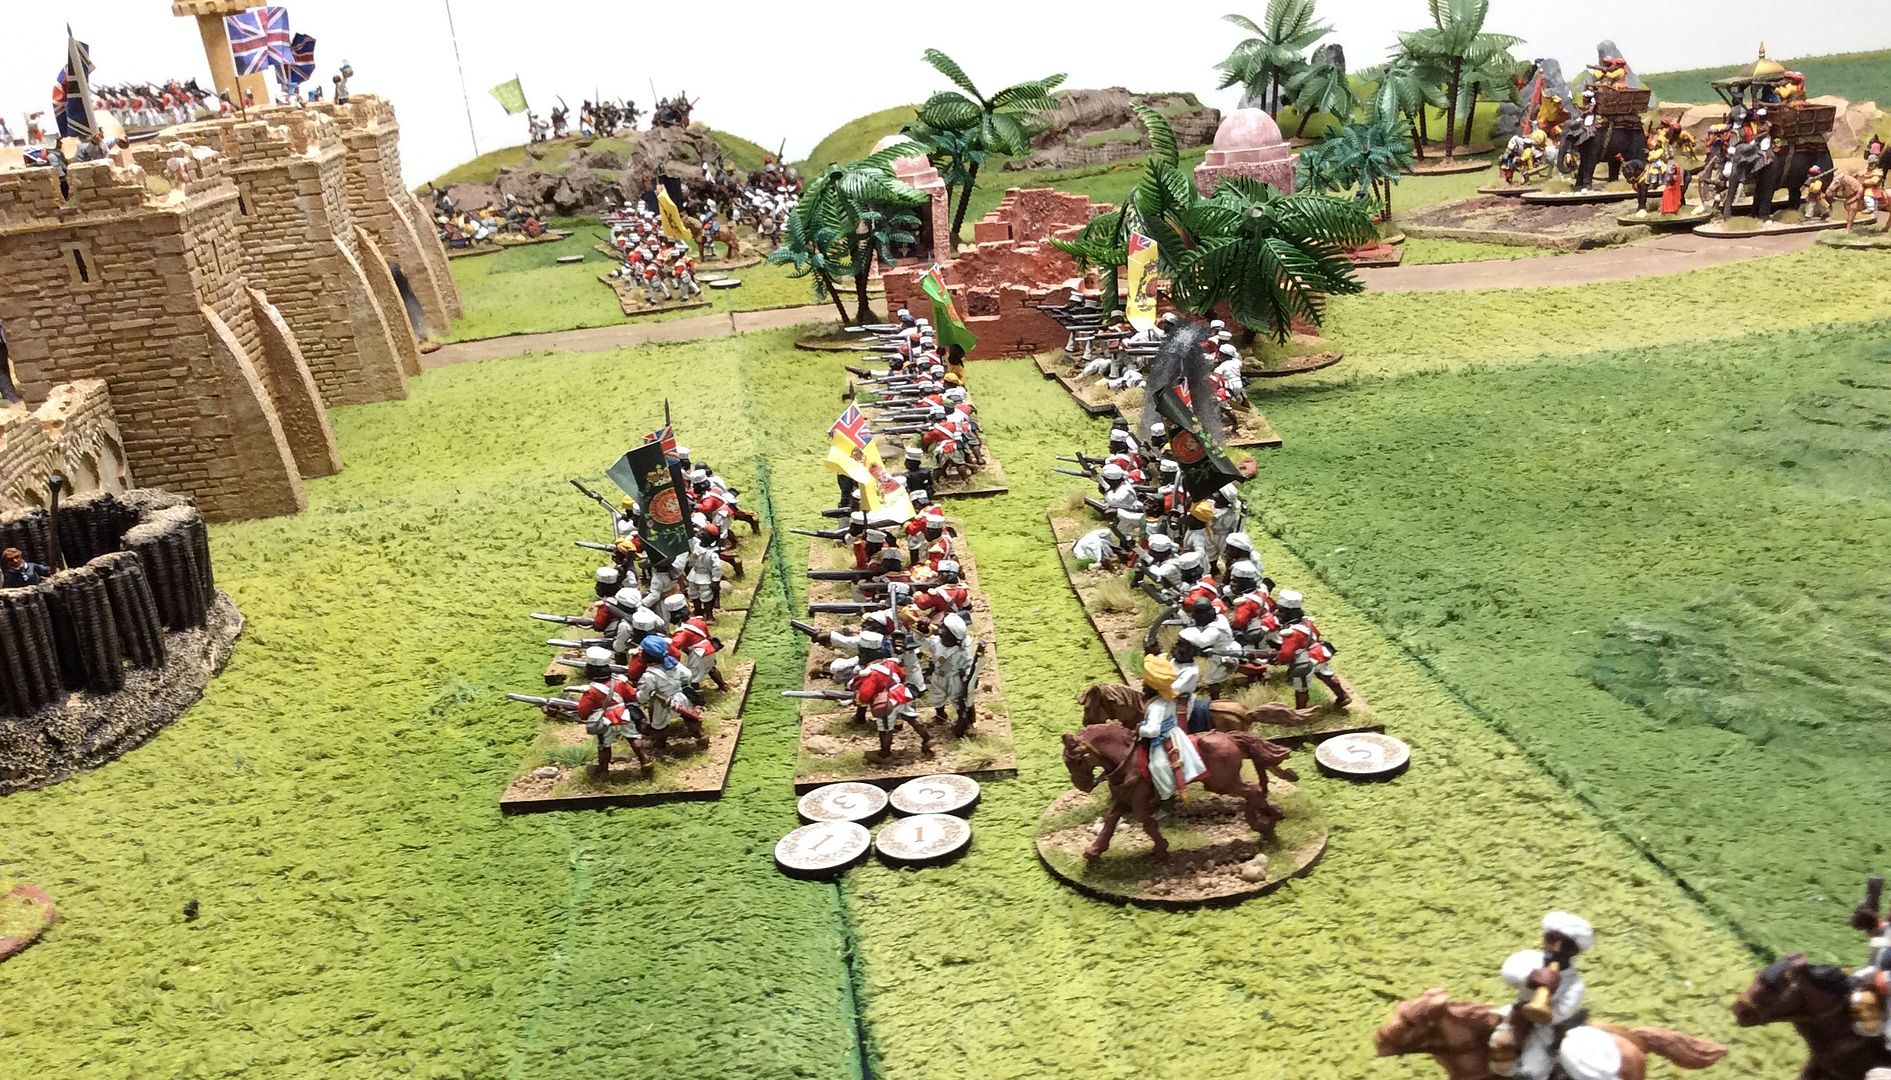
On the Mutineers' right more infantry, supported by local Badmash ner-do-wells and Bhurpa horse advance to assault the defenders of the Native Quarter ~


Although more concerned with protecting his treasure convoy than fighting the enemy, the Nabob of Nham's force moves cautiously forward as strains of the pipes are carried faintly to his ears on a passing breeze ~


At this stage of the game, after eight turns and with the Mutineers paused to enter the next phase of the attack we broke for lunch. When we resumed fortified, fed and watered the Relief Column could test to enter the table. John threw two D x 6 at the start of each turn, which I needed to better by four in order that the column could march onto the table. Their were six turns that the Relief Column could test to appear, after that it was assumed their advance had been blocked by other mutinous Pandies! In the meantime the Bhurpas had made their way through the mountainous terrain and were poised to assault the defenders of the Great Mosque in the Native Quarter ~


With no sign of early relief, the defenders prepare to repel the enemy with repeated volleys of musketry, shot and shell, and cold steel if necessary ~


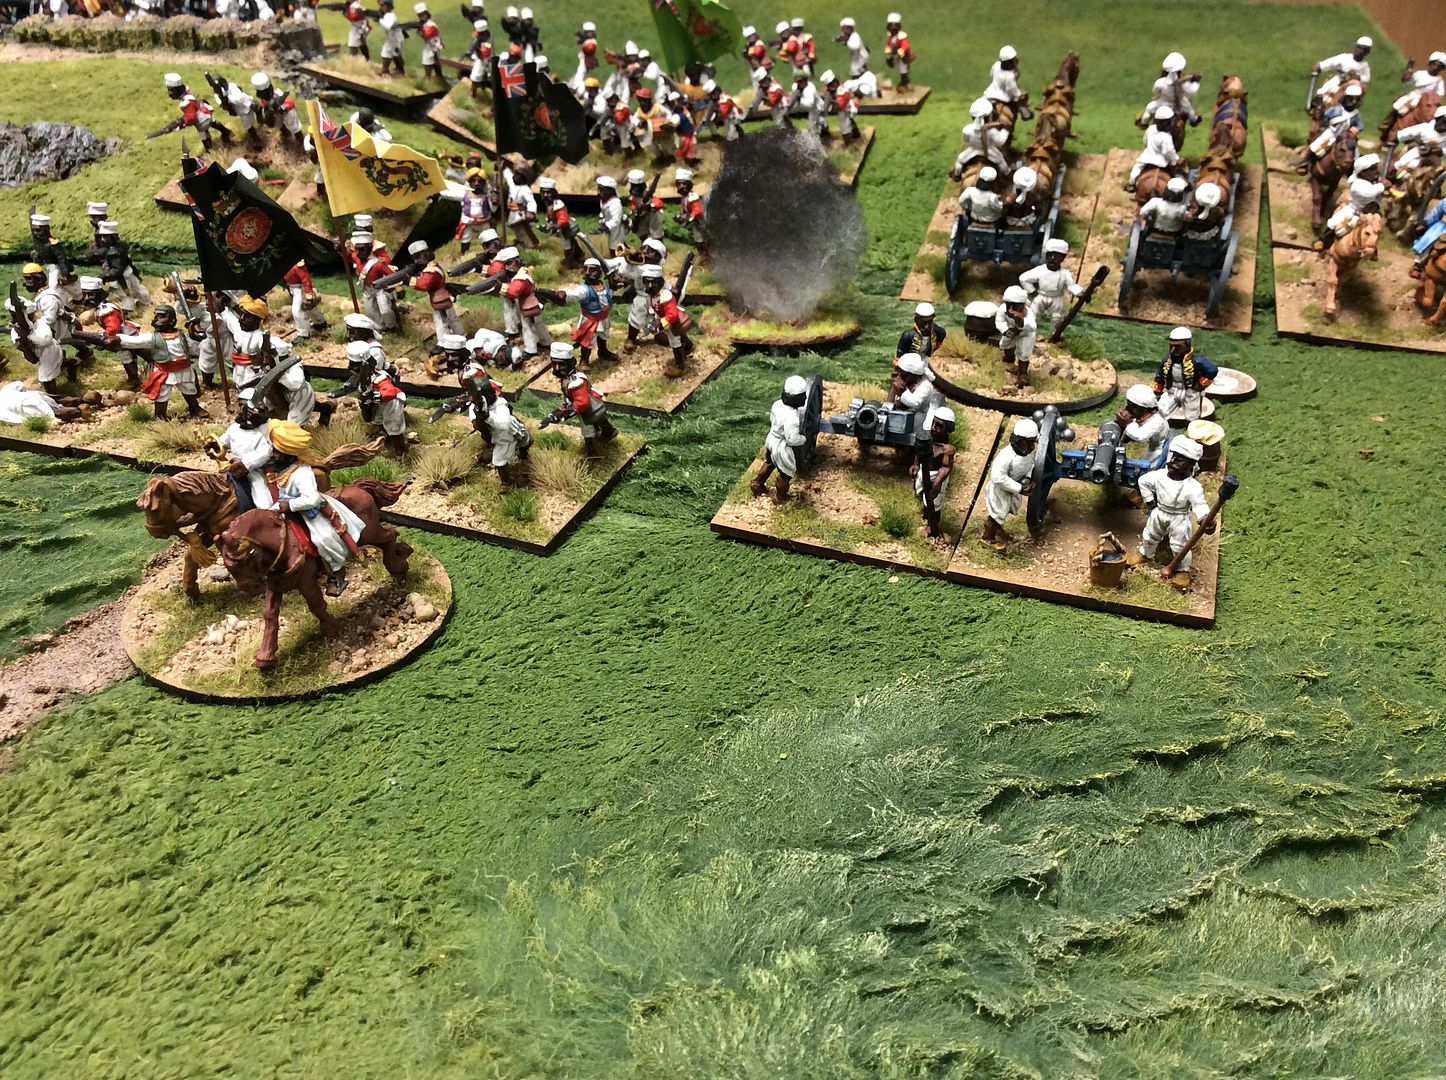
As the Bhurpas rush the walls of the Great Mosque, the Mutineer infantry and their Badmash supporters advance enthusiastically against the walls and the battered gateway into the city ~


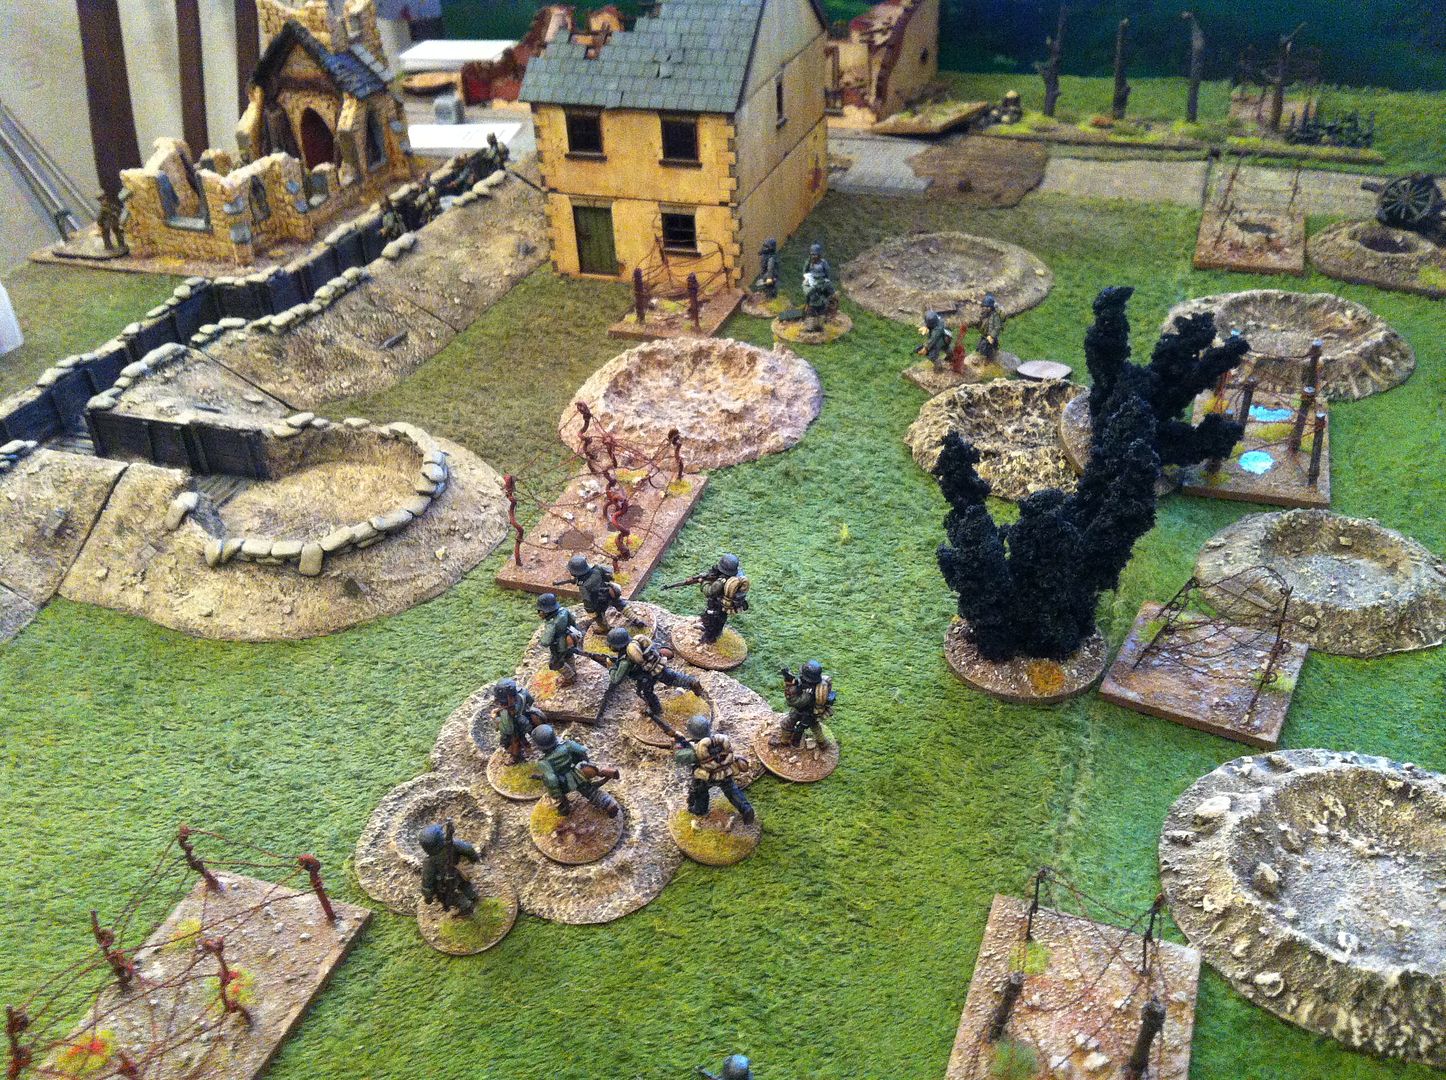
Despite heavy fire from the defending Loyal Native Battalion, the Bhurpas reach the walls of the Great Mosque and attempt to force a way in through the weakened defences ~


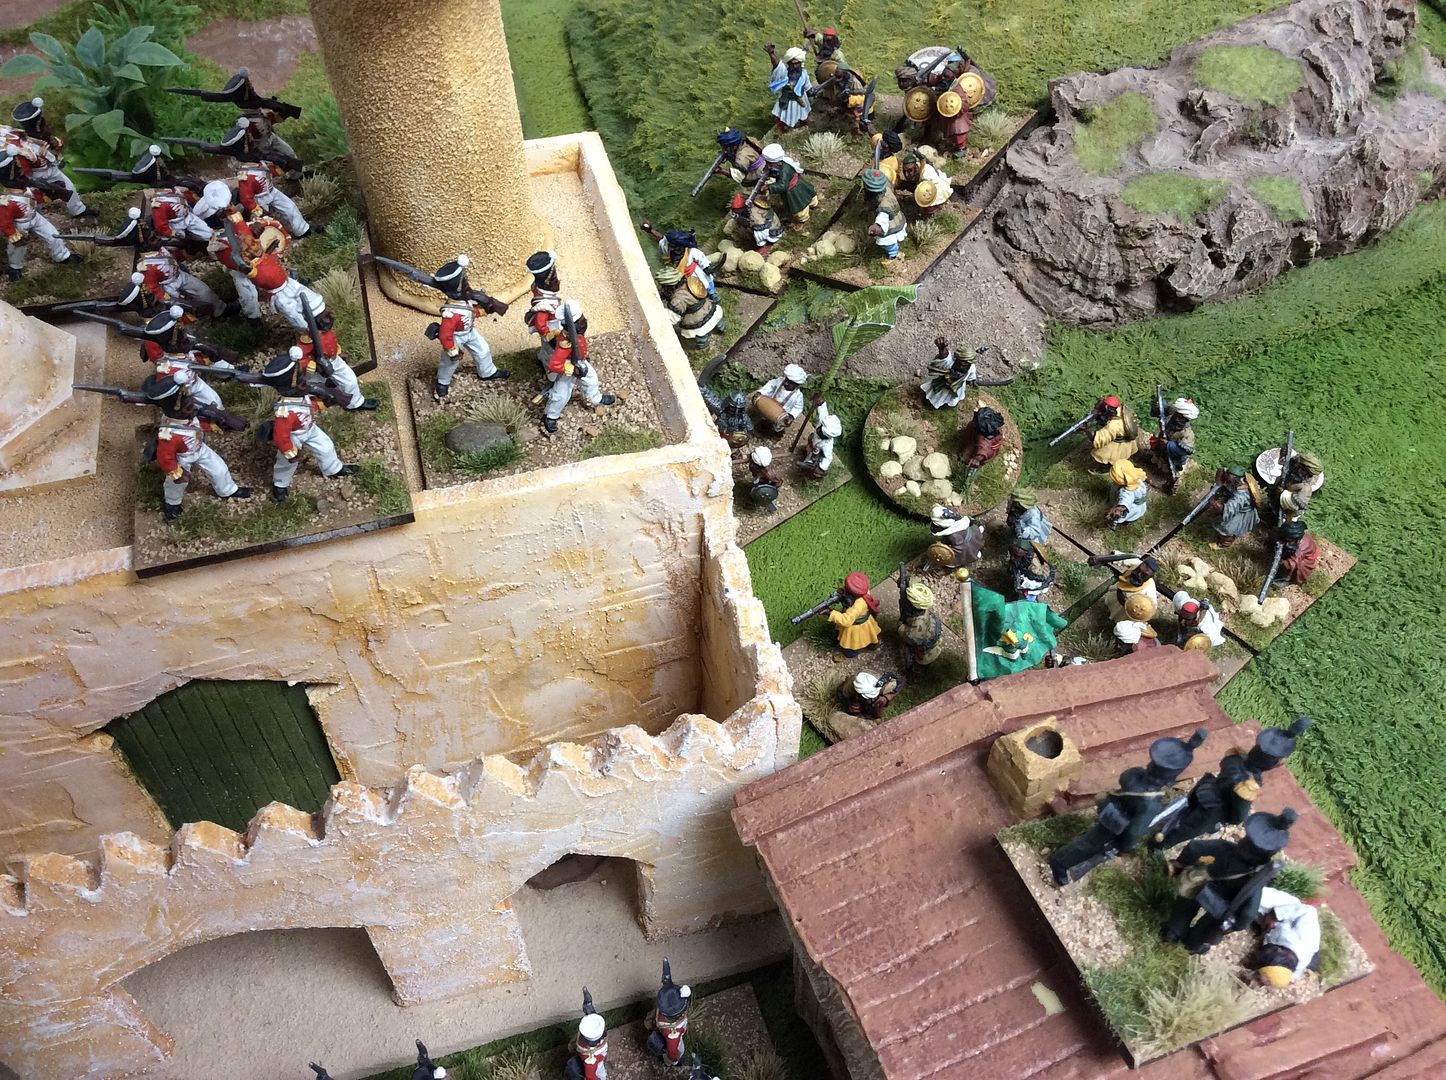
The hand to hand fighting is bitter and confused, but one Bhurpa unit breaks under its heavy losses, though the second fights on tenaciously ~


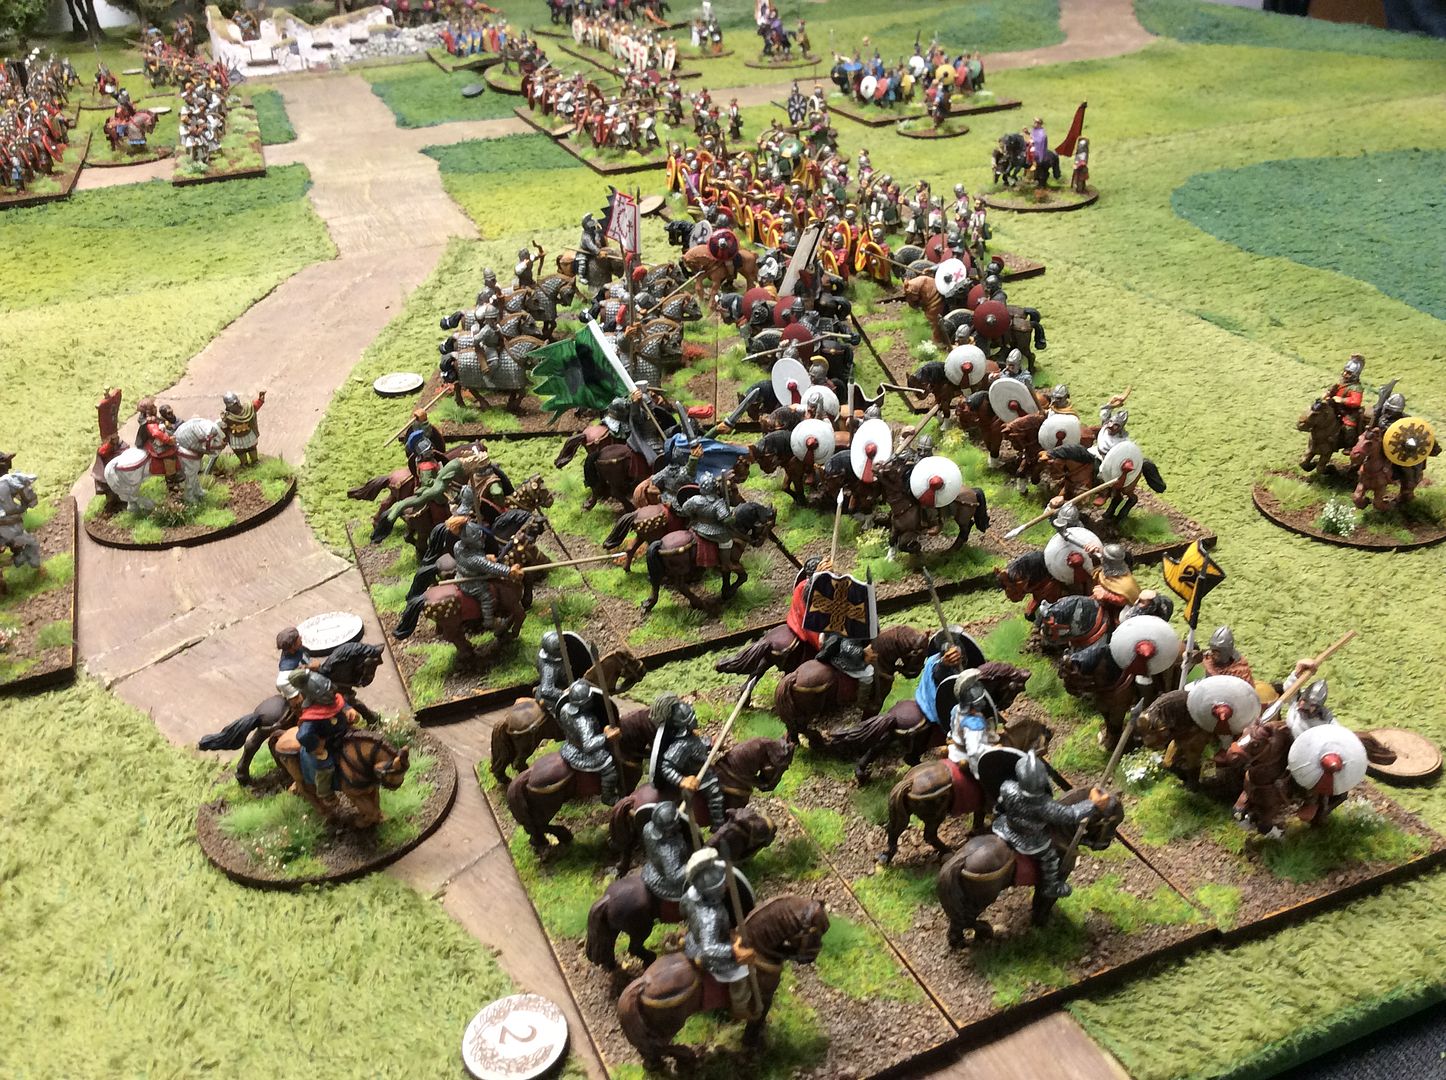
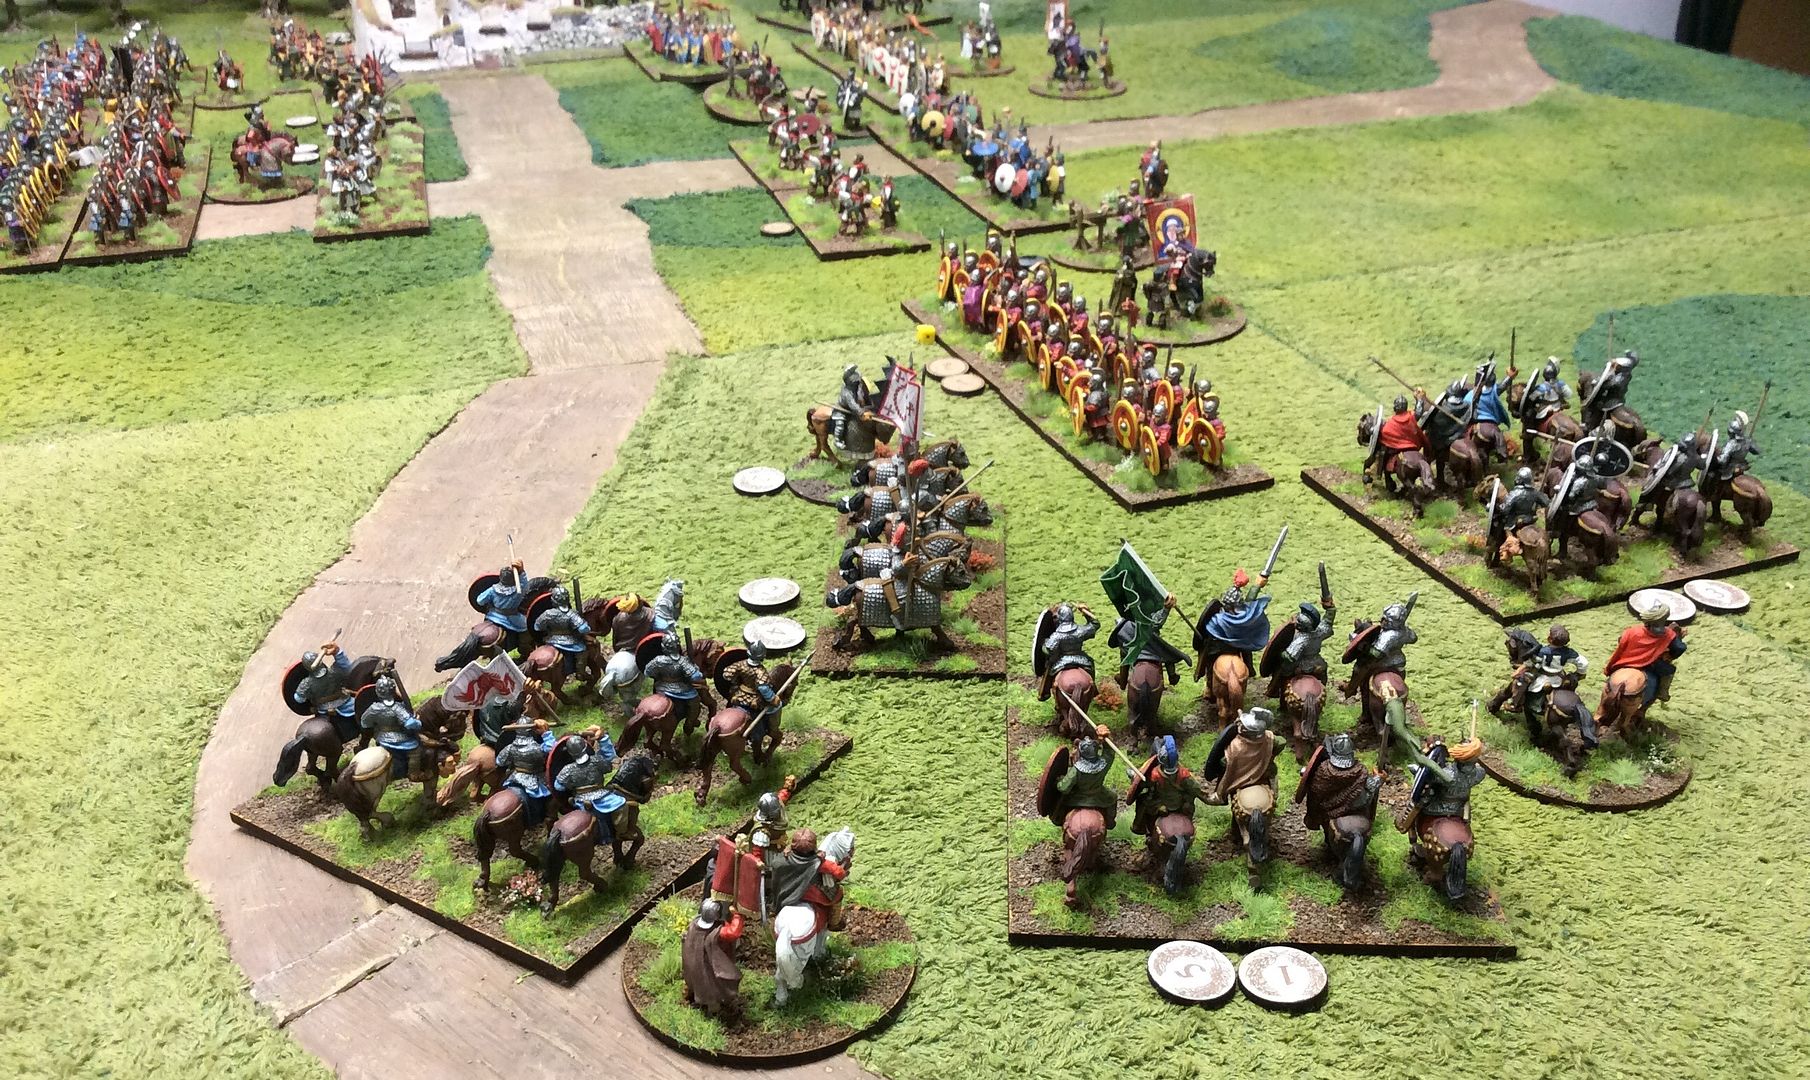
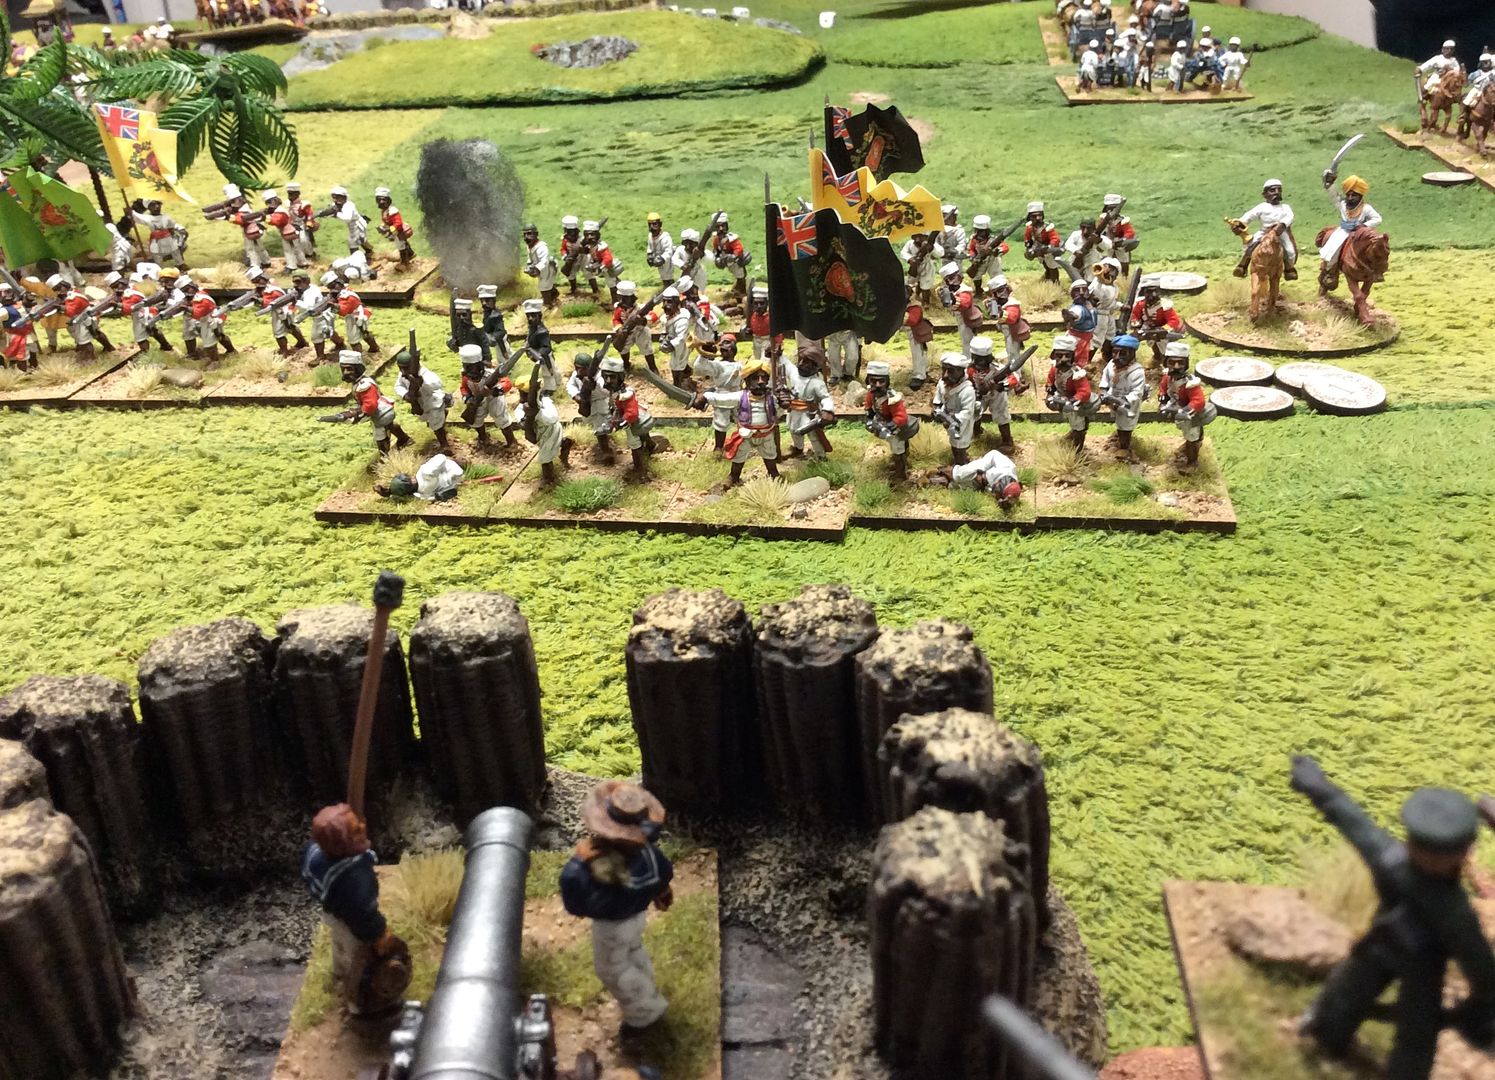
Away on the Mutineers' left flank, despite heavy losses from the defenders' fire, the Infantry close to attack the battered RN battery and its supporting infantry~


Still with no sign of the approaching Relief Column the situation is looking serious for the heavily outnumbered defender of Bhyklabad ~


Although all hope of relief is now over, the defenders fight on tenaciously. The remaining Bhurpas are driven off, but at the cost on the native defenders of the Great Mosque when their pluck finally snaps and they flee deeper into the city ~


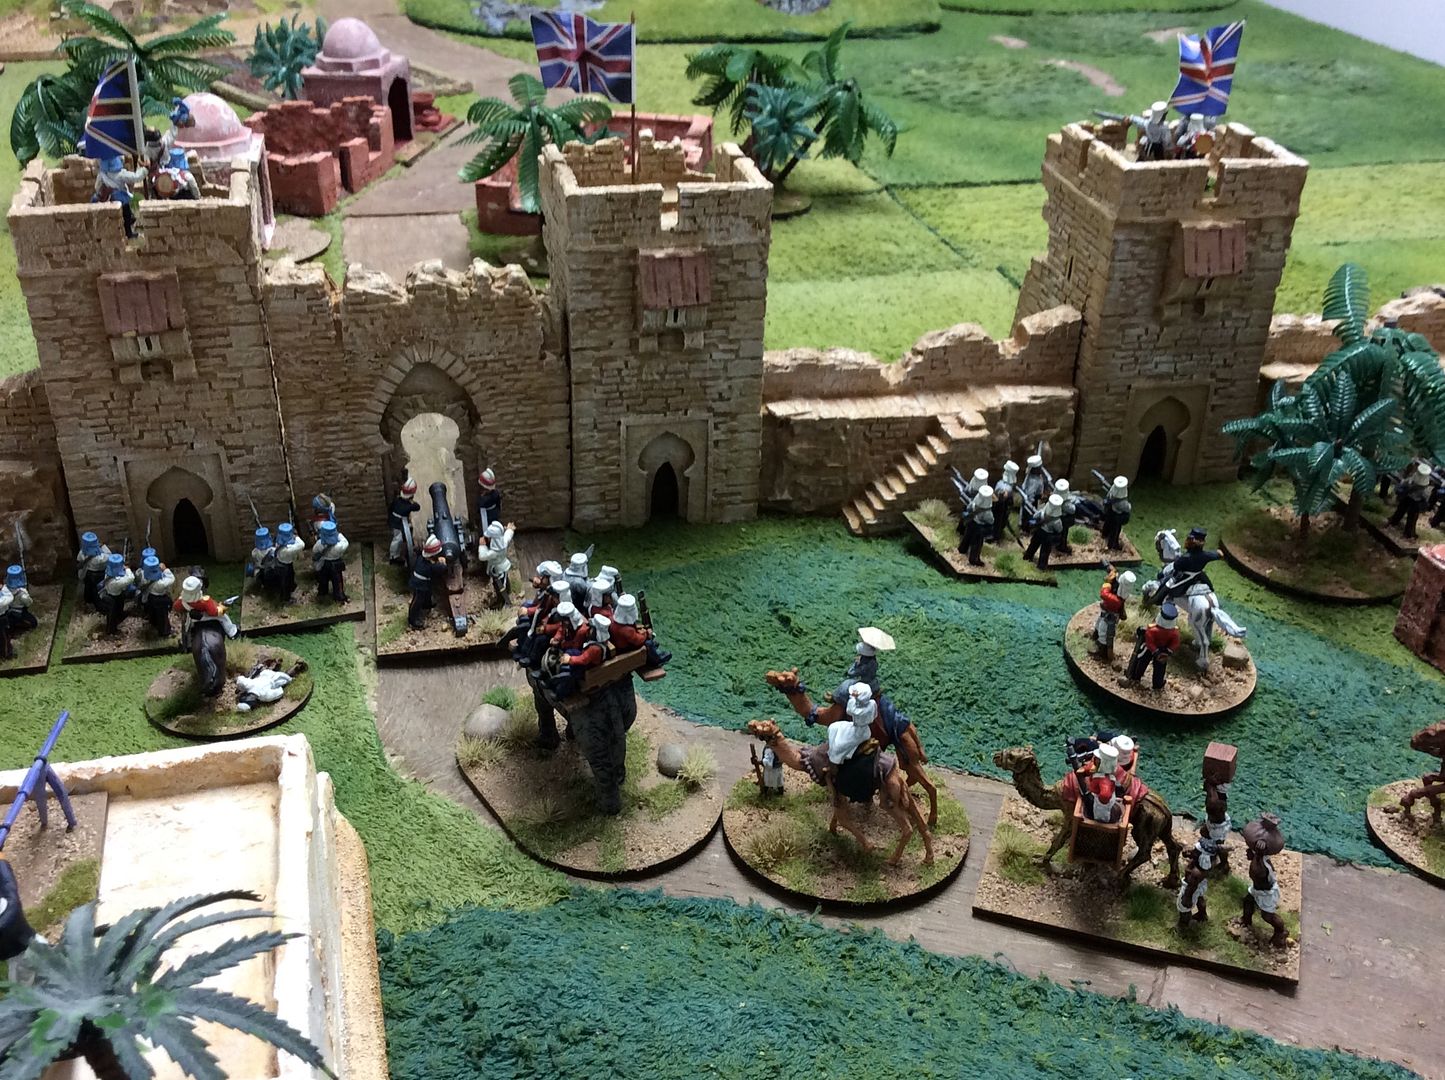
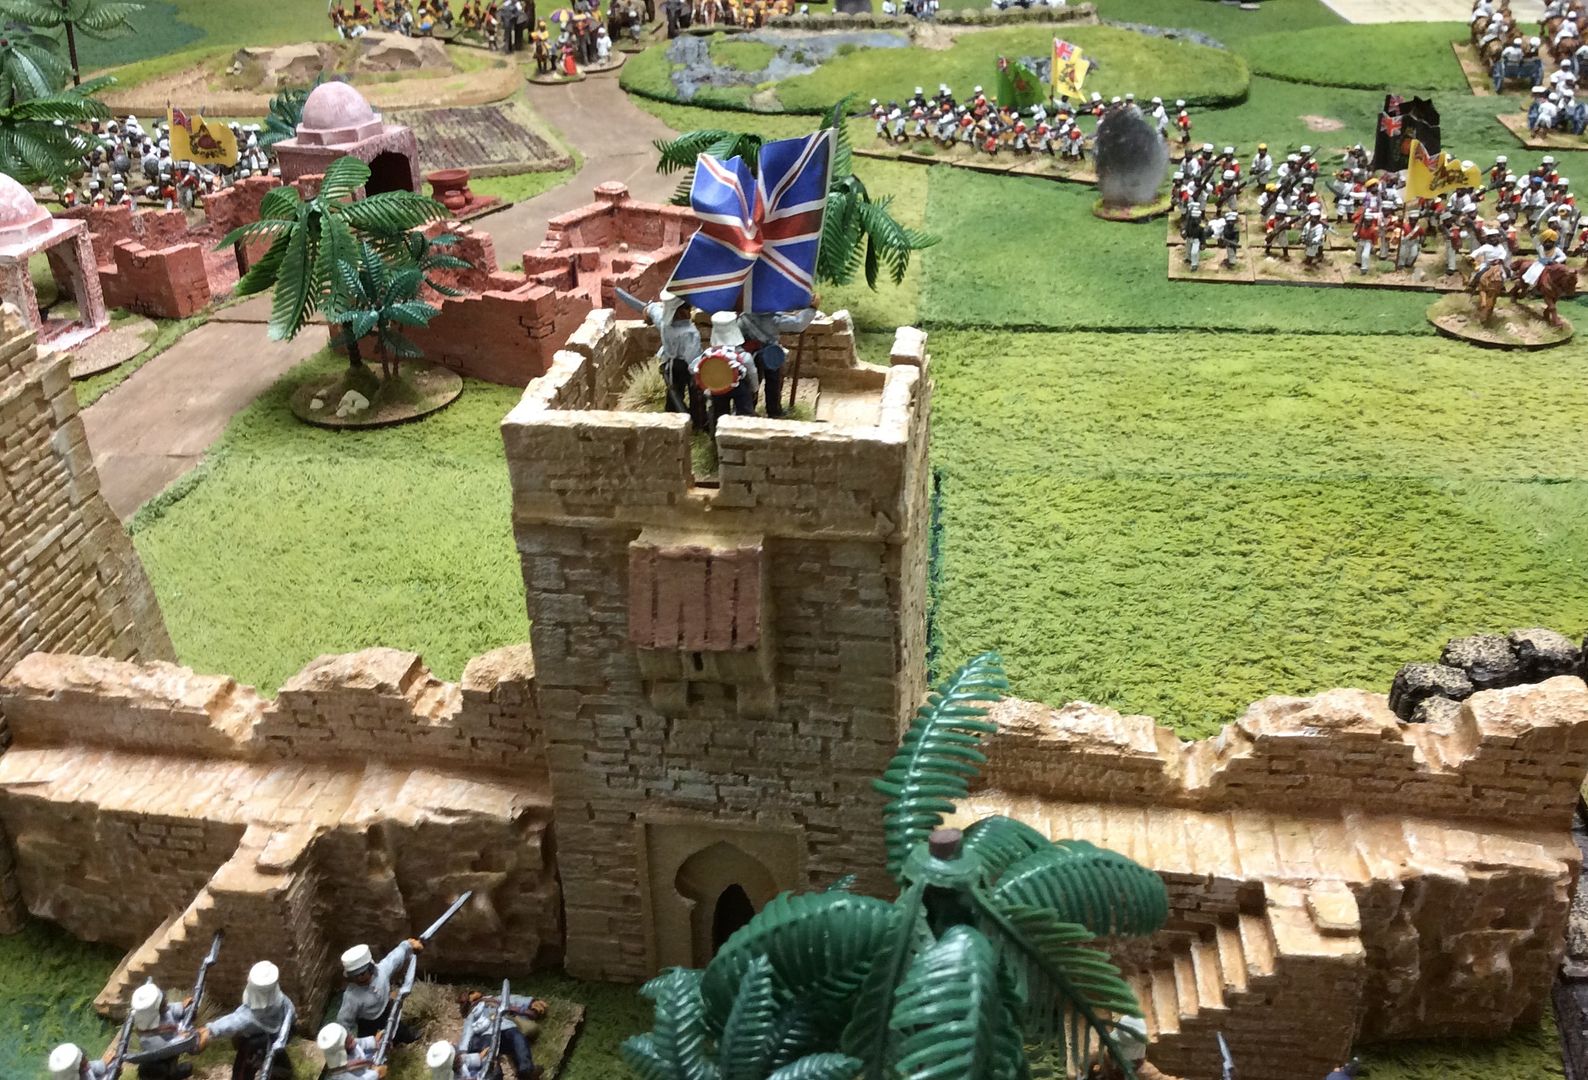
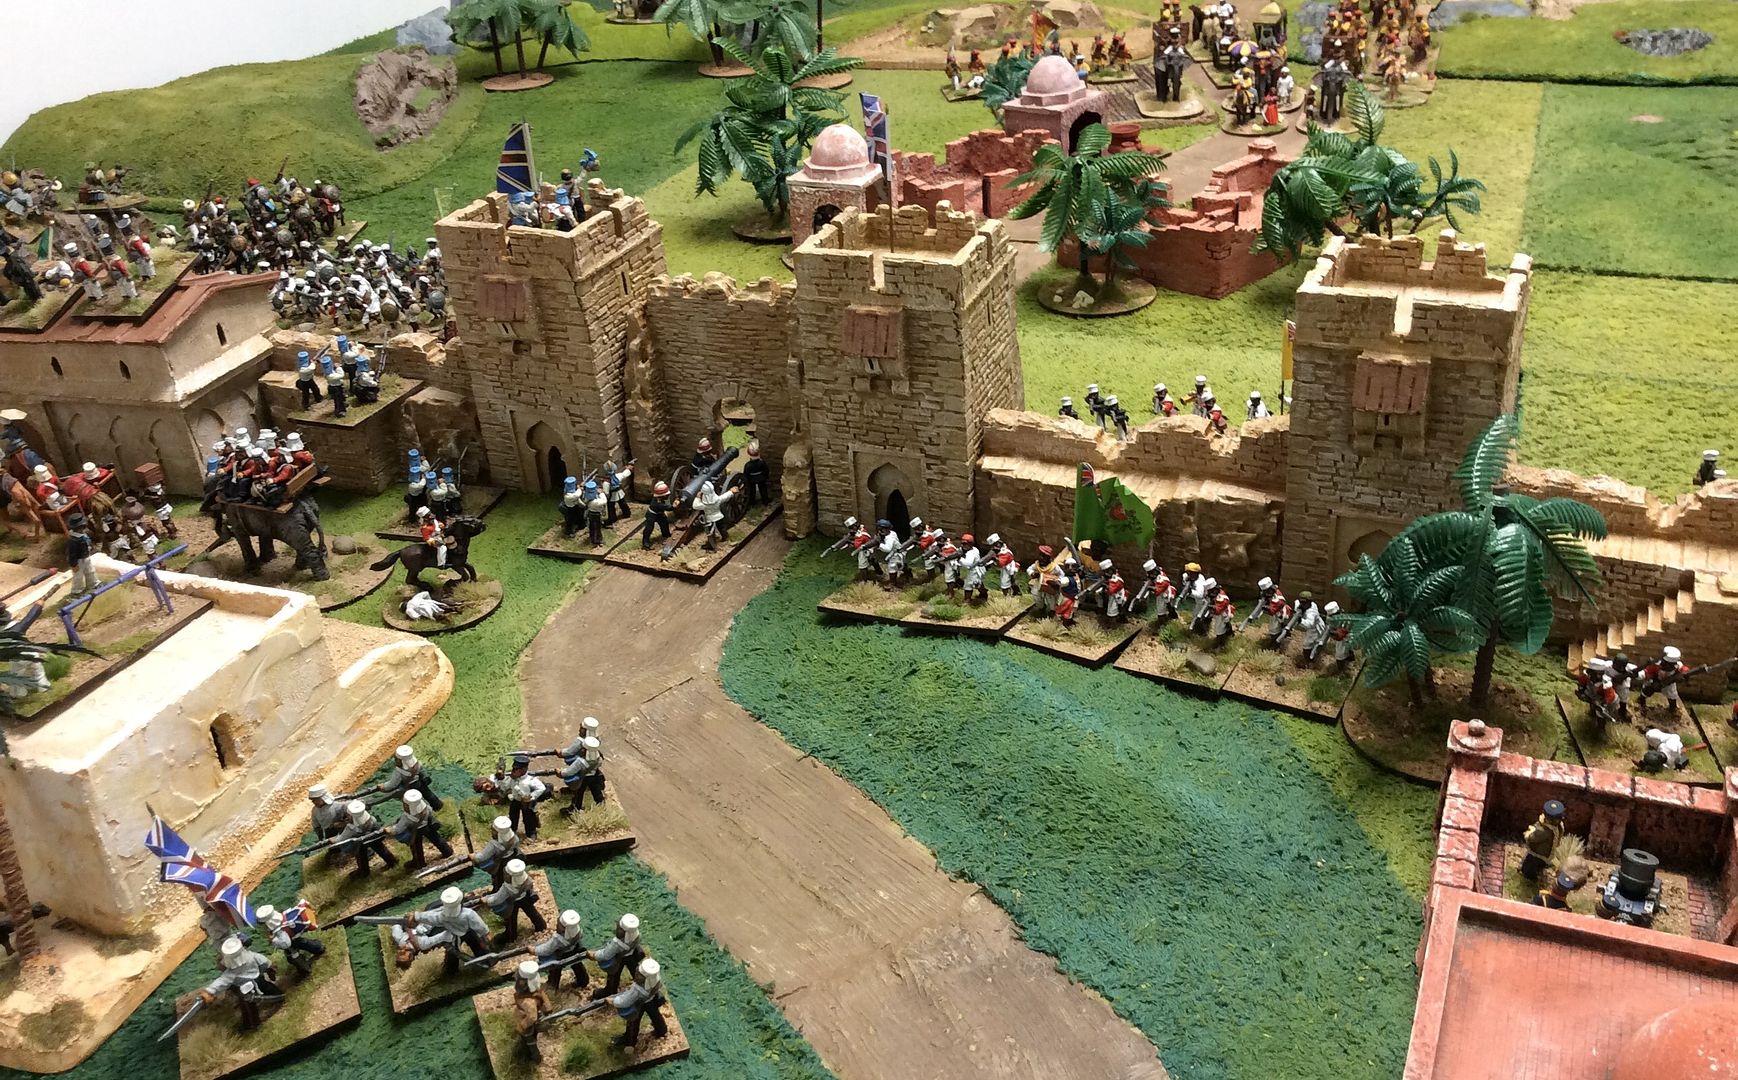
The Union Flag still flies over the city's gates, but masses of Mutineers are pressing the defenders closely all along the walls ~


To the right of the gate the defence suddenly crumbles as the remaining Fusiliers are overwhelmed and the Pandies flood over the walls into the city ~


Disastrously the depleted RN gunners are put to the sword and more Mutineers flood into the city ~


The remaining defenders take refuge in the walls of the Great Mosque and in the Residency, determined to fight on until relieved by Hutless ~


After 21 enthralling turns we called a halt to proceedings. Clearly the Mutineers had achieved their objective, as had the Nabob of Nham, despite the defenders being still in possession of the Native Quarter and the Residency. No doubt scenes of looting and debauchery would ensue amongst the indisciplined Mutineers and their allies, but we can draw a veil over those aspects of warfare in a wargame ~


I plan to play a follow up to this game with Jon, probably next week, when Hutless' Relief column will appear in the Mutineers rear and attempt to rescue the survivors of the battle holed up in the Native Quarter and the Residency. We shall see how things pan out then for the Nabob and his cronies!
For those who like to know these things: the walls of Bhyklabad are from Ian Weekley's Battleground range; the native buildings scratch built by Phil; the European Quarter buildings from Mutineer Miniatures: the figures almost all from my collection of Wargames Foundry Indian Mutiny range; the palms from Tiger Miniatures; while the shrines in the ruined outskirts of Bhyklabad were scratch built by me. The hills are a combination of scratch building by Phil and Jarvis hard foam scenics.

Tuesday 17 November 2015

Muse Ho?

Not a great deal wargames related has been going on here in GHQ for several days, as we are hosting our eldest grandson, Arthur, on a visit while mom and dad redecorate his new room. There has been some painting, both by yours truly and by Arthur, but more of that in due course.
As some of you will know I have been retired for several years now from teaching as I developed a sudden and profound hearing loss. While I think I cope reasonably well, most of the time anyway, the reality is that I miss so much that goes on around me. An example: last month I was chatting to Phil during a break in our game over at his OHQ base. I remarked on the fact that he had started painting his next WWI 1914 Germans for our joint project. Actually, he told me he was still finishing his third battalion of infantry, but that went right by me! As I result I broke out my fourth British infantry unit and set to! These are Great War Miniatures by the way, like all the others in my growing force. Now, no criticism is intended of the sculptor, but they are very poorly cast in my experience with myriads of vent runs and mold flash and so forth. They are also very uninspiring little chaps on the whole. No fault of the sculptor really, as I said, for they accurately depict the men like two of my great uncles, Sergeant Rostance of the South Staffs and Private Boot of the Coldstream Guards, who went off in August 1914 to fight for King and Country. But the fact is they are really uninteresting figures to paint! They are brown and drab and have no variation in equipment, being depicted in full kit! Not a patch on the late war Brits for interest and variety! So, progress this month has been glacial, even more so since Phil finally put me right on where his painting was! I am beginning to think my life would benefit from subtitles! Well, despite this, I have completed 24 of a 30 figure battalion and have 3 more underway, so hope to finish next week when all is restored to the norm here at home.
In the meantime, I went to Phil's on Monday for a Great War game using his collection and scenery, which I think is second to none myself. You can judge for yourself in January's Wargames Illustrated when it will feature accompanying an article or two in the 1916 theme, as his Back of Beyond collection and scenery did in this month's issue! He has written and illustrated an account on his Blog, "News from the Front" {see link in the side bar} but I'll add a few phone pictures I took from the German perspective ~


My Storm-troopers set off to attack the weaker flank of the British position, immediately coming under heavy mortar and sniper fire. The flamethrower group move to the front as a distraction for the German's main problem in attacking the British line, the machine gun post ~


While the Storm-troopers attacked the right flank and the flamethrower group distracted the British machine gun post and supporting infantry, the German support infantry began to arrive and engage the British trench line ~


While the machine gun made inroads into the flamethrower group, I need n't have worried too much about it. In three turns my lone sniper killed all three of the crew, the last man even when he was 'Down'!


We were using 'Bolt Action' rules with several amendments for the game and had set the length at six turns plus a dice throw. Phil's dice throw added no turns, so I was just short of turfing the remaining British infantry out of their trenches when the game ended. A bitter pill really, as his reinforcements arrived at a crucial moment to attack my Storm-troopers just as they were ready to sweep into the trench line! His 14 dice produced three kills, while my remaining 8 produced four, giving me a surprise boost!


At the end of the game the Germans were poised to attack the last British infantry in play on two fronts, so must have carried the day. The Toffee Apple mortar was destroyed and the other reinforcements Phil hoped for lost in the morning mist! As you can see, confident of the outcome, von Bikkel dispatches his report via runner to the HQ from the cover of a ruined house! No need to even bother about the British sniper, for whom a barn door would have proved a difficult shot!!!


Despite only coming away with a winning draw I thoroughly enjoyed the game and recommend you try some of Phil's scenarios. For me this was a first run out as a German! I think I got my tactics right although I'm honest enough to say that Phil's dice throwing might have helped me along the way a tad. Next up will be a First Carlist War game at Phil's next week, after we have taken Arthur back to Dad and Mom that is!

Thursday 5 November 2015

Pompus Maximus Imperator domitorem Baldinus

Well, at least that's how it comes out on Google Translate! Sadly for me my schooldays are far, far behind me and my four year dalliance with Latin is lost in the mists of time, so this will perforce have to do. As I mentioned in the previous post, "Double Header", Phil and I played two games on Monday recently. As you will know, I came a poor second in the afternoon's Vietnam game, despite some heroic efforts by my little chaps, but in the morning it was an altogether different story...
We used our 'home adjusted' variant of Neil Thomas's Ancient and Medieval rules, which allow us to deploy many more units than they were meant for when originally written. Our modifications work really well we've found, so much so that I am expanding the collection by several new units slowly but surely. Our adjustments also include rules for Army commanders and the generals who command each Division of the army, even allowing for characteristics which modify their effectiveness and influence. They may even die in combat, as you shall see...


As ever, the rightful ruler of the late C4th Roman world, Pompus Maximus, takes the field in person commanding his ever victorious army. Opposite his veritable host was the bedraggled assortment of second rate troops mustered by the pretender, Baldinus, who despite numerous reverses clings to the misguided belief that it is he who will assume the purple in good time! The two armies faced each other across the table ~


One edge of the battlefield is bordered by a thick and impenetrable forest, the only sign of civilization being the ruins of a once prosperous villa estate, long plundered by the armies fighting to control the Empire. Both armies have deployed with their infantry in the centre and their heavy cavalry on their open flank. On the flank nearest to the forest, both generals deployed their Light Cavalry: Pompus his Horse Archers, the pretender his hordes of Huns!


The order is given, the horns sound their melancholy notes, and Pompus' heavy cavalry surges forward to meet their foe. Baldinus' infantry seem to have adopted a defensive posture very early in the battle, relying on their artillery and archer units to hurt the advancing Legions and Auxiliaries of Pompus' force.


Men and horses fall to their deaths as the epic struggle ebbs and flows as each force struggles to assert its supremacy over the enemy and sweep his army from the field. {The dice were very mixed for both of us over several turns!}


Despite suffering heavy losses from Baldinus' artillery and archer units, the infantry of Pompus' army steadily closed with the enemy, pinning his forces and preventing any redeployment to mitigate the unfolding disaster overwhelming his cavalry on the flank. Meanwhile, Baldinus' Huns are unable to dislodge Pompus' Horse Archers protecting the left flank of his army ~


Finally, the cavalry hordes of the 'pretender to the purple' are beaten and either flee or are destroyed where they stand. The infantry finds its flanks threatened by overwhelming cavalry force, while its front is pinned by the infantry of Pompus' Legions and is forced to withdraw in the face of overwhelming odds.


The battle is over as Baldinus' infantry cannot hope to hold their position with so much cavalry threatening their flank and rear. Baldinus quits the field, leaving two of his generals to feed the birds, and his army to fend for itself as best it can...


Postscript:- Jon and I had played a variant of this game the week before using the Warlord Games' Hail Caesar rules. Despite over three hours of intense fighting we could not force a result and called the game a draw when we ran out of time. Using Neil Thomas' Ancient and Medieval rules, Phil and I had a clear resolution in a smidgen under three hours. As they say, you pays your money and you takes your choice...
The figures are all from my own collection: Foundry miniatures originally painted for me by Andy Dumelow and then added to by my own hand as the years rolled by in GHQ. I got the ruin on the Flea Market at either Carronade or Claymore this year for £4.00 as it is, nothing to be done but plop it on the table. I call that a bargain! No game fixed as yet for next week as Dan from Wargames Illustrated is coming over to photograph Phil's outstanding collection of Great War Miniatures World War One figures for a future issue of the magazine. My role in this? Holding up the back boards I expect! About my level I guess...


Monday 2 November 2015

Double Header

After a period of life when games seemed almost as rare as hen's teeth, along came today with not one, but two games played! Phil was over for the day today, rather than the usual afternoon game we tend to have, due to a change in personal transport options! The result was that we were able to play one game before lunch and a second after. The morning game was another Late Roman Civil War game, which I'll return to in a dedicated post later in the week, while the afternoon session saw us returning to the Vietnam War for the first time this year I think!


My 20mm collection is quite small really and I can't see me adding to it, unless I light on some cheap painted fugues on eBay or on a Bring and Buy somewhere. I have a number of tanks and helicopters, mostly in 15mm scale as prepainted Die Casts, but they do for us. One such figures in today's scenario, requiring the American player, one Lt Robinson, to rescue the crew of a downed helicopter before the local VC, lead by the cunning Major Ho Bic Li can carry off the drew for interrogation! The table is laid out with a village on the edge of the table. A road crosses the river and exits the table through the village. The American convoy enters from table left, while the Vietcong are distributed randomly by markers {50% of which are dummy blanks} as you can see in the following picture ~


The villagers of Pah-Doc are strictly neutral and can move 1x D6 when their movement card is drawn, their movement chosen by the player whose card was drawn immediately previously. A close up of the village shows the main distribution of these extras ~


The Americans enter from table left in a motorized convoy and must locate and rescue the crew of the downed helicopter. Each element moves individually on its card being drawn each turn while the Vietcong are activated by any American element passing within 6" of a marker, the net drawn Vietcong card determining which element is deployed. {Note: there are fewer Vietcong markers than elements, so the Vietcong player does not know the composition or distribution of his rapidly assembled force.}


Obviously, the American player will get a number of moves before any Vietcong can be activated when he has crossed the river and met the first of the encounter markers. First up was an encounter between the Vietcong HQ of Major Ho Bic Li and one of the M113's. One American is killed by enemy fire from the ambush, but in return two VC are killed and one suppressed!


Sergeant Paddock's squad debuses quickly from their M113 to deal with a second VC squad barring their advance on the village. These heroes were to absorb a tremendous amount of enemy fire from two VC squads as well as devastating mortar fire as the game progressed, but lets not get too far ahead of ourselves just yet ~


Despite there being three encounter markers just beyond their crash site, the downed chopper crew decide to try to move towards their rescuers. The markers are subsequently activated: one is a blank but two are the real thing. The card draw produces two VC rifle armed squads! In a melee one crewman is taken prisoner by one enemy squad and two escape the VC's clutches! The VC who capture the crewman must now try to get him into the village an off the table. They move at 1 x D6 each turn, while he can escape on a 20% chance each turn. The second VC squad is free to pursue the escaping crewmen in the next round of the game. Meanwhile, another VC rifle squad is engaging Paddock's men and holding up the rescue attempt ~


Casualties are steadily mounting for the Americans on the hill overlooking the village from a combination of VC rifle squads and the mortar fire from beyond the village. The Medic is the busiest man in the HQ squad at this stage!


As you can see in the picture above two crew men have made it to safety, their escape covered by the heroes of the hill! The third crewman is loose in the village, being hunted by another VC squad, while the captured crewman is being very slowly escorted from the area ~


The second US squad, under Sergeant Moore, have rapidly advanced up the road and risked activating other VC markers, which all turn out to be blanks! Where are the VC RPG squads I am wondering at this stage? Under the cover of US fire, the captured crewman rolls 19% and escapes the clutches of his VC captors! He makes a dash for the friendly faces of the US grunts, despite picking up two wounds in the fire fight with his captors!


Its all up for major Ho Bic Li as his forces are scattered and the four crewmen are rescued! He is left to rue the draw of the cards and the random distribution of his forces.


The final body count shows five Americans killed and several wounded, but most patched up by the Medic in the course of several turns under heavy enemy fire! The VC suffered twelve dead and fifteen suppressed, so a comfortable US victory in the end to add to the rescue of the four crewmen. I was mainly undone by the failure of my two RPG squads to materialize on the table, but that was the chance element built into the game. Neither player knows what or where the VC will appear, so its a case of throwing caution to the winds to rescue the men or of a steady and coordinated attack to determine the disposition and strength of the enemy. Phil began with the latter option, then absorbed casualties until his second squad were in position to make a dash for the village and effect the last rescue. My VC put up a stiff fight but were out gunned when no machine-gun or RPG squads turned up in my force. But still, the game lasted about 12 turns and was very tense for both of us right up to the end. If only my prisoner escort squad had not found the rice paddy such heavy going I might have claimed a minor victory point!
For those who like to know such things, the figures are mainly SHQ and Britannia, with others from several sources including one long gone company whose name I just can't recall but who I wish I had bought more from years ago at a SELWG show I attended while staying with Matt in London! The buildings I've no idea who made, but I know I bought them from Shaun of The Bunker fame at one Partizan show! The wound counters I made up from a £1.00 bag of novelty buttons bought in Hobbycraft! The helicopter is a Corgi die cast pre-paint job while the vegetation is a mixture of The Last Valley and home made stuff using aquarium plants! Make sure to pop back later in the week to see how the Ancient game in the morning session panned out!