David Bickley's Wargames Blog

The occasional ramblings of an average gamer, journeyman painter, indifferent modeller, games designer, sometime writer for Wargames Illustrated and host of games in GHQ.


Wednesday, 9 February 2022

Two Days...

 ...two SYW games, two defeats! Not my greatest showing as a wargamer, going from heroic defence finally overwhelmed by weight of firepower in the first game, to abject failure and a short order thrashing in the second! The first game saw the French under my command going down to defeat in Turn 9 after an heroic defence, while the second game saw the British under my command soundly thrashed by Phil in Turn 5! Though even Phil will admit the 'dice gods' did play more than a bit part. The table layout for both games saw the French defending their lines between a roadside Inn and a low ridge, their front protected by gabions manned by French infantry reinforced by batteries of heavy guns. Meanwhile the British and their Hessian allies were trying to force the position and drive back the French, who have little room for manoeuvre ~

A view along the French lines shows the strength of their position and the general disposition at the start of both games ~


In the first game Jon, in his persona of Lord Walton, commanded the Allies, while as the Comte du Merde I commanded the French defenders. As usual now we set the game at a maximum of 12 Turns using Black Powder 2 as the rules with some modification suggested by the supplement Last Argument of Kings.
Two regiments of Grenadiers move to protect the French right flank beyond their camp. These heroic units were to live up to their status beyond expectations as the game developed 
Lord Walton sent forward his British foot en mass in an concerted effort to turn the French right flank. The guns played their part in softening up the defenders.
The French Grenadier regiments look as if they will be easily overwhelmed by Turn 3! Strange how wrong you can be...
While the decisive action develops on the right the Guards mass to attack the French centre, a daunting proposition against entrenched infantry supported by batteries of guns.
The Comte du Merde positions himself alongside his Guards who he hope will be able to attack any breakthrough of his lines and restore equilibrium to the defence.
A host of redecorated infantry! Somehow it just looks overwhelming from the defender's perspective as they come on steadily, undeterred by enemy fire 
On the lied right von Weiß leads his Hessians forward, supported by combined battalions of British Grenadiers.
The British attack struggles to make progress against the French right. The Grenadiers' courage and tenacity under fire draw admiration from their foe! Encouraged by their example Du Merde sends forward support from the second line of French infantry.
Shaken, but not stired, the French right refuses to buckle trading volley after volley with the British regiments massing against them.
On the French left though the Light troops defending the tavern are driven off by the British assault, taking with then the supporting regiment of Regulars. 
Despite this reverse Du Merde orders up his Second line of Regular Infantry before the enemy can crest the line of gabbions! He has no troops to spare though now to protect their left flank beyond a battery of artillery on the hill.

Finally on the French right the Regiment Normandie breaks and flees to the rear. Du Merde commits the Swiss Guards to attempt to plug the gap opening in his lines.
Too late! The French right is broken and with it the army's will to resist. In a close and bloody struggle Lord Walton and von Weiß have carried the day, but at a cost...
In the second game Phil took the role of the French commander, the Comte du Merde, while I commanded the Allies as Lord Useless! You'll see why if you read on ~
Having witnessed the British struggles to turn the French right in the first game I opted instead for a head in attack on the centre but combined regiments of Grenadiers, supported by the Foot Guards, while demonstrating against the two flanks.
You see I had consulted a luck gypsy before settling on my plan and she saw my coming victory as the mists cleared!
The British demonstration against the French right seems to be going well as the Dragoons on foot manage to hold up the Grenadiers De France. A false hope as the French Guards move smartly through the camp to block the dithering British. The 'dice gods' showing their hand, again...
The British Grenadiers' attack goes in, though the support from the Foot Guards is sadly absent, a Blunder sending them in retreat! Those pesky 'dice gods' again...
Well, unsurprisingly that ends in the destruction of the Grenadiers. Hard after all to beat -7 in a Morale Check!
Still, von Weiß' has finally got the Hessians in position to assault en masses! If only...
It's only Turn 5 but the Allies are Broken and retire from the field. Du Merde has carried the day, though I'm sure Phil will admit that those blasted 'dice gods' did play their part...
Now, can the Comte sneak off from his wife to enjoy the 'company' waiting in his tent I wonder?
Better smarten himself up first then perhaps?

Two grand gaming sessions with two good friends. Games played in the spirit of wanting to enjoy the experience whatever the outcome, that's the true winner amongst we GHQ Irregulars. Back to Olaf's HQ over at Phil's at last next week for a WWII encounter. It's been a while, but normality is creeping back for us all I hope.


Monday, 7 February 2022

Der Weiße Bauernhof

 Just a short update on my Cold War Gone Hot 15mm project, another building finished. This is the Small German Postwar House from LaserCraftArt of course which I've used as the farmhouse, paired with the barn from Empires at War (which is also painted now but lacks a base as yet.) Together they can form Der Weiße Bauernhof, the White Farm, while they can also be used separately of course ~

I've another small order on the way from LaserCraftArt in the shape of another house, the Large German Postwar House, and two bases intended for terraced housing which I plan to repurpose as bases for the two Modern Apartment Blocks I've painted. The bases are large enough to accommodate the buildings and leave space to represent car parking or lawned recreational areas. 

While I wait for Phil to fit in the vehicles for the game around his commission work schedule I'm plodding on with the 76th Hindoostan Regiment for the Army of the Pendawar Presidency. I'm hoping to complete the 28 figures this month, a modest target I failed to achieve in January! So far I've finished 4 figures for the Light Co and have the first 4 figures for the first Centre Co underway. First though, two SYW games here in GHQ, with Jon today and with Phil tomorrow.

Friday, 4 February 2022

The 74th (Highland) Regiment...

 ...have mustered in and are to be posted to the Army of the Pendawar Presidency. They were the subject of a short post last month, so no need to say over much about the regiment here ~

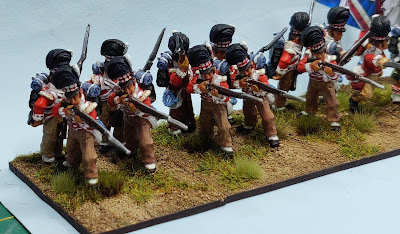
The figures are from Wargames Foundry, sculpted back in the day by the Perrys, while the flags are from GMB Designs and the bases are from Warbases as ever. As an experiment I bought a pot of GW Contrast paint, Snakebite Leather, to try on the horse of the mounted Colonel. As you'll know from all my moaning on I really don't like painting horses much at all. So, I thought I'd give the Contrast a try out, figuring most folk could forgive one horse if the outcome was poor. From my view the jury is out. I quite like the effect on the horse's mane and tail, but I'm less keen on the look of the body of the beast. Any and all opinions or advice welcome on this front.  No more wittering on, here are a few group pictures ~

Next under the brush are the second HM Regular regiment of infantry I'm adding, the 76th (Hindoostan) Regiment. These are using the Perry Miniatures British from the Napoleon in Egypt part of their Napoleonic figure range. My modest painting target this month is to complete the 28 figures for the regiment, a target I failed by 4 to achieve with the 74th last month! As in January though I'll intersperse the figure painting with the painting and modest modelling  of the 15mm MDF buildings for my CWGH mini project. Next up there are a house and barn for a small farm. Well, it passes the time for we geriatric-in-waiting folk if nothing else...


Tuesday, 1 February 2022

No-one Has Blundered!

 Face to Face gaming resumed in GHQ after a week's forced hiatus resulting from illness in Phil's close family and isolating in mine following close contact with a Covid 'leper'! With luck now we will be back to gaming in alternate venues, so for this last time in GHQ for a while I asked Phil to choose a game. His choice fell on an AWI game, so I first laid out a table and then decided on the armies: Hessians v Continentals! Von Bikelberg v Benedict A Robinson perhaps? See how it panned out now in the following photomontage ~

In Turn 1, with the initiative lying with the American Rebels, their first brigade advances very slowly along the road bordering the Watkiss Farm.
Their slow approach allows the sluggish Hessians to rouse themselves in their camp on Watkiss Meadow and push out troops to stall the American advance.
In Turn 2 Von Bikelberg arrives at the head of the second Hessian brigade. The Fusilier regiment with support from a 4ld gun makes a sweep to the east of the farm while he leads the remaining troops straight up the road for the farm.
By Turn 3 the American Continentals are finally getting into their firing lines, harassed by the fire of the Dragoons and the Light artillery piece.
The Fusilier regiment and their supporting 4ld gun are making heavy weather of their flanking move, allowing Arnold's Second Brigade of Continentals to steal the advantage.
In the distance as Turn 4 opens we see Arnold's Second Brigade of Continentals begin their advance on the left flank of the First Brigade , whilst the remaining Hessians finally get organised in the meadow and begin to form for action. 
The Hessian Fusiliers are deployed lining the fences surrounding the farm's cultivated fields, isolated from the test of the force they ready themselves for action.
Support is slow to arrive on the Fusiliers' left, but mercifully Arnold's Continentals are equally tardy. In the distance fighting has erupted around the Hessian camp in the Meadow. Casualties there are mounting steadily and troop morale on both sides is shaky already.
A closer look at the fighting around the Hessian camp in the Meadow reveals the toll already taken from the 5th New York while the Hessian Dragoons and Light artillery piece have also lost men in the developing firefight.
The Regiment Von Rall has finally deployed into a firing line in time to confront the 3rd New York who have relieved the battered and Shaken 5th. The 9th Pennsylvania have moved up also to engage the Dragoons lining the Meadow's fence line.
The 3rd New Jersey, the Blues, boldly advance through the crops to attack the Hessian Fusiliers who calmly await their fate.
Regiment Von Rall and the Dragoons have the better of the firefight! The 9th and 3rd are driven back Shaken while the 5th are on the verge of collapse when the Brigade's commander is shot down!
He met his fate unflinchingly leading his men, dying with his face to the enemy. The 5th are Shaken by this and fall back as the Regiment Von Rall advances on them, bayonets glinting in the Spring sun.
Back on the other flank the fighting is fierce as the 3rd New Jersey are joined by the 4th and 8th Virginia Continentals. Casualties mount for both the Virginians and the Hessian Jaegers as neither will yield ground to their foe!
On the other flank the determined advance of the regiment Von Rall drives back the Broken First Brigade, although the retiring Yankees keep up what fire they can to discourage the Hessians from closing with the bayonet!
The Fusiliers, supported doggedly by the brave Jaegers, have halted the remaining brigade if Continentals in the fields and along the road. Surviving heavy fire they shrug off loses and hold their ground.
Regiment Von Rall is finally broken in rout by mounting losses caused by the galling fire from the retiring Brigade. Von Bikelberg has too many Shaken units to press the Americans closely. Their Broken brigade will be able to safely withdraw from the field unmolested by their foe. 
The remaining brigade of Virginians and the New Jersey Blues are too strong to be assaulted by the remaining Hessians. The brave Fusiliers, supported by the stubborn Jaegers have fought the Continentals to a standstill but lack the support to press them as they prepare to withdraw from the action.
A smaller game than many here in GHQ produced a tense fight over the full twelve turns. The fortunes of war swung both ways from turn to turn, but never favouring one side for long enough to turn the game in their favour. An honourable draw then, slightly in the favour of the Hessians! Black Powder 2 as ever gave an excellent and gripping game right down to the wire! All being well next week will see a SYW game featuring here in GHQ, allowing the Hessians to flex their military muscle in a European setting for a change alongside their British employers.