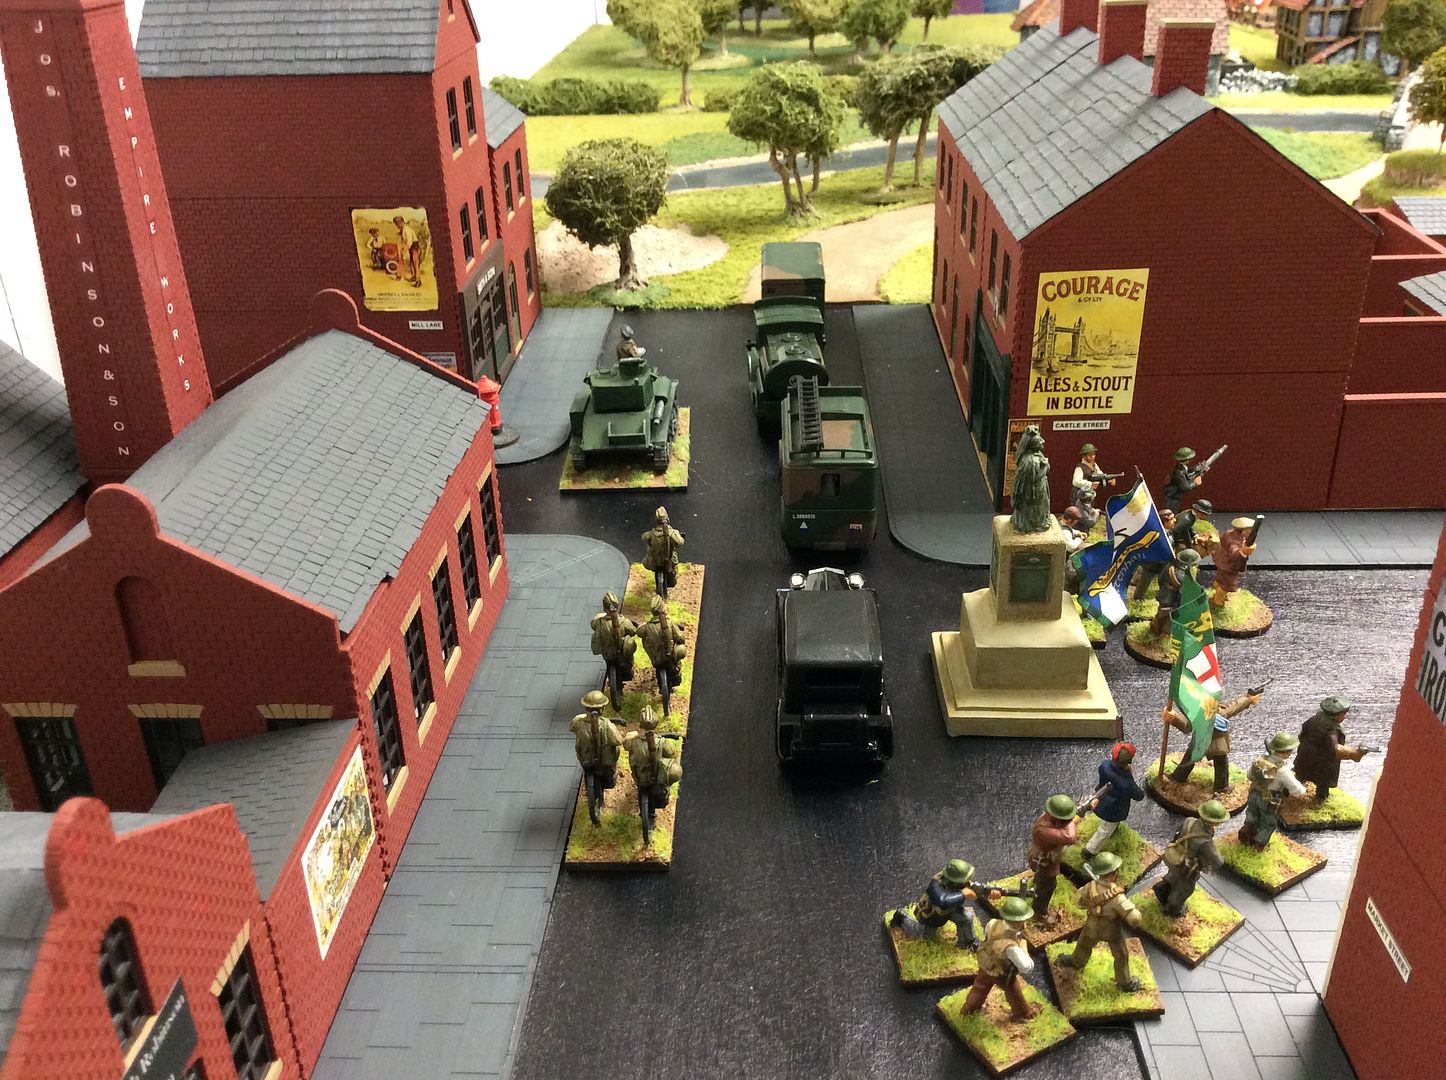
Elements of the Shropshire Light Infantry move out along the road to Bilbrook, supported by Militia: Swindley's Own from Tettenhall and the Express and Star Rifles, lead by the Editor in chief ~
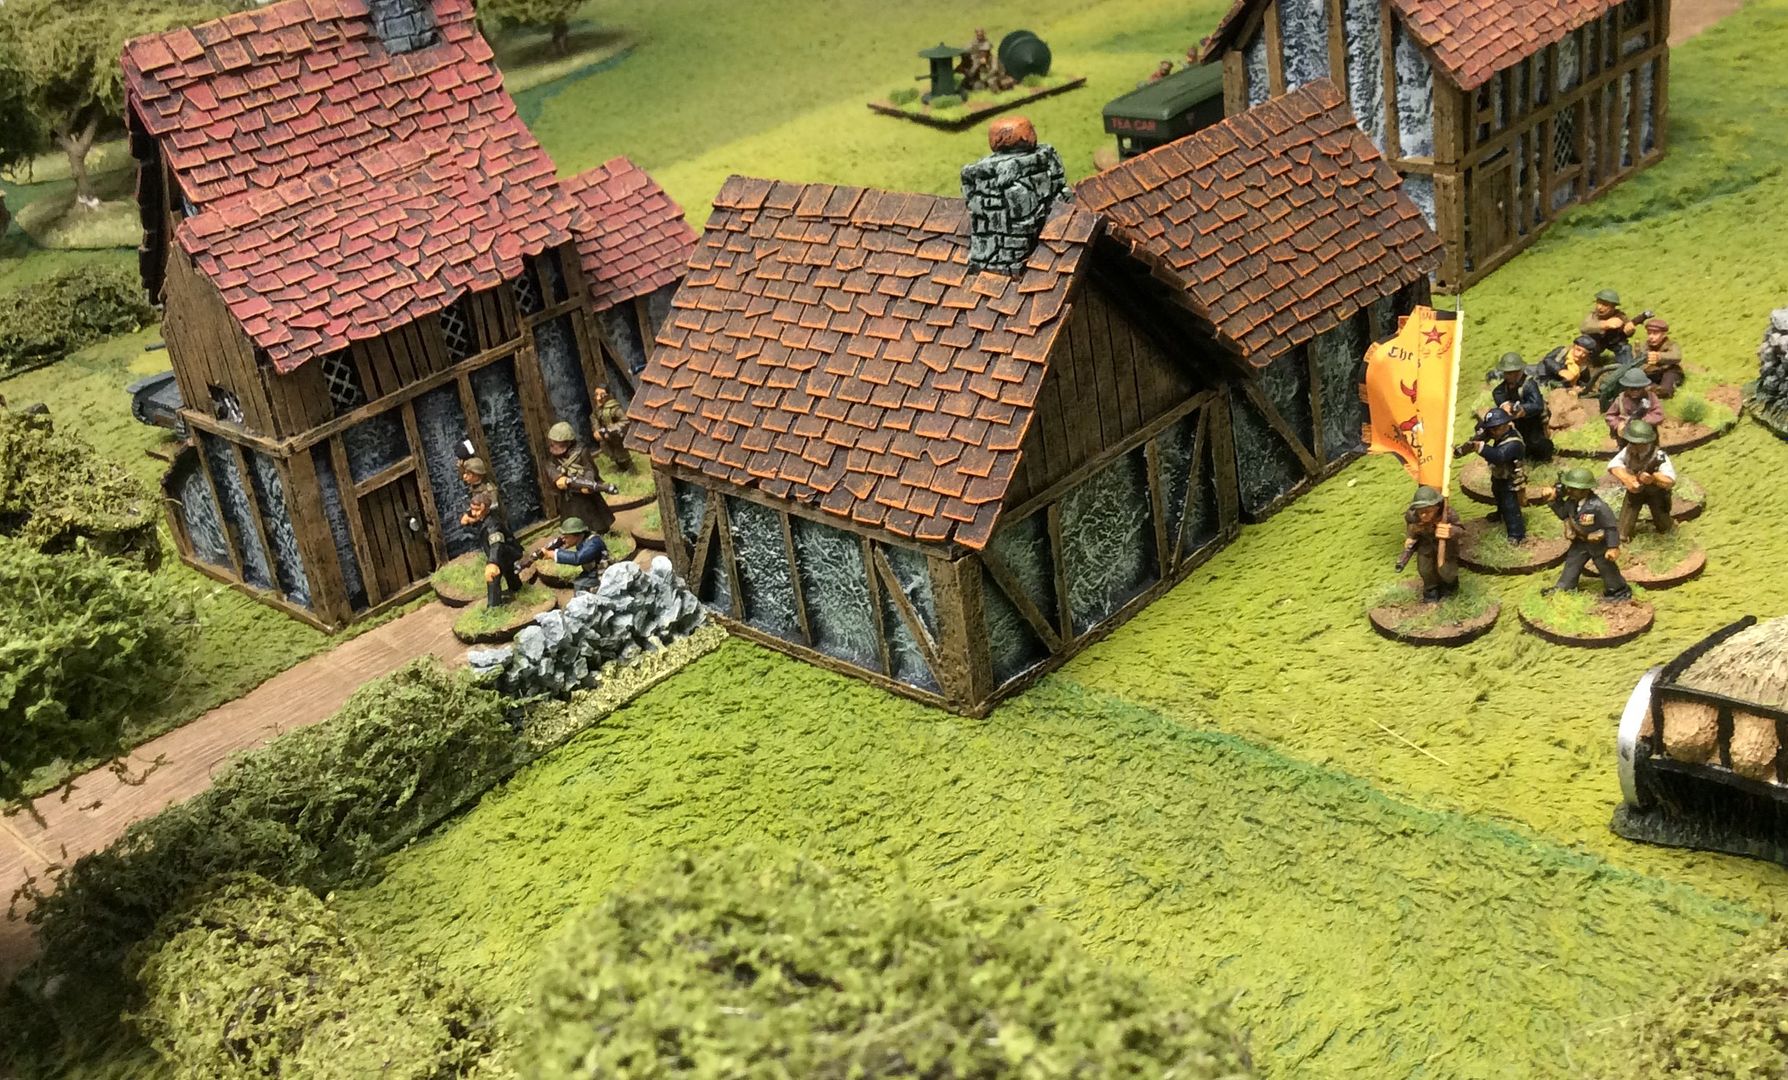
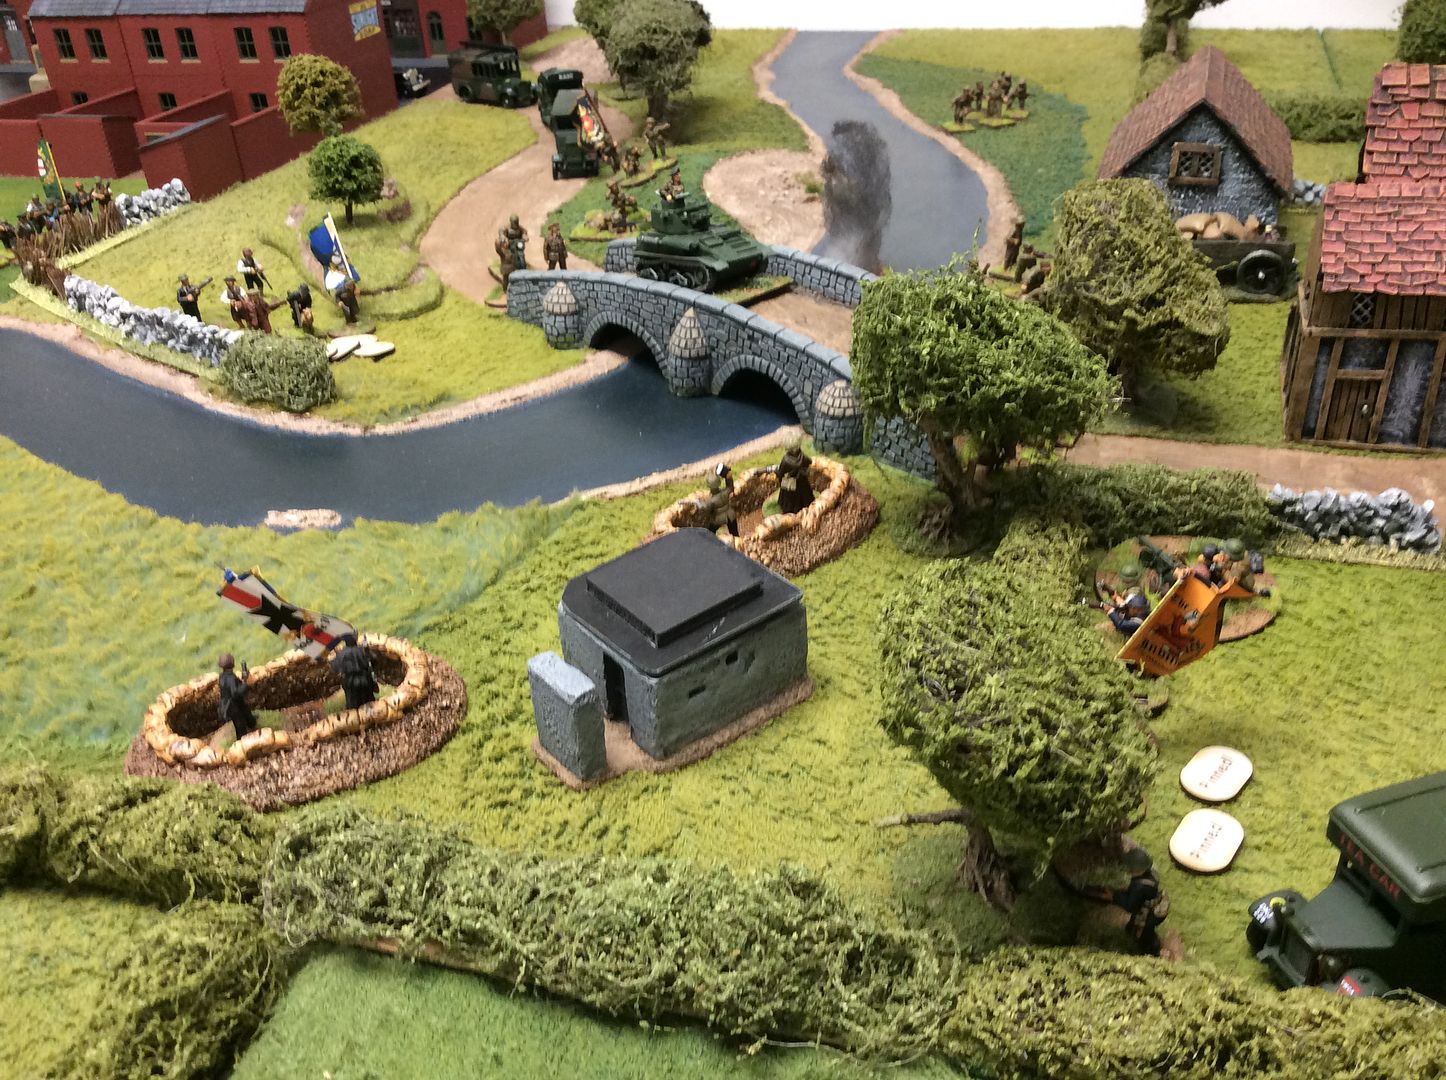
Supported by a German 'Lend Lease' Panzer 35T which has been 'acquired' from its rightful owners in the BUF,the Peoples' Forces move swiftly to seize the Bridge: the Three Tuns Invincibles move towards the pill box and entrenchments guarding the bridge approaches, while the Boulton Paul Workers Cooperative forces move directly through the village ~

Whoever controls the bridge at the end of the game will be the winner, so Jon's forces made directly for the bridge's two flanks ~
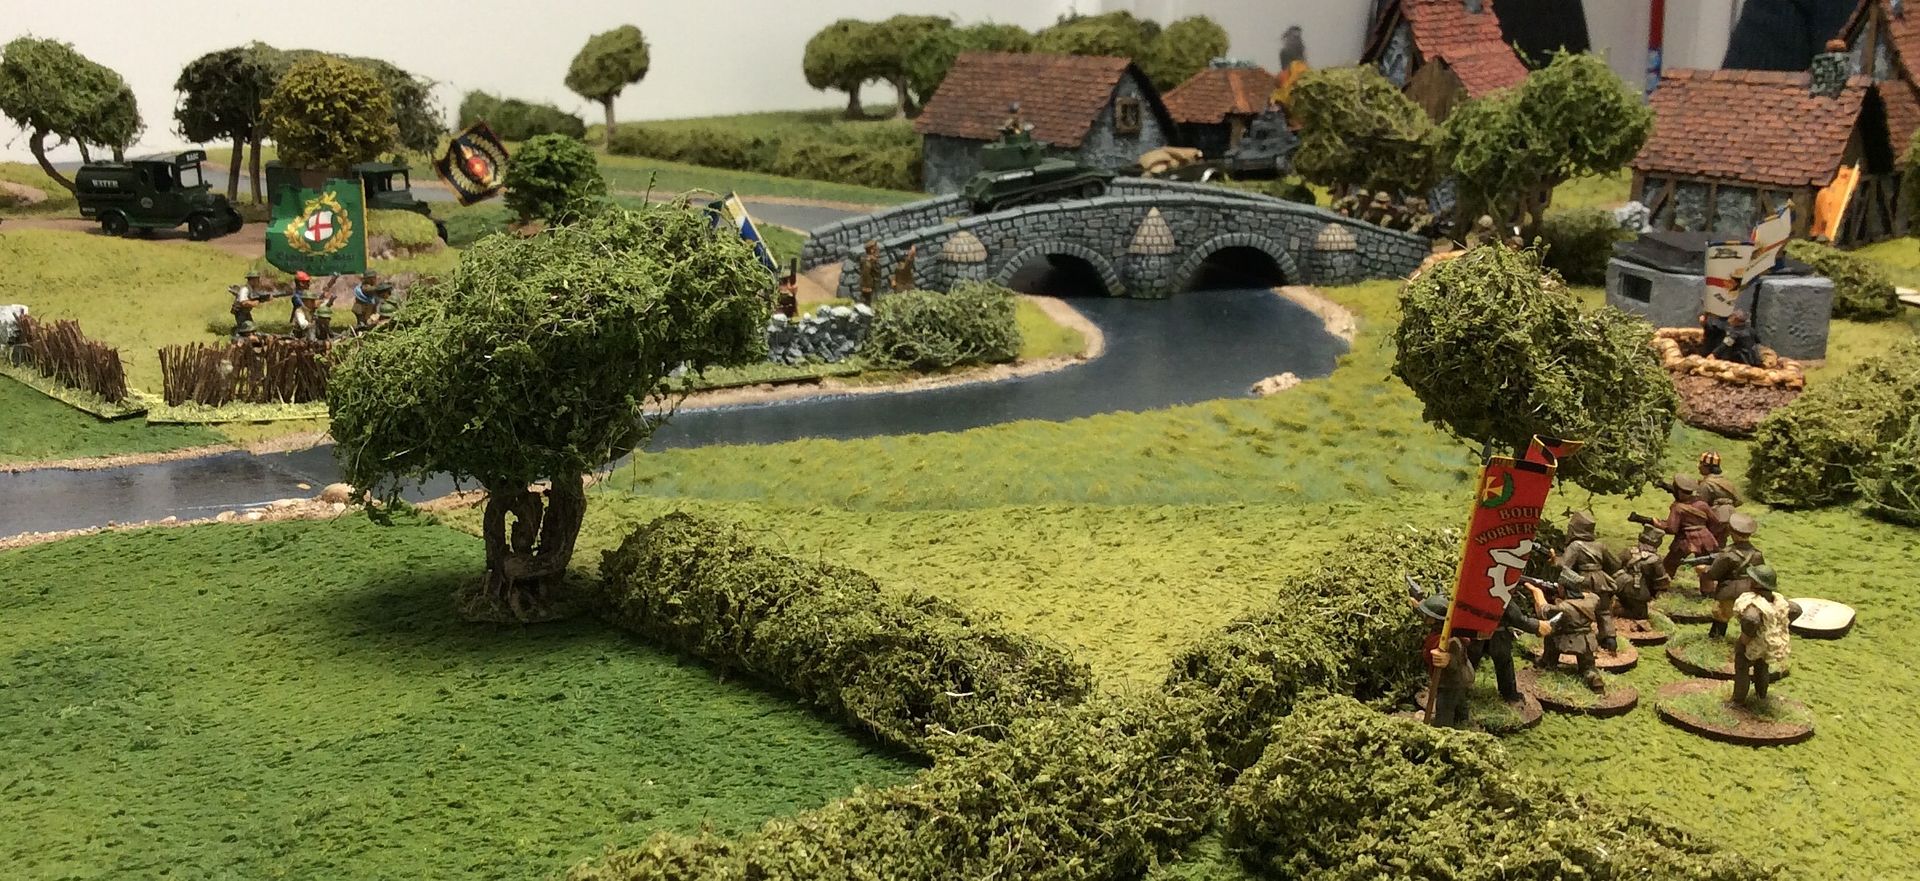
In the meantime, as my Regular Army elements moved directly on the bridge, the local volunteer units moved to the right to protect their flank ~

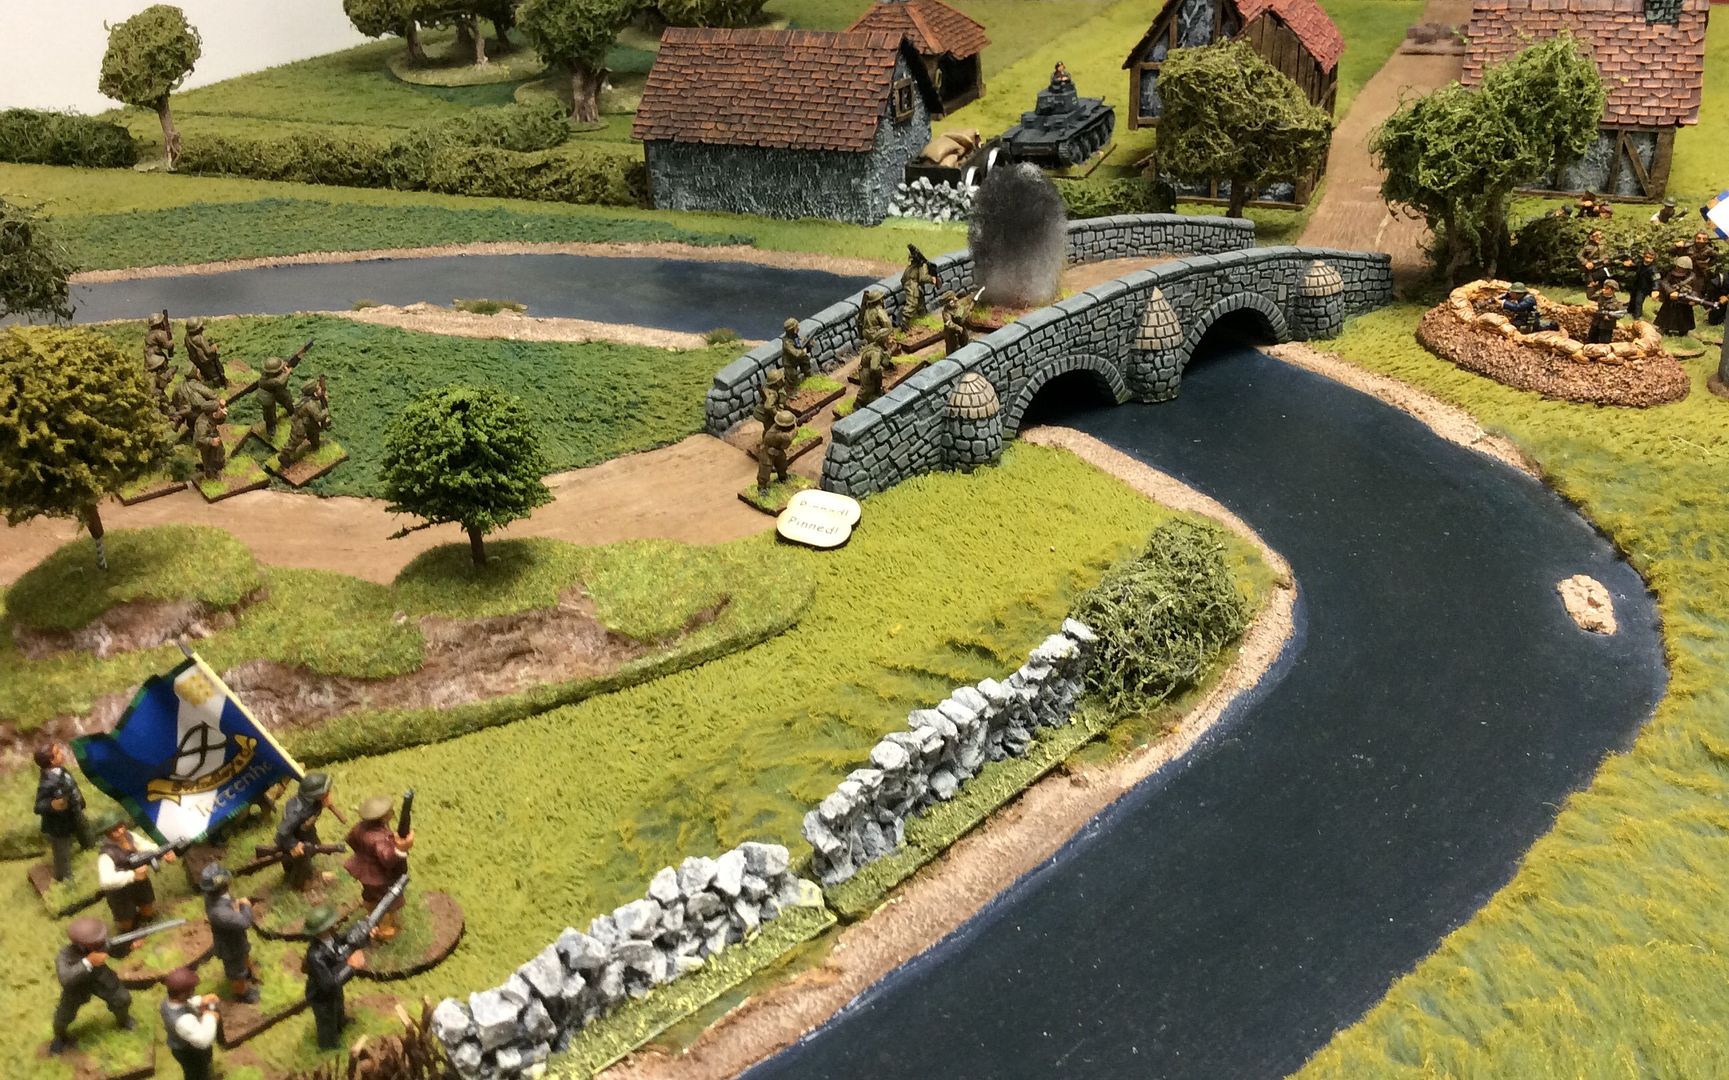
The 'Lend Lease' 35T halts the Regulars' rush over the bridge, which allows volunteers from the Holy Cross Crusaders to occupy the pill box and entrenchments defending the crossing. Swindley's Own are hurrying forward to support the Regulars, but there's a good way to go and under fire too ~
While the Three Tuns Invincibles support the Holy Cross Crusaders by occupying nearby gardens overlooking the bridge and road, the Boulton Paul Workers Cooperative force moves to try to flank the Government position. Luckily, the Express and Star Rifles are in reserve to counter the move. Meanwhile elements of the Shropshire Light Infantry have begun to cross the Penk and move to flank the enemy positions defending the bridge crossing ~
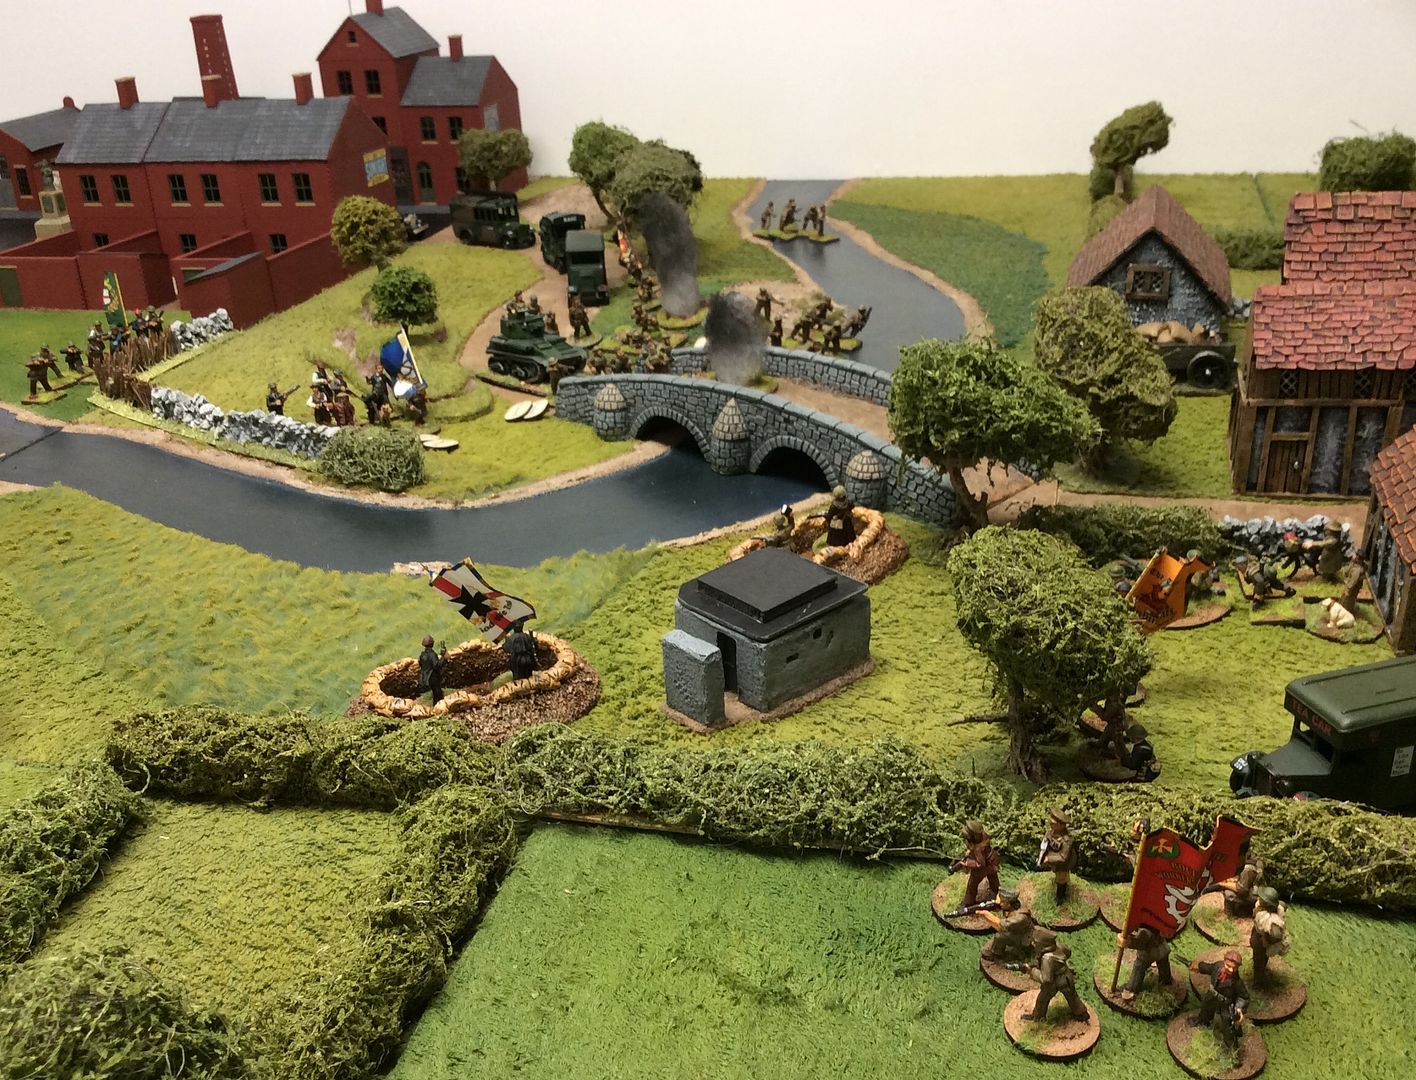
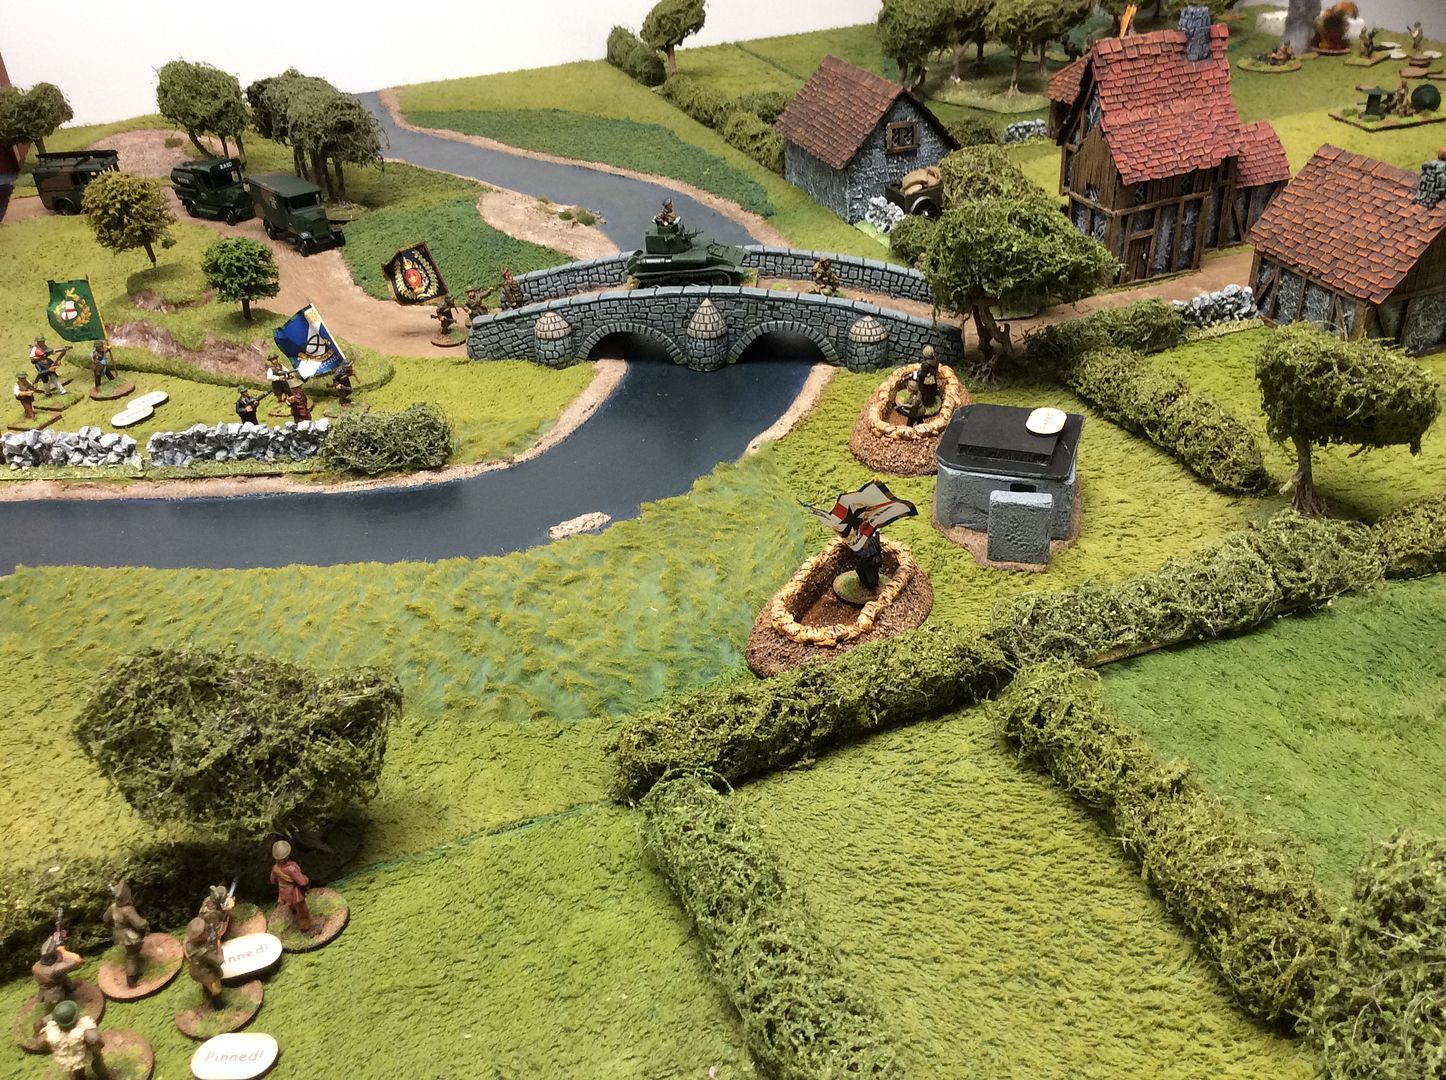
The 35T and the Smith gun position themselves to threaten the Vickers MkVI of the Shropshire Yeomanry as it tries to support the Regular Army in their attempt to dislodge the Militias around the bridge defences ~

The Regulars are across the Penk and moving towards the flank of the militias defending the bridge. Despite heavy fire, the Vickers MkVI is still supporting the troops trying to cross the bridge, but on their flank the heavy fire has pinned Swindley's Own in open ground ~
While heavy fighting rages around the bridge and the outskirts of Bilbrook, the Boulton Paul Workers Cooperative forces have worked their way stealthily around the enemy's flank without being noticed ~

Swindley's Own are still pinned down by heavy fire and now are in danger of being flanked by their enemy. Fortunately, the Editor has held back the Express and Star Rifles and they may be able to offer fire support to their endangered allies ~

The Regulars of the KOSLI are across the bridge but cannot dislodge the enemy Militias from their defensive positions despite the fire support from the Vickers MkVI tank. Meanwhile a heavy firefight on the flank is taking its toll of both sides ~
The Three Tuns Invincibles are overwhelmed by their Regular Army opponents and the Holy Cross Crusaders are suffering mounting casualties. It begins to look as if the Government forces will carry the day and capture the bridge ~
But the Peoples' Forces rally and mount a concerted attack. The 35T and the Smith gun engage the Vickers as it tries to force a crossing. Its knocked out by their combined fire and completely blocks the bridge ~
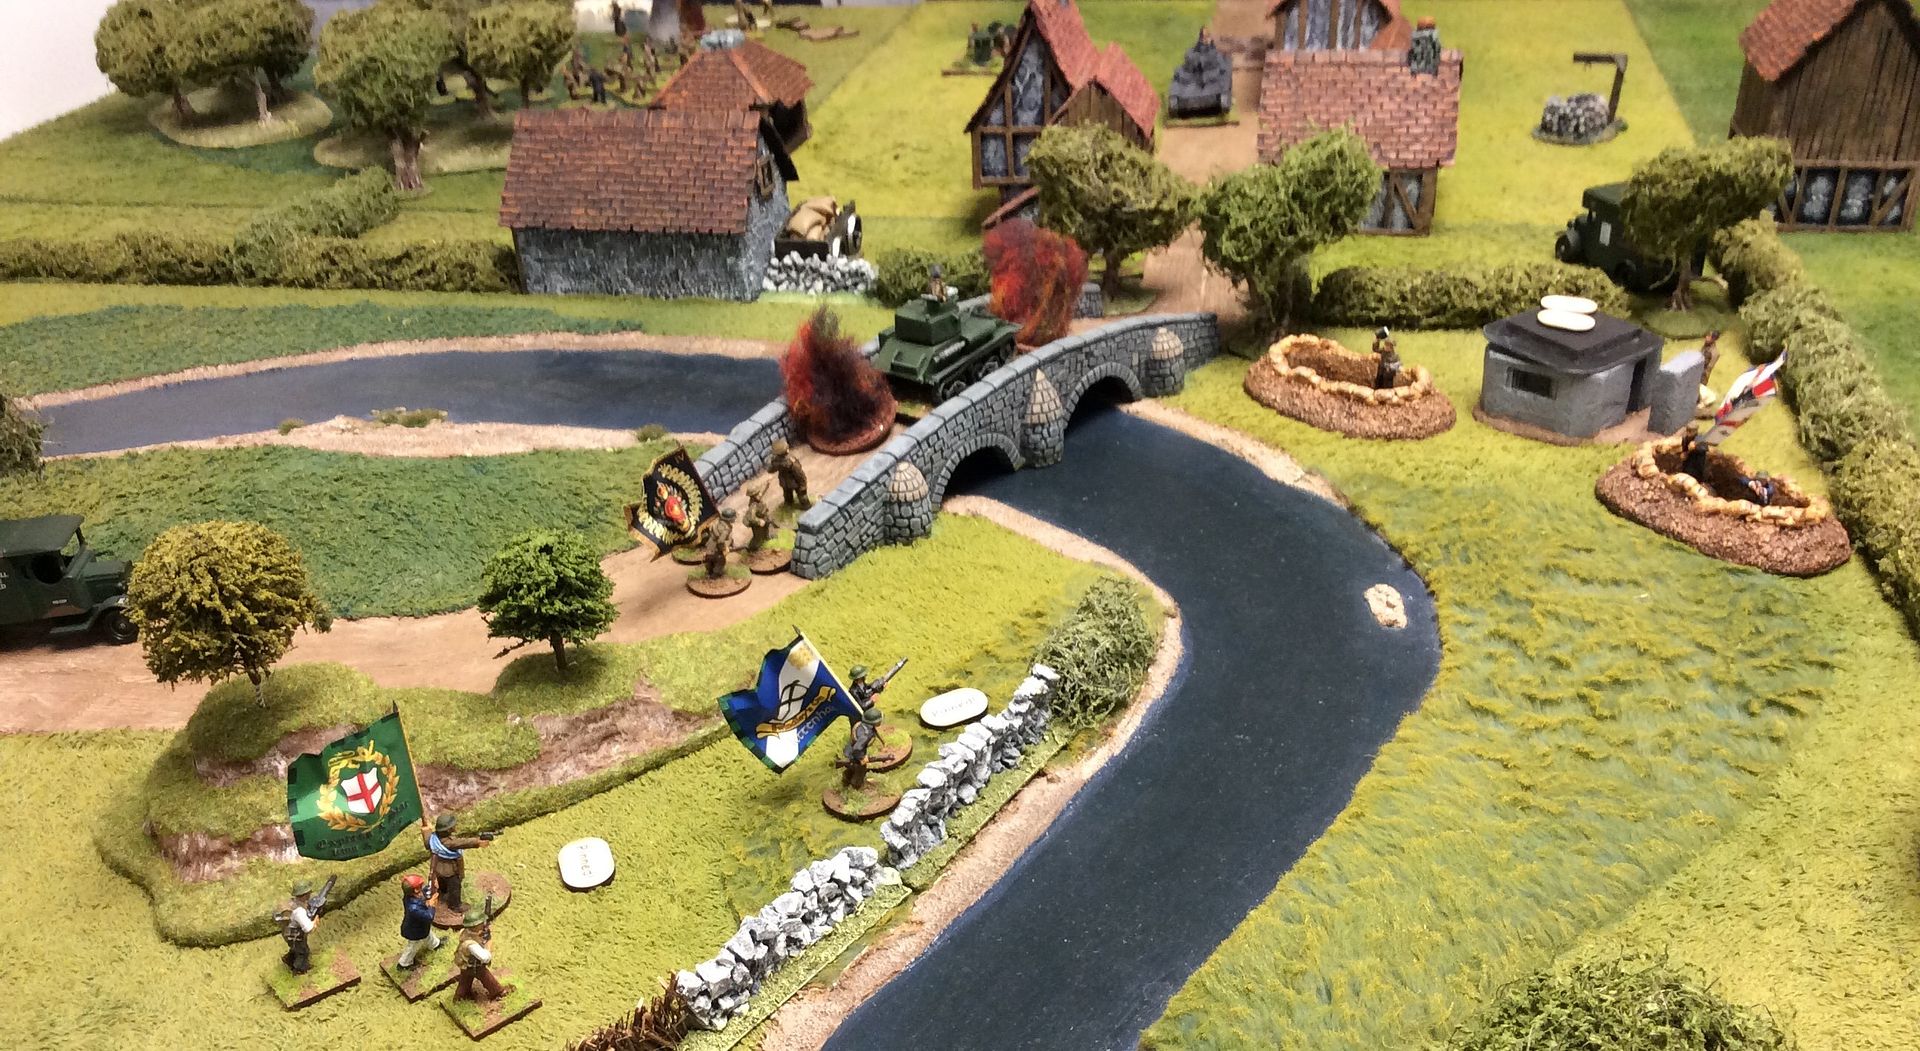
Both sides are completely spent and Turn 12 comes to a close with neither side having captured the 'Bridge over the River Penk'! Heroes from the KOSLI have attacked the 35T which was prevented from advancing on the bridge, meaning the game ended in a Draw! Both sides will withdraw to regroup, rearm and recruit ready to carry the war to the enemy the next time ~

For those who like to know these things: the buildings representing Bilbrook are the Conflix pre paints while those of Wolverhampton are by Oshiro. The bridge is a Hovels piece and the vegetation is by The Last Valley. The figures are a real mix: some by Foundry; by Musketeer Miniatures; by Artizan; by Stronghold; by Pulp Figures. The flags were made for me by Leicester Gamer over on the Very British Civil Forum. I need to add more figures to this game, but somehow I never quite get around to it!
Great stuff!
ReplyDeleteThanks AJ! Glad you enjoyed our battle!
DeleteBostin report there, both sides took a right ommerin 'n no mistek.
ReplyDeleteArdo ower Kid! Twas a reet gud set too an all!
DeleteHuzaah for the Holy Cross Crusaders! Great game, next time I'll remember to check if the river is fordable ;-)
ReplyDeleteIf it isn't go for a flanking manoeuvre across Moat Brook.
DeleteIndeed you should check, though getting across did my chaps little good in the last analysis!
DeleteGreat looking game and appreciate the info on where the terrain came from - was going to ask!
ReplyDeleteThanks TF! Glad to sort out the terrain issue as well!
DeleteExcellent in all respects.
ReplyDeleteAs far as figures go less is usually more at this level of game, especially if they listen to wiser heads in the platoon and don't bunch up.
Thanks for the advice Jim! I must remember it next time, I may suffer fewer losses!
DeleteGreat sounding game, that was some fight for the bridge.
ReplyDeleteCheers
Stu
Indeed Stuart it was an epic struggle to the last man and the last round it seemed at times!
DeleteWell that's just a fantastic looking game David!
ReplyDeleteChristopher
Now Christopher, from you that is high praise and I thank you. We do our best.
Delete