David Bickley's Wargames Blog

The occasional ramblings of an average gamer, journeyman painter, indifferent modeller, games designer, sometime writer for Wargames Illustrated and host of games in GHQ.


Tuesday 30 August 2022

The Raid

 Much going on here in GHQ at present, but all is put on hold for our regular game. The current offering is a run out for my expanded French and Indian War collection. We used 'Black Powder 2' as the rules driver, assisted by ideas from the 'Dark and Bloody Ground' supplement, modified of course by our own tinkering. The game portrays a British surprise raid into New France around the small settlement of Petit Raunslé. The surprise is turned on its head when the French get news of the impending raid from their scouts. But first up then a few atmospheric shots before we get down to the nitty gritty ~

The French garrison outside Petit Raunslé. Pére Stephan blessed their efforts as they march out past their encampment.
French-Canadian backwoodsmen and their Iroquois allies work their way through the crop fields around the settlement.
Forte Dubonné is garrisoned by a few veterans and invalids but boasts the only French artillery, a 4lb piece. Grenadiers drawn from the Regular Infantry garrisoning the area support the Compagnies Franches de la Marine.
On the French left their commander, General Phillipe, has placed a second Iroquois war party supported by his available Coureurs du Bois.
The British Commander, Major Dyzasta - a Hungarian officer serving in the Hanoverian army - has been sent to command the British in this remote area of the Colonies. He has formed a strong right flank  to attack in force. He plans to pin the centre and right of the French position and roll up their line from their left. His Regular infantry and Rangers supported by their Mohawk allies should be more than enough for the task.
His plan to pin the French centre largely depends on his composite formation of Grenadiers, supported by a second Regular infantry regiment and detached Light Company men. Speed of movement down the track should be the key to disrupting French deployment.
The left of his line extends into heavily wooded hills and valleys. His Rangers, detached Light Company men and Mohawks are admirably suited to warfare in such terrain.
Meanwhile, for these trois mademoiselles a walk in the woods turned out not to be such a good idea after all...
The Farmland around Petit Raunslé gives way to heavily wooded hills and valleys. Fighting here will be up close and personal as each side tried to ambush their enemy and gain the upper hand.

The British advance gets off to a very poor start! As the Regular Infantry struggle through the wooded terrain they find the Iroquois lying in ambush. They are Disordered by the unexpected volley from their flank. Poor scouting by the Lights I fear!
Away on the British left the Mohawks' cautious advance draws an impetuous attack from the Iroquois! War whoops fill the air, hatchets split skulls and the shrieks of the wounded rent the air!
Major Dyzasta's centre has found the going harder than anticipated, allowing the French regular infantry to deploy into firing line awaiting their arrival. So much for the planned element of surprise. The French scouts must have reported back on his movements.
The British right, the key to Dyzasta's plans, has been soundly thumped by the French and their Iroquois allies. His plans already lie in tatters!
With his left seemingly secure and the British centre advancing so slowly the French commanders feels a growing confidence in the outcome, despite the nuisance value of a small group of Rangers in his midst!
From bad to worse! With his Mohawks Shaken and his regular infantry routed Dyzasta's right is crumbling, leaving his Light Company men isolated and under heavy fire.
Bravely facing growing numbers of French, the men of the detached Light Companies hold their ground in some Disorder.
 But Dyzasta's left is faring much better, with the Iroquois and Backwoodsmen being forced back by the Mohawks after a vicious and prolonged melee.
The Mohawk warriors on his right rally but too late to effect any relief as they see the Regular Infantry flee past them in rout!
Suddenly, as is often the case with Black Powder, the situation changes. The French centre and left are bending under heavy pressure. Dyzasta senses a decisive victory in his grasp!
The French regular infantry in the centre are devastated by volley fire from the British Grenadiers. He orders the Rangers on the Grenadiers' left flank to rush the French-Canadian militia defending their homes. Inevitably after a short and bloody combat the militia are overwhelmed!
Much confusion in the French centre reinforces Dyzasta in his conviction that the day is his!
The Grenadiers cheer on the Rangers as they sweep the French-Canadian militia from their position. Surely victory is a mere formality now?
Sadly it was not to be. A sudden attack by the reformed and refreshed French left flank sees the British centre shattered! Two of Dyzasta's three brigades are Broken and the day is lost. To his disgust he hears cries of "Vivé La France!" "Vivé Le Roi!" rent the air.
Once again Black Powder had delivered a splendid and unpredictable game! In Turn 5 I was quite sure victory was a mere formality as the French centre bent and the right Blundered into Retreat. Turns 6&7 soon disabused me of that as Phillip first rallied his forces and then struck decisively to turn my anticipated victory into bitter defeat. What a great game though!


Monday 29 August 2022

Aircraft for the CWGH project

 I'm no modeller I know full well, despite belonging to that post war generation who regularly spent our precious pocket money on Airfix kits! Embarking on the current 15mm Cold War Gone Hot project in 15mm exposed me to the daunting task of assembling Main Battle Tanks and supporting armoured fighting vehicles from plastic kits, this due you might recall to Matt's challenge pre-pandemic. Of course you will have already got ahead of me when I say that it couldn't stop there!

First I decided I could not really avoid helicopter support for both sides: a Hind for the Soviets and a TOW-Lynx for the B.A.O.R. I assembled the kits from Battlefront and Phil has finished painting those, they just need the transfers sealing before you see them. Reading through the Battlegroup Northag rules I realised I could have air support in the game. Now really there's no need for any sort of representation on the table, the aircraft in question being so fast and high, but I'm a wargamer after all so I sourced kits, again from Battlefront: a Harrier VTOL Fighter-Bomber for the B.A.O.R. naturally; a SU-17 Fitter for the Soviets, slightly early for my 1983 setting but still in service.

Like many of the tanks and such these were originally available in resin one piece casts, with metal detail pieces of course, but now they are plastic kits. I admit I had found aspects of the vehicle kits tricky for the aged hands and eyes, but they were as nothing compared to these kits! Having seen the landing gear in several tiny parts (why when it's a wargames piece?) I opted to have both in their inflight mode. Still fiddly but I persevered and in the end I managed to get them done. That left their painting next, but for complex reasons Phil would not be able to fit them in to our deadline, so that fell on my shoulders. Spray undercoating them with my trusty regular Double Acrylic white was no problem, but unlike Phil I've no airbrushing kit so I had to manage by hand with my trusty sable brushes (from ABC Brushes, highly recommended). Anyhow, the finished aircraft, just don't look too closely ~

You will have immediately noticed that they lack their various identification markings! Phil will, I earnestly hope, apply same later this week after our regular game. (I fixed the aircraft temporarily to their flight stands with White Tack in order to take the photo by the by.) Another bone of contention, the pieces come with no instructions on assembly or deploying of the included rare earth magnets to hold them in place. I searched on-line and found a set, but they didn't match the parts included!!! Could you make it up? I doubt it, but I'm confident we will sort that out later in the week too.

Sunday 28 August 2022

Bought on a whim!

Well now, I fully expect that every wargamer reading this has been there, done that, and got the T-shirt! Buying something either in person at a Wargames Show, or even at that rarity a Hobby Store, or perhaps of late more likely via the internet from eBay, Colonel Bill's or perhaps direct from the manufacturer. A purchase which you had no intention of making, not even a vague inkling that it was something you needed or wanted! So, having confessed my faults, here is the first of three such purchases I made on a whim at Partizan back in May. A Trent Miniatures Napoleon Bonaparte as a General, accompanied by the same manufacturer's Representative of the People, the latter which I painted with more of a military appearance as I already have a figure on horseback for that role. 

I already have one mounted figure of the Corsican Monster, the Foundry offering of 'Napoleon crossing the Alps' which I received ready painted from Matt as a cherished Christmas gift. Had I any need of a second rendering? Of course not! Is my effort an improvement on Matt's? Don't be daft! But, none the  less, here he is. Pointless and unneeded I'd think, but I have enjoyed painting the two figures and no doubt they will appear in a game at some future date! I'm currently working on the second of these impulse acquisitions, so keep a weather eye out for the second installment...

Thursday 25 August 2022

A Day of Battle!

 At last the stars aligned and Jon and I were able to meet in friendly conflict here in GHQ! That is to say his busy work schedule and my rather more relaxed retired life patterns found a window at last for a game. Jon has catholic wargames tastes and will happily play most games on offer here in GHQ, as will all the Irregulars naturally, but I know he likes big battle games the most. So, taking advantage of the terrain from last week's Early Renaissance game with suitable alterations, I laid out a French Revolutionary Wars game set in northern Italy where the Austrian general, von Bikleburger, was attempting to defend a road through a strategically important pass from General Le Blanc's Revolutionary French. As is the custom, an annotated photomontage to give a sense of the intense action. The rules in use of course, Black Powder 2 ~

Le Blanc deploys his Light Cavalry to cover his infantry attack in the centre. On the far right his Legére will contest the farm, the vineyards and the hamlet. His task is to force a passage through the foothills, defeating von Bikleburger's army if he can.
Von Bikleburger's centre is strongly defended by Austrian infantry, supported by a small Hanoverian brigade to his left and a strong Light cavalry brigade on his right. His heavy artillery is deployed to dominate the road leading through the pass.
Le Blanc sets his attack in motion. As the infantry march forward the Austrian artillery plays on them causing casualties,  weakening morale and causing Disorder. The French are not dismayed and press on with élan!
Von Bikleburger moves his infantry forward to bring fire on the enemy. The larger Austrian infantry regiments have increased firepower augmented by their light battalion guns.
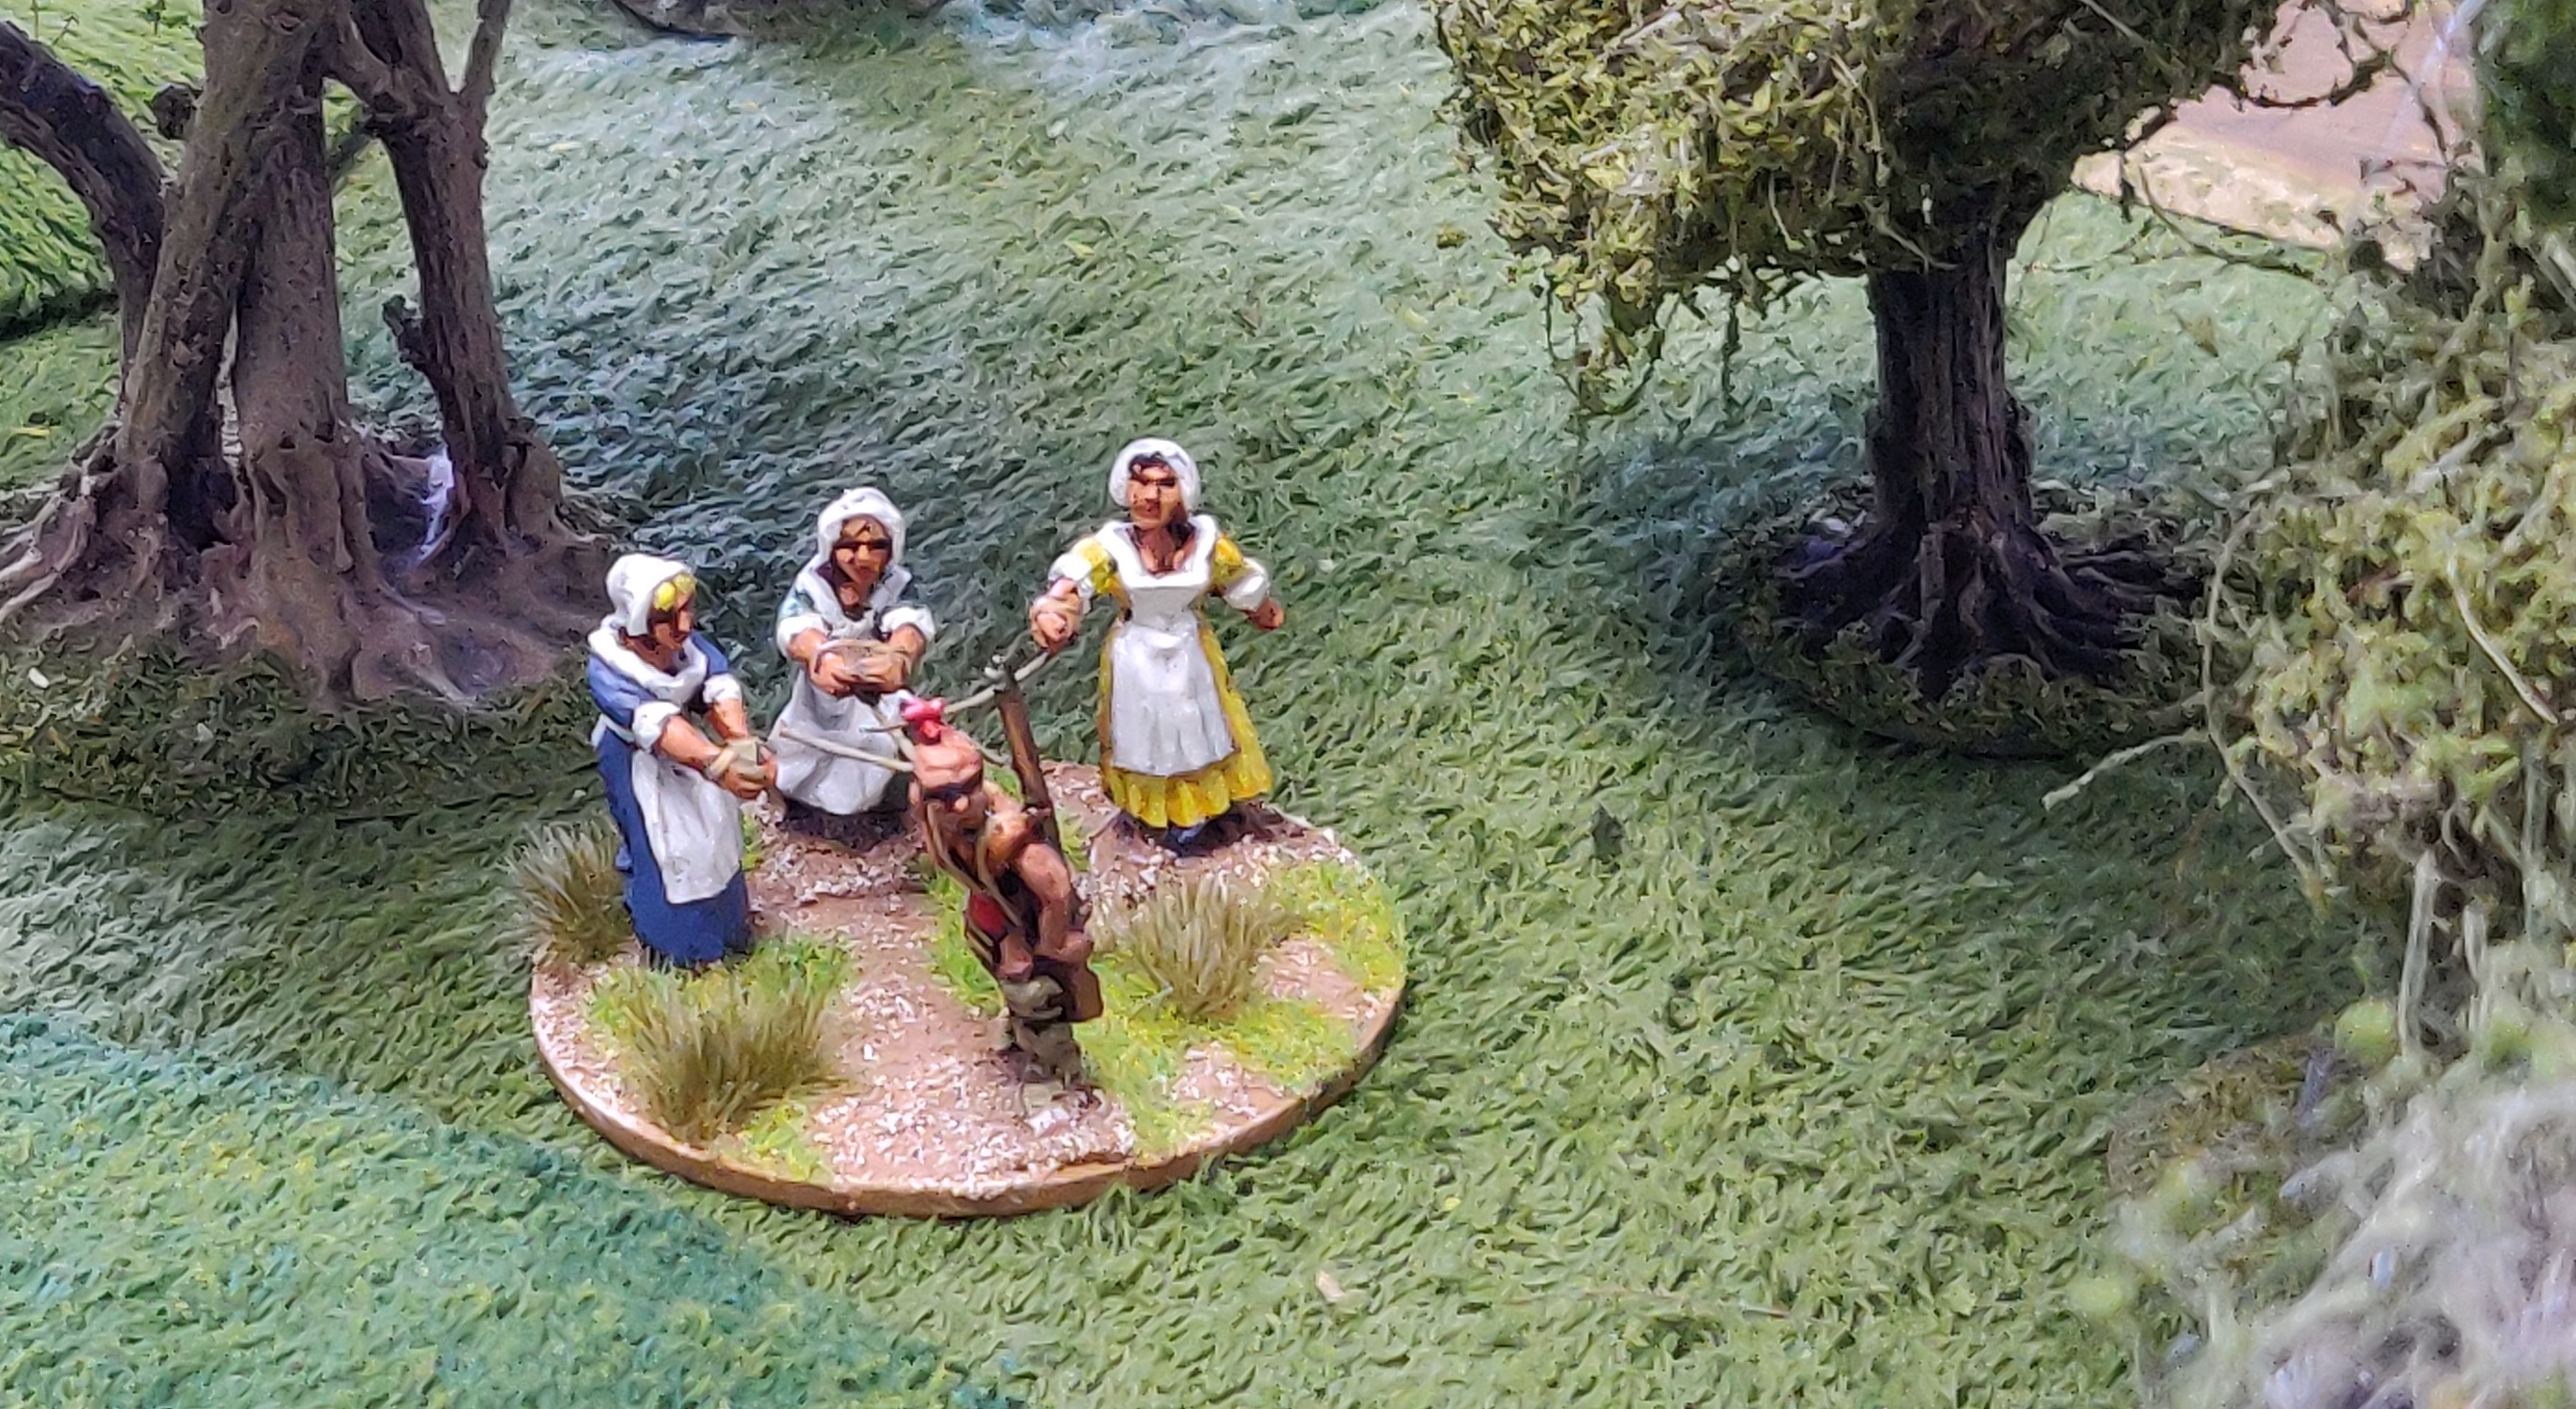
"As any fool know" staff work is the bedrock of any army's success in a campaign. Le Blanc's staff officers are hard at work in the security of the walled farm.
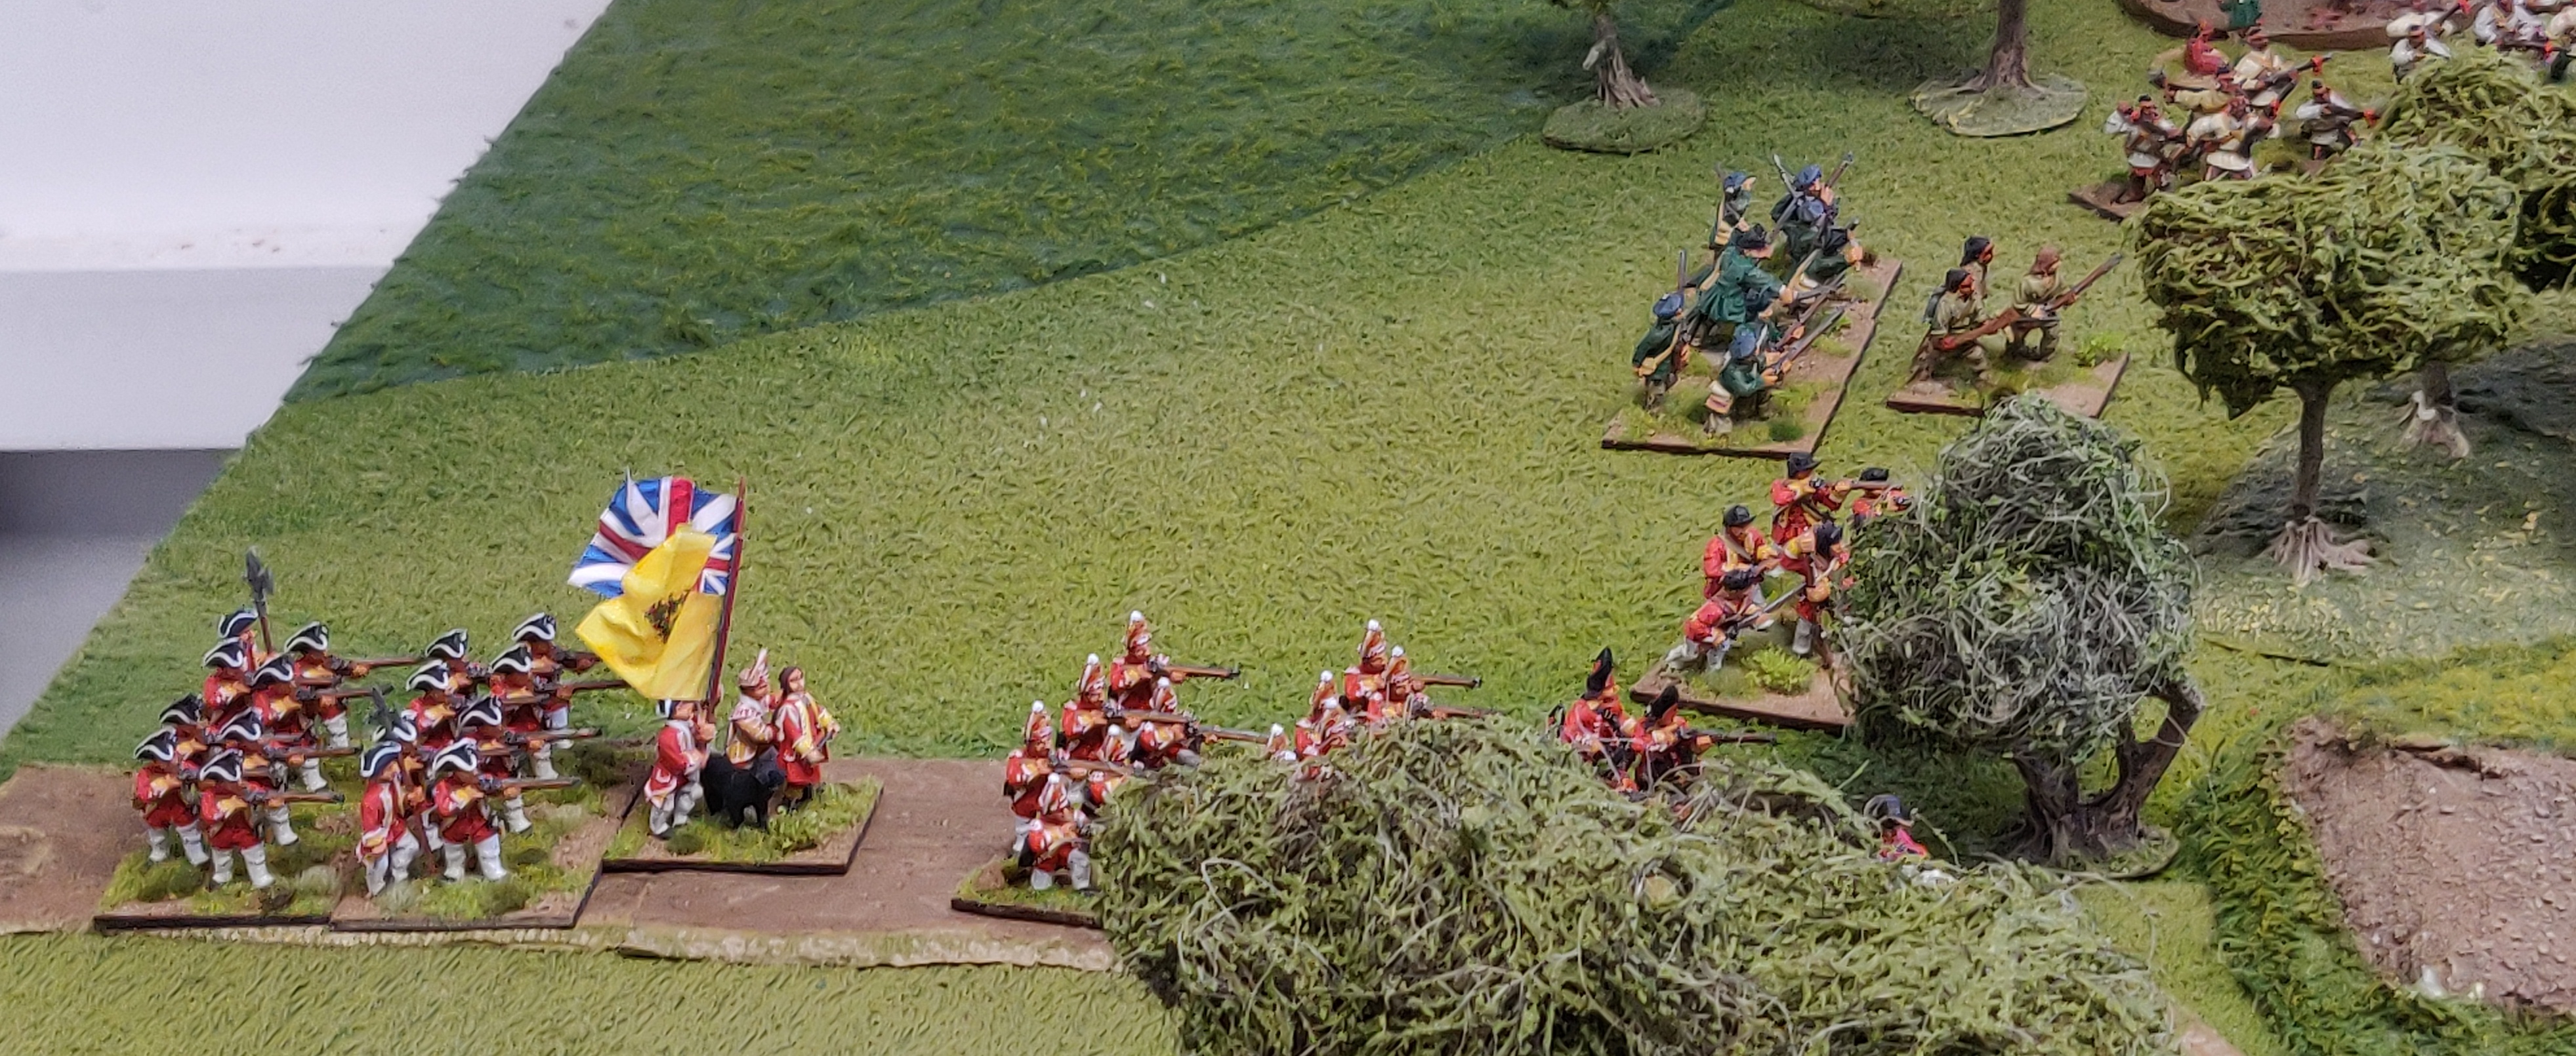
Drums beating, bugles blaring, flags flying Le Blanc's infantry march forward determined to oust the enemy from the pass! Steely Hanoverian infantry ready themselves to deliver a volley!
On his right, von Bikleburger's leading Hussar squadrons charge their French counterparts defeating them in melee and driving them back. An inconclusive second round of combat ensues, with von Bikleburger's horse coming off worse and routing back towards their supports. While the French cavalry's immediate threat is nullified, they are not driven from the field.
Austrian Hussars fail to rally and flee the field in abject rout! If only their sweeping advance following up the initial victory had been favourable! C'est le guerre! 🎲🎲🎲🎲
At the midpoint the Austrian infantry are holding their own. Le Blanc's infantry are taking casualties, though much Austrian fire is desultory. The outcome is far from clear at this point.
Le Blanc's Light Cavalry shake themselves out and the lone Chasseur regiment surges forward threatening an exposed Austrian infantry regiment trying to flank the French infantry attack. They form square and deter the charge!
On von Bikleburger's left flank the fight for control of the vineyard and the small hamlet sees the French make steady progress amongst the vines while the Hanoverian infantry comfortably hold the hamlet.
In the centre fighting is now at close quarters with musket volleys crashing out all along the front and artillery roaring its support. The Austrians are holding, but their fire is proving ineffective at times!
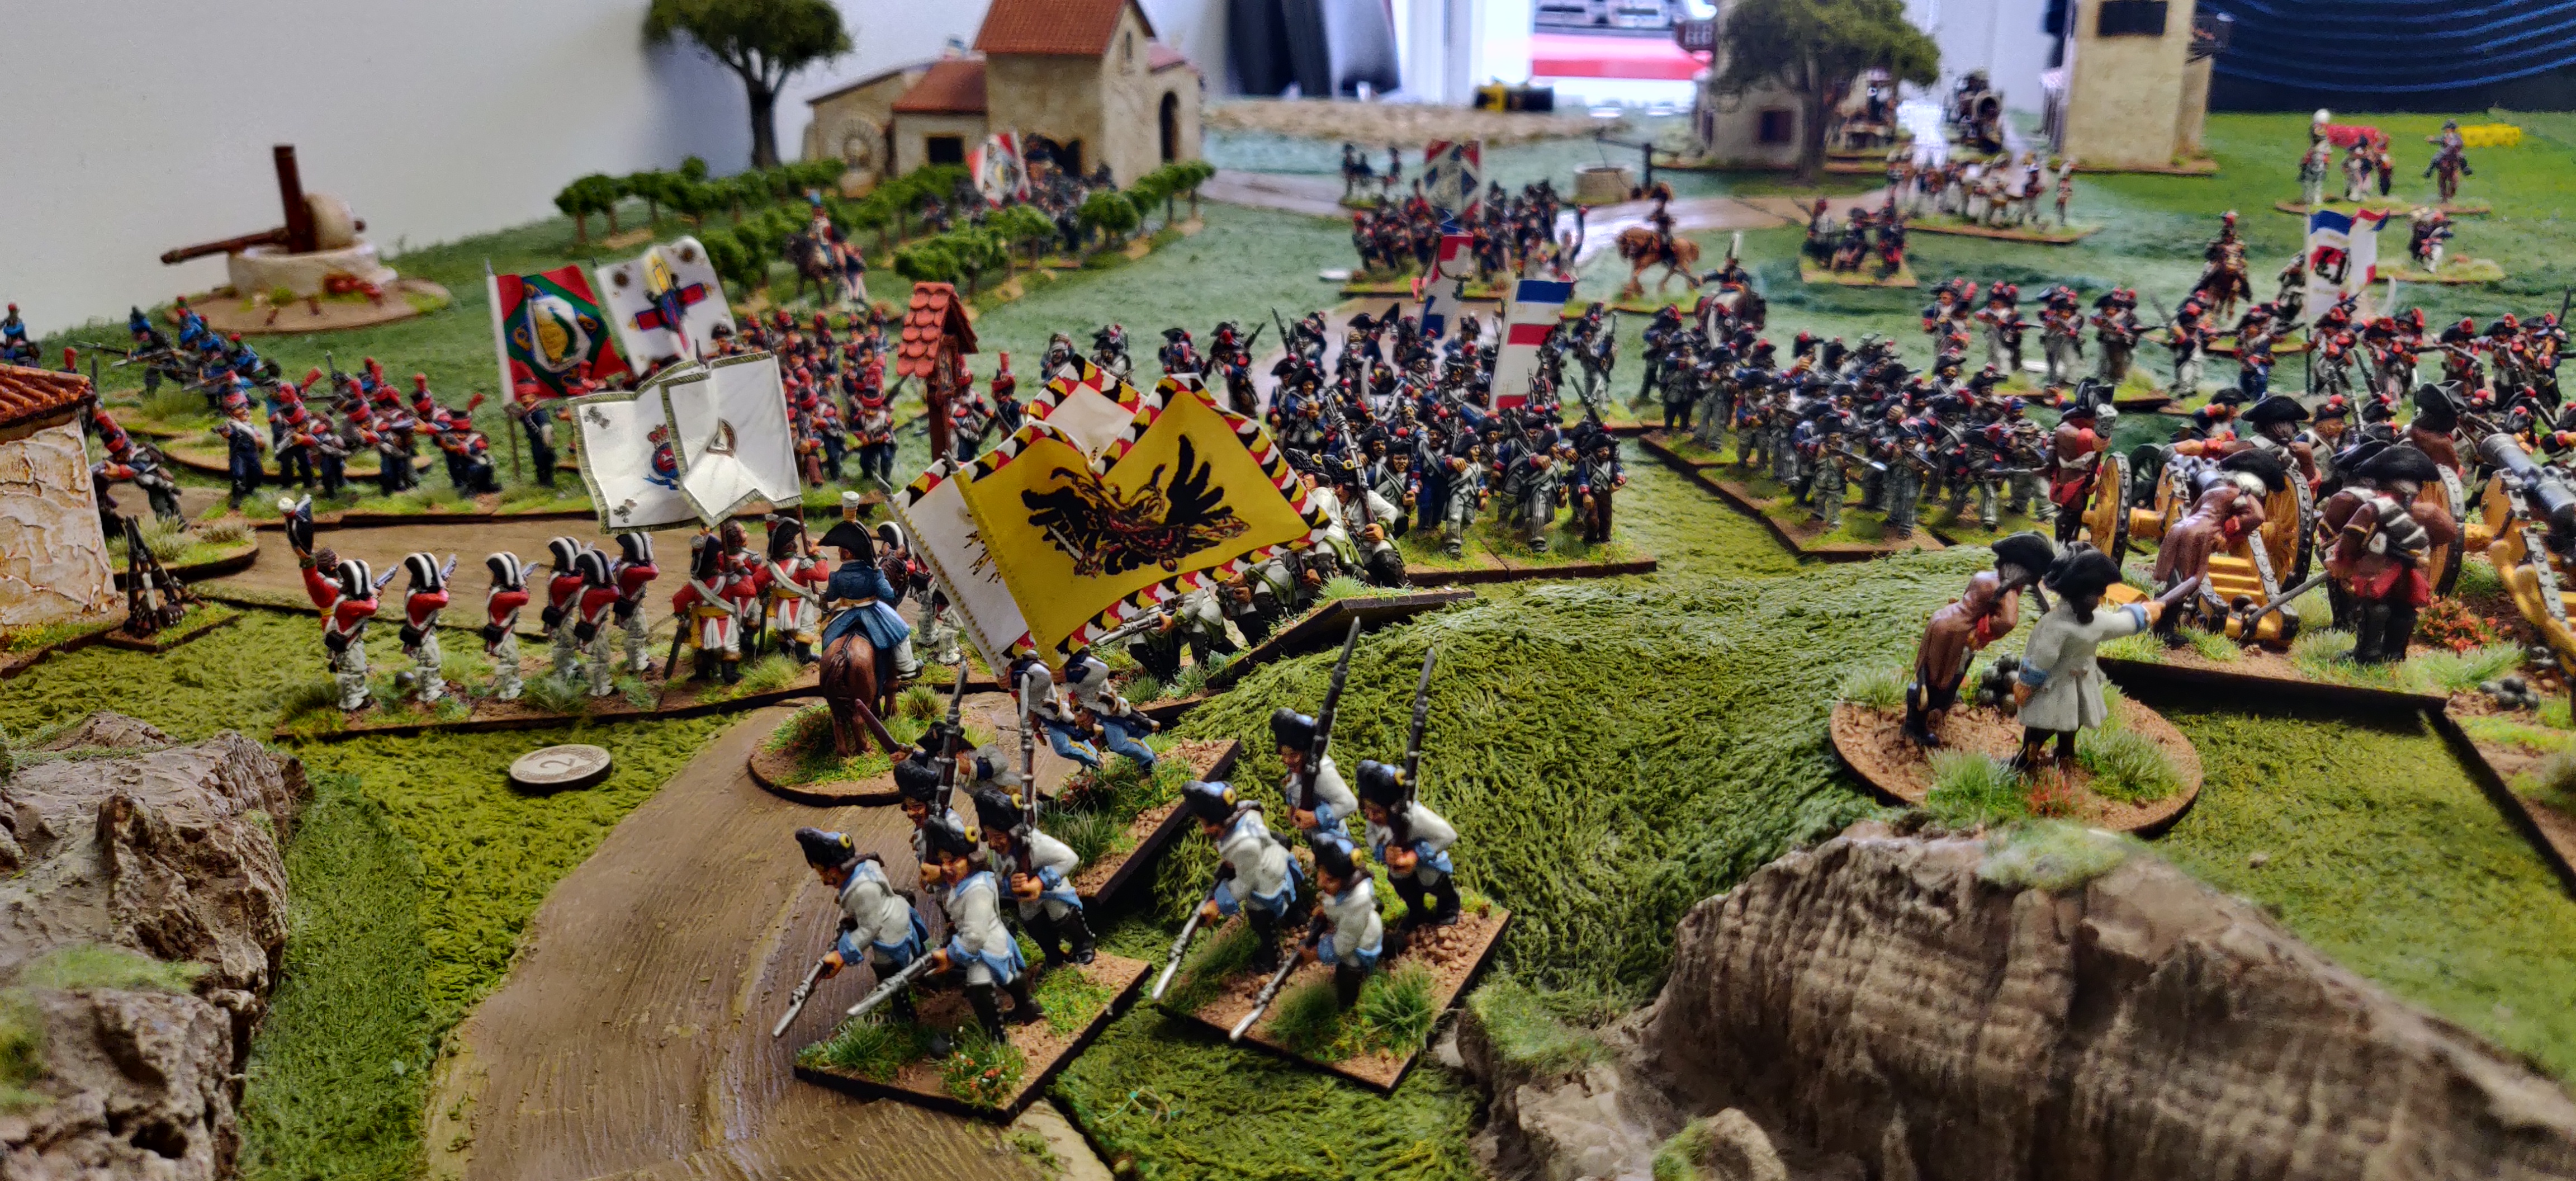
Le Blanc's attack is faltering so he orders more men rushed to the fighting! The French march to the sound of the guns! Not forgetting the baggage of course!
On von Bikleburger's left one Hanoverian infantry regiment has broken under sustained French fire. A gap is exposed in the defenders' position leaving the road to the pass open!
The Austrian infantry square on their right is broken by close range artillery fire and flees in confusion. The tide of battle is turning it seems.
Determined to deny the pass to Le Blanc's forces, von Bikleburger pulls his remaining Hanoverian Line infantry back, conceding control of the hamlet. The situation there will soon worsen as the French Legére occupy the buildings 
In the centre Le Blanc's infantry attack has so far been held off by Austrian fire but losses are mounting steadily from French fire 
The forward Austrian infantry can take no more! Casualties have reached the tipping point and morale has collapsed. They flee in rout for the rear and safety!
Still von Bikleburger's infantry tenaciously hold the centre. They may yet save the day if the Hanoverians on the left can hold off the French envelopment.
The situation is precarious on the left but von Bikleburger is far from despondent. His centre is holding up well and his Light cavalry are still largely intact, detecting the French cavalry and threatening the infantry's flank.
As ever though in the heat of battle the situation can change suddenly. The Austrian Grenadiers are driven from the field in abject rout, isolating the Hanoverians on the left and opening up the road through the pass once more! 
In the centre intense French pressure finally tells and many Austrians flee for safety, their morale finally shattered despite a spirited defence!
In a last desperate throw, von Bikleburger's Light Cavalry moves to threaten the flank of the attacking French infantry but it proves too little too late, a minor hiccup in the advance of the French juggernaut!
Seeing all is lost, von Bikleburger orders his remaining forces to withdraw. The victory is Le Blanc's, but at a heavy cost. The road to safety through the pass is open to him and the enemy army is destroyed as a fighting force!  The cry bursts forth from his exhausted army, "Vive La France! Vive Le Republic!"
A splendid game we both agreed played out over almost 5 hours, with our customary break for lunch laid on by Sue. Next up here in GHQ should be a French and Indian War game giving the new and the rebased units a run out with Black Powder 2 utilizing some ideas from the  'A Dark and Bloody Ground' supplement.